- Follow us:


Friday, April 22nd, 2016
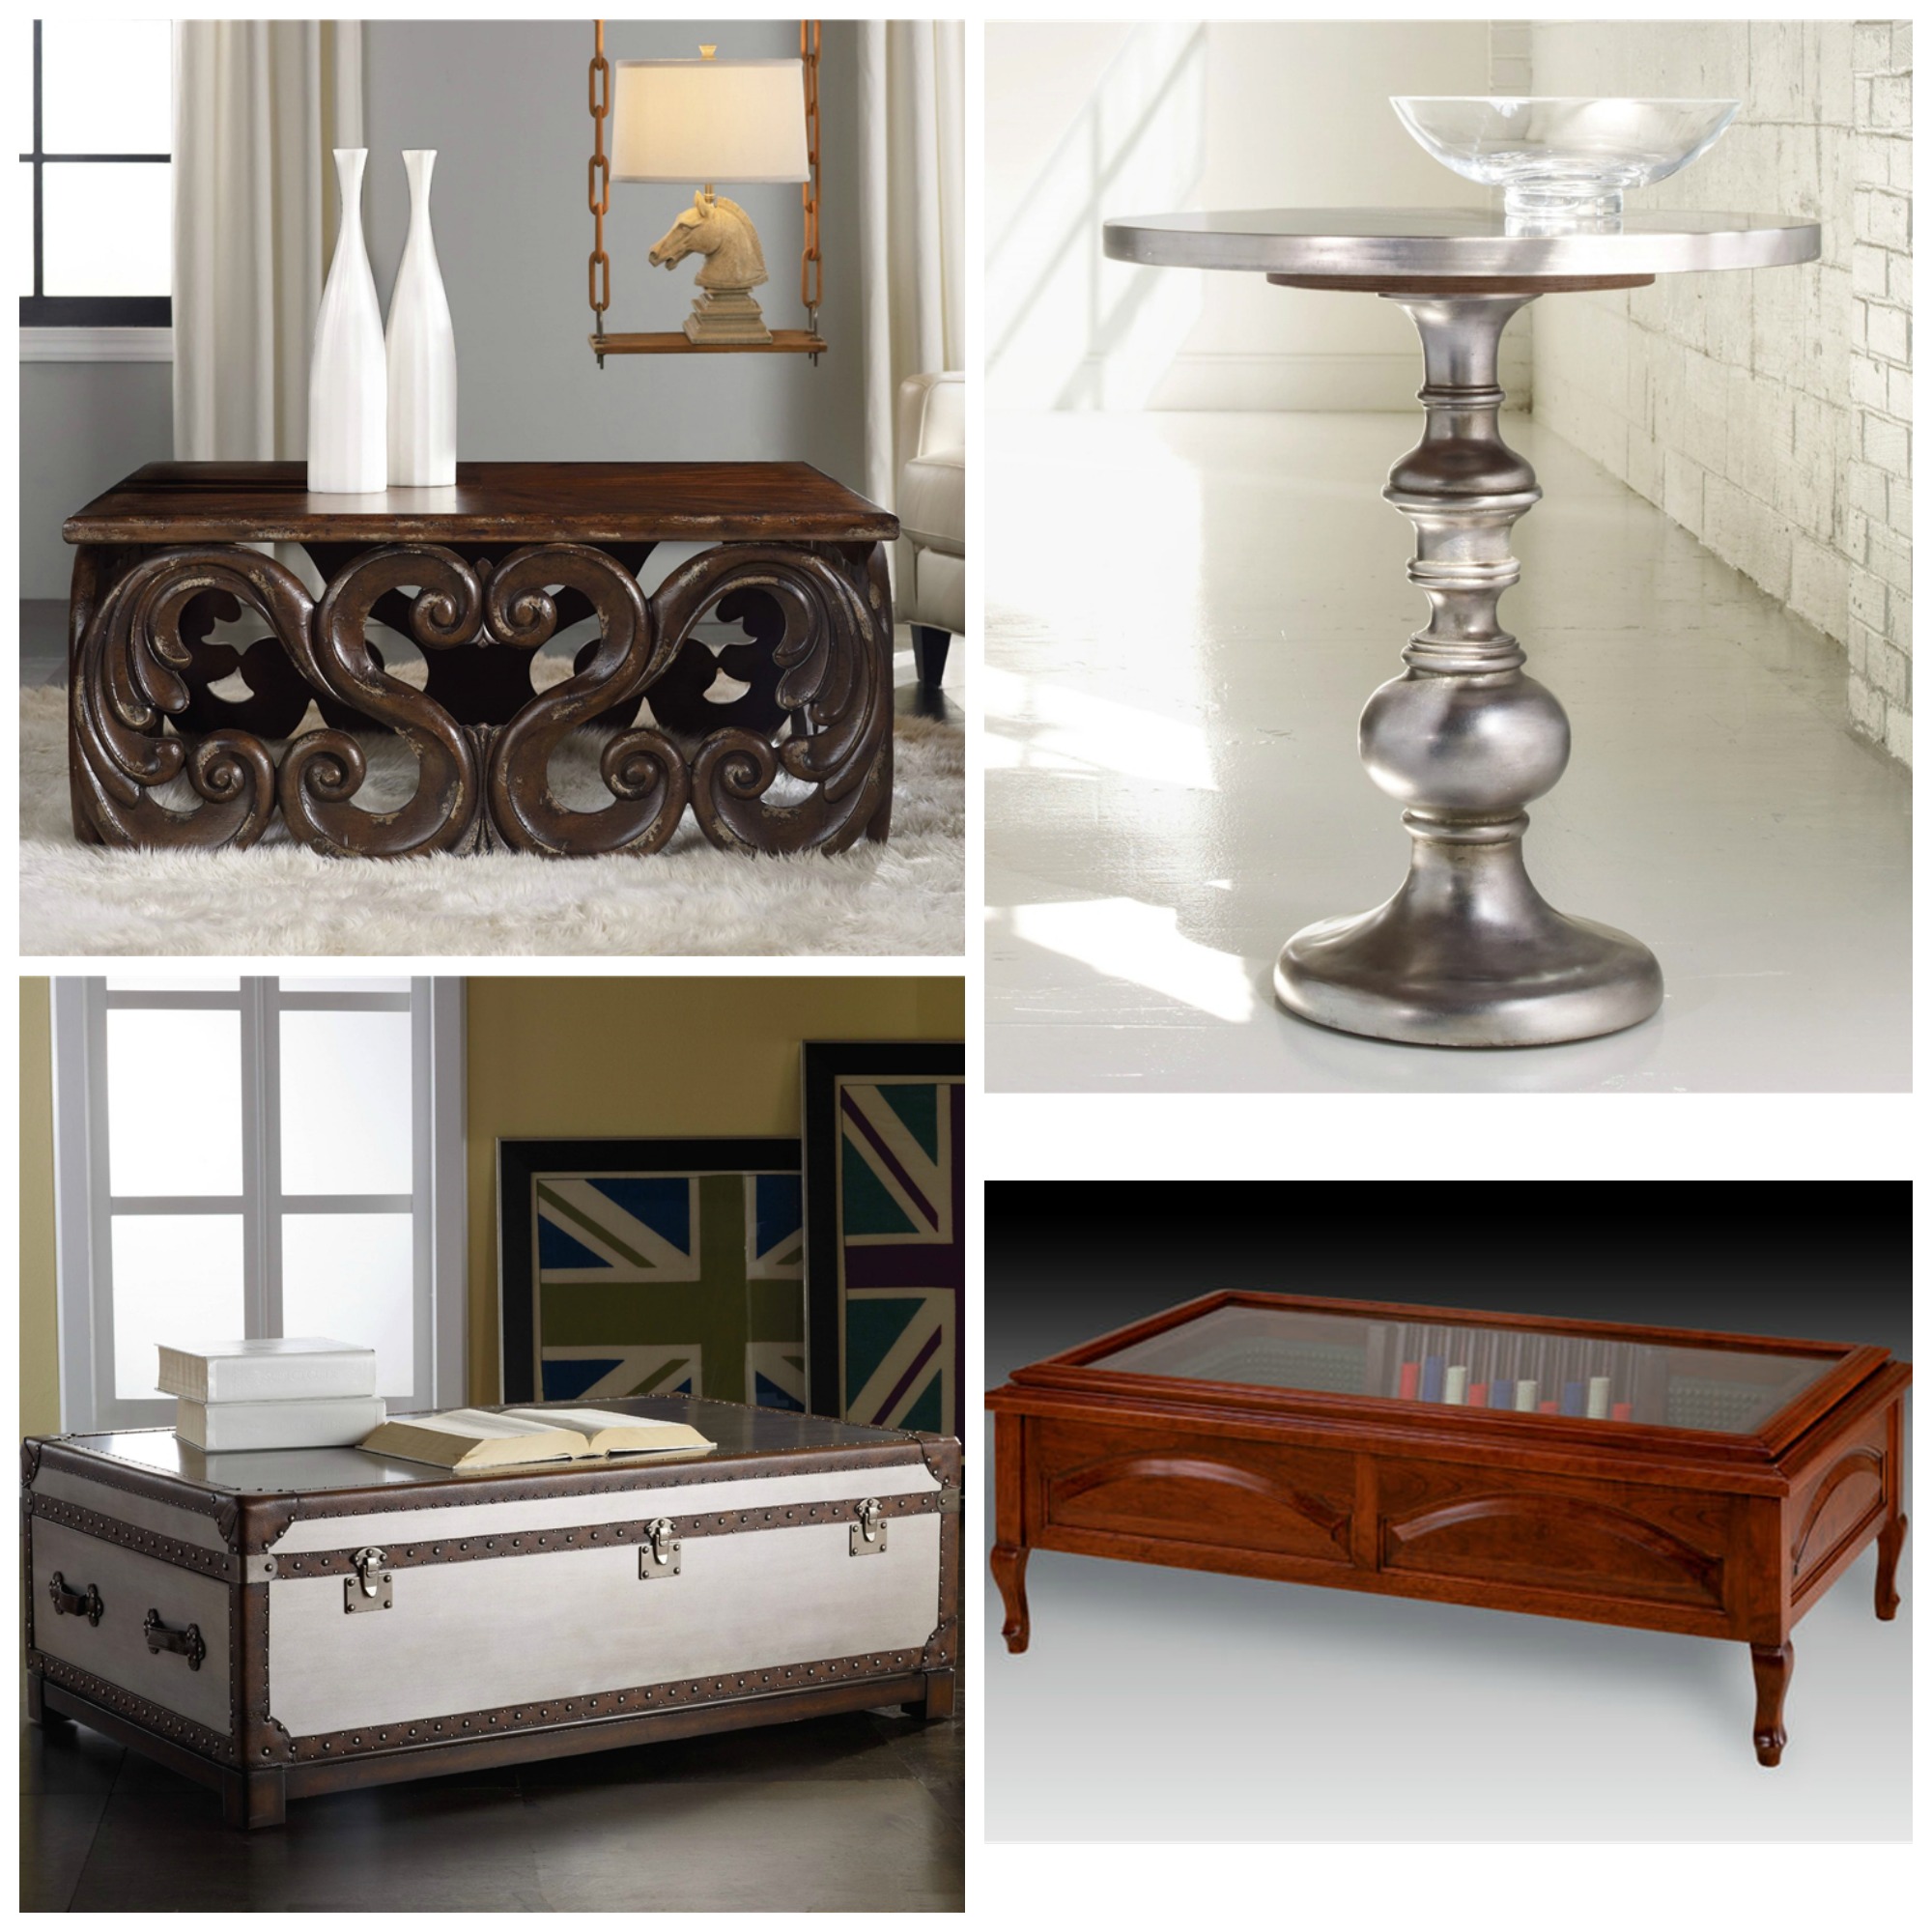
Clockwise from top: Hooker Furniture Living Room Melange Bondurant Cocktail Trunk; Hooker Furniture Living Room Melange Kenmar Pedestal Table; I.M. David Living Room Craps Coffee Table 6200; I.M. David Living Room Craps Coffee Table 6200
Are you always looking for easy ways to update your home’s design? Even the most beautifully designed spaces can look stagnant if you fail to give them the necessary updates. Tweaking spaces every so often will surely make your home more exciting – at least, design-wise.
There is a simple solution that can make your home more intriguing. Placing a lovely tray filled with decorative pieces will immediately liven up any room. Just don’t limit yourself to trays and vases and pots, though. There is so much more that you can add to your home that will make it come to life.
But, back to the tray, let’s discuss what size, shape and options are being offered. Your choices are absolutely limitless. Whether you are buying a new one or reusing one that has been up the attic for too long, you should consider the requirements from the onset. Pick your design then find accessories that would match later on (such as that ever reliable tray).
When picking the tray that you would put atop any table, consider what it would hold. Function should always come first. Necessity should be considered first then leave ample surface space on every tray. You can place a dish, box, coffee mugs, a glass vase, even candlesticks.
Onto the Coffee Table
There is one accessory inside a living space that is often ignored yet it holds some of the most interesting pieces that you can find. A mirrored or glass coffee table can also play an important role in beautifying your home. Remember, though, that a glass or mirrored surface can easily show fingerprints and other such smudges so make sure that you clean the reflective surface many times during the day. Go ahead and bring out that Windex spray out of the cabinet.
The tray can offer a more forgiving placed for your vase or any other decorative piece.
Another piece that can also be a goldmine in terms of decorative properties is the ottoman. Did you know that this can also serve as a makeshift coffee table for your family? While this is a family-friendly seating unit that is placed in front of the sofa, when topped with a lovely tray, it becomes something else entirely. It can also be used as a smaller table where food and drinks are served during an informal gathering. Just make sure that you use a smaller tray so that the beauty of the ottoman will not be entirely concealed.
Bringing in a bit of organic beauty into your home is easier as you use the coffee table and top it with a beautiful potted plant or a vase of fresh flowers. So go ahead and bring in the greenery.
If you are the more intellectual type, you can use the coffee table to hold stacks of magazines or books. You can also organize coasters, playing cards, remote controls or cocktail napkins on this special table. For a more uncluttered look, use a tray (yet again!).
The coffee table could be simple but if you place something bold or bright-colored atop it, then it becomes a noteworthy piece.
As soon as you have figured out the functions that need to be met, you can then find out what sort of style you can play with. Will it be beachy, sophisticated, rustic maybe? The coffee table may play a supporting role in this whole ensemble but it is an important role nevertheless. It c an complete the symmetry in a room or it can add the needed eccentricity requirement. Whatever your function is for your coffee table, it goes without saying that it is an important piece that you need to seriously consider from now on.
Tags: coffee table, decorating coffee table, dressing up the coffee table, McCreerys, McCreerys Home Furnishings
Posted in Accents, Furniture, Interior Design 101, Interior Design Elements | No Comments »
Thursday, April 21st, 2016
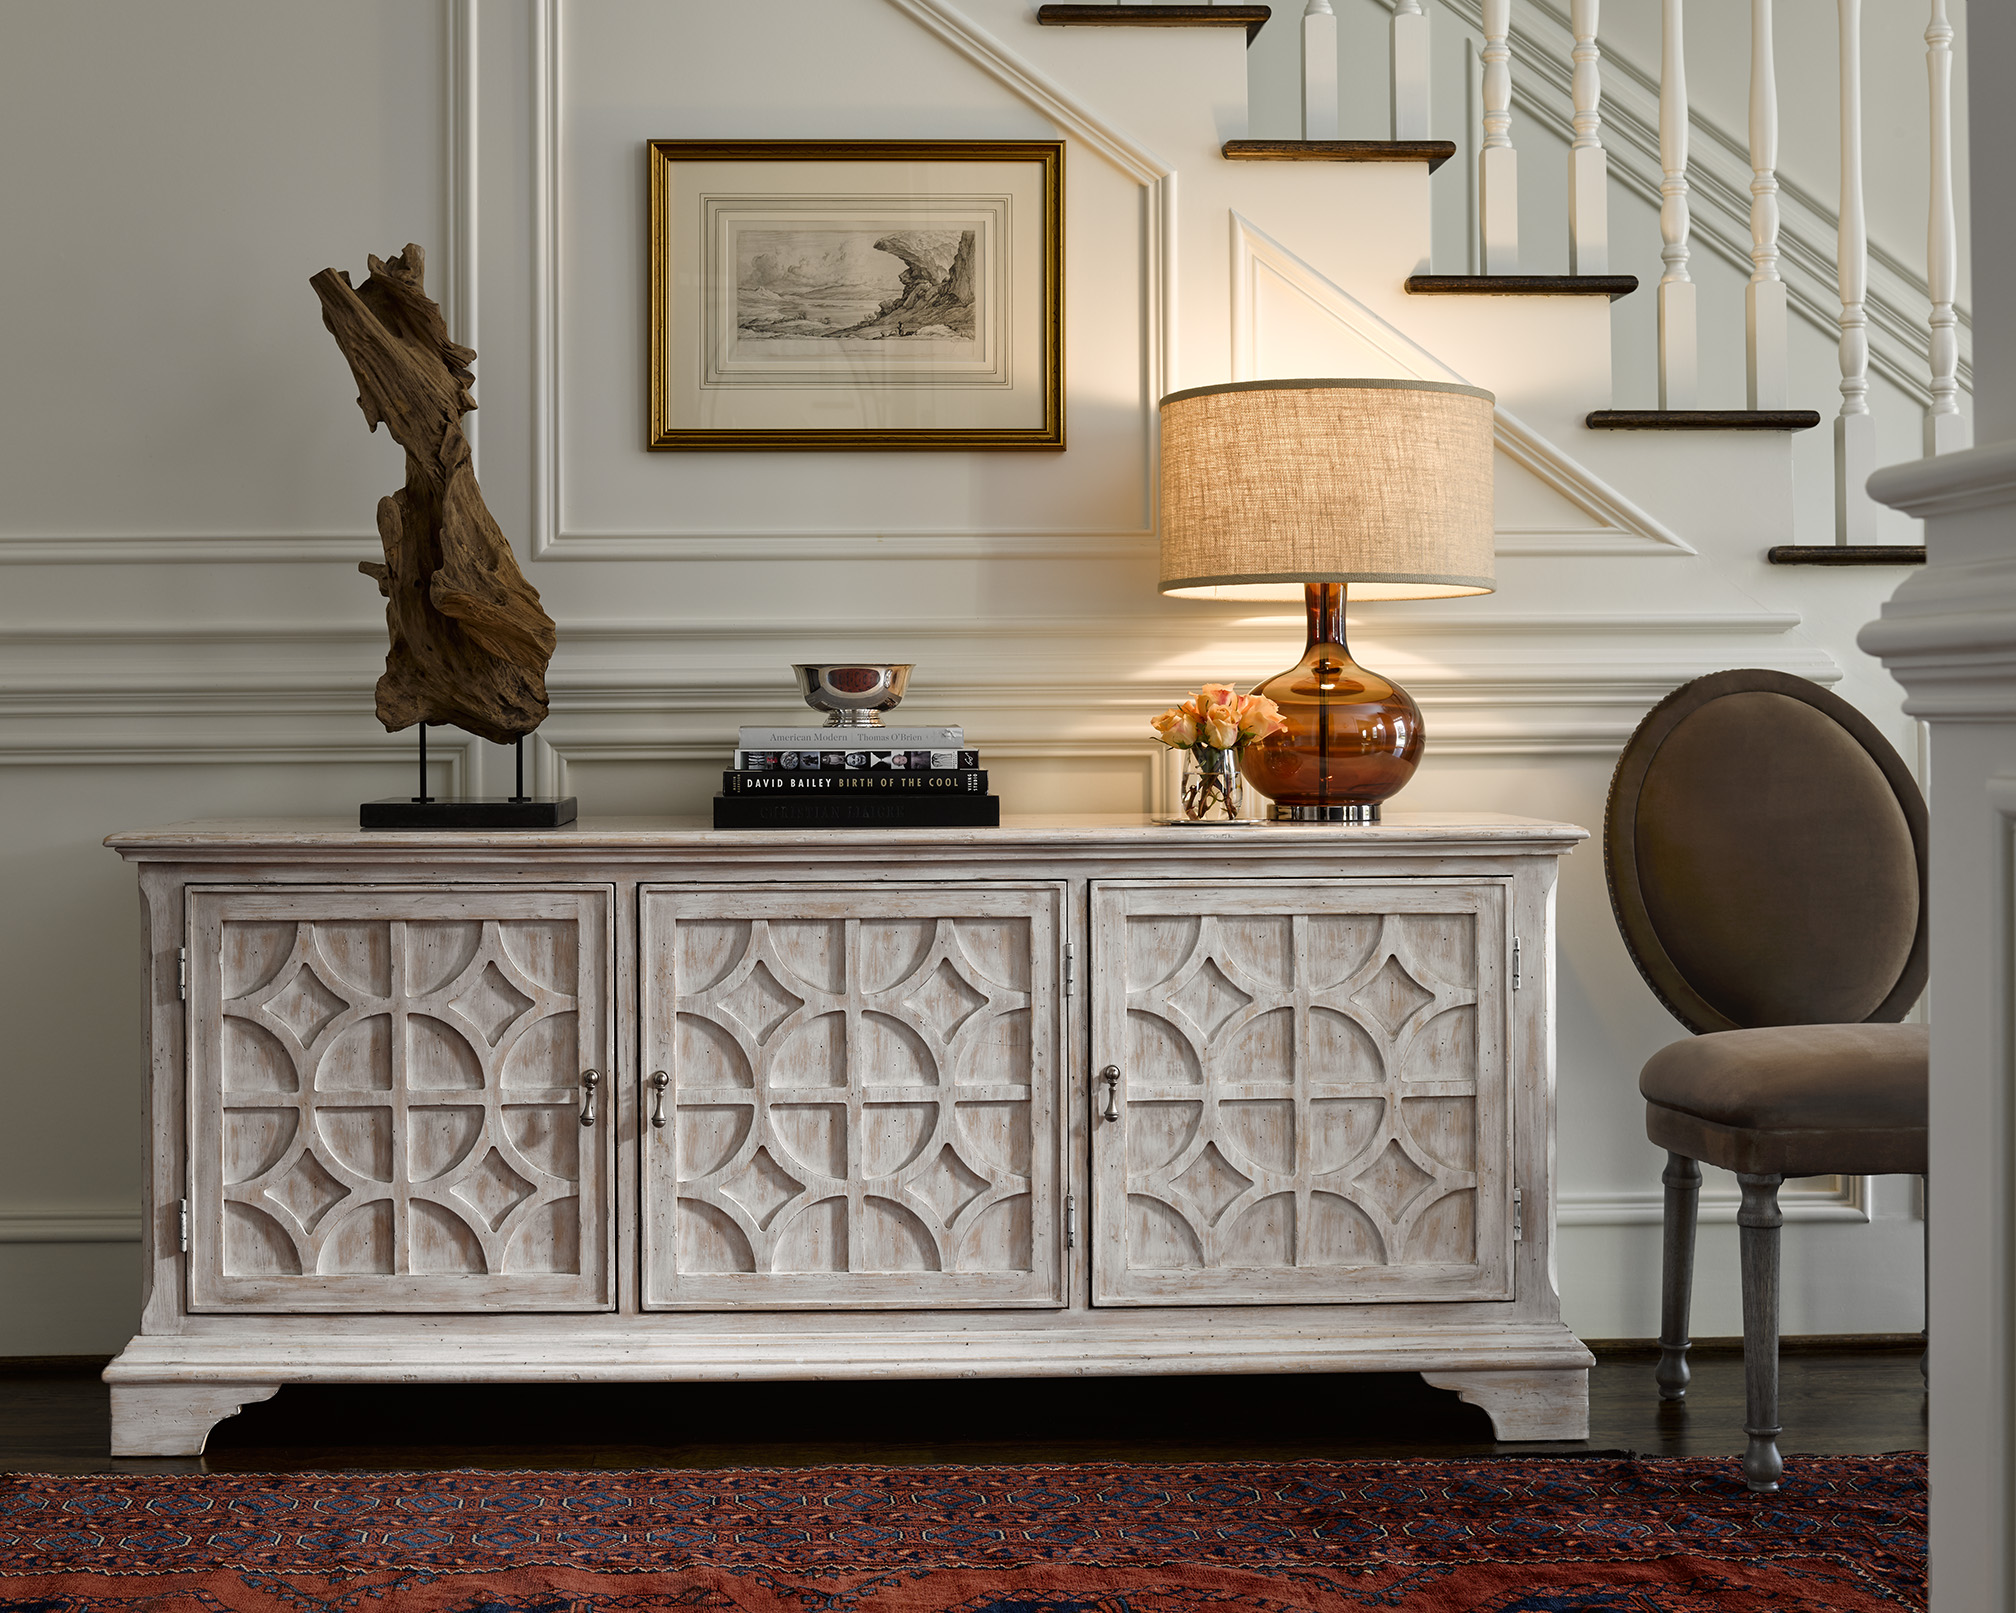
Whitewashed piece is from FFDM’s Campton Grove Collection
Antique finds and vintage pieces – the distressed, imperfect and cracked finishes, add the sparkling crystal chandeliers, old yet fresh-smelling linens, lots of white – yes, these describe the shabby chic style perfectly. This interior design theme is not for everyone, though. Shabby chic is luxurious yet still comfortable. This thrives in the spirit of seemingly old stuff yet new and clean.
This Style Ain’t Shabby
Don’t ever let the word shabby fool you into embracing the principles of this wonderful theme. It may seem unstructured to look at, at first, but the lack of formal rules is what makes this style timeless. It brings in an effortless sophistication into any home.
Don’t think of flea markets, though, or cheap retail shops or you would be disappointed with what you would find.
Say yes to handicrafts, vintage textiles , and white, distressed furniture. There is no need to search high and low for the best whitewashed furniture pieces, we have everything that you would need to set up your shabby chic home.
Get the look with these simple guidelines –
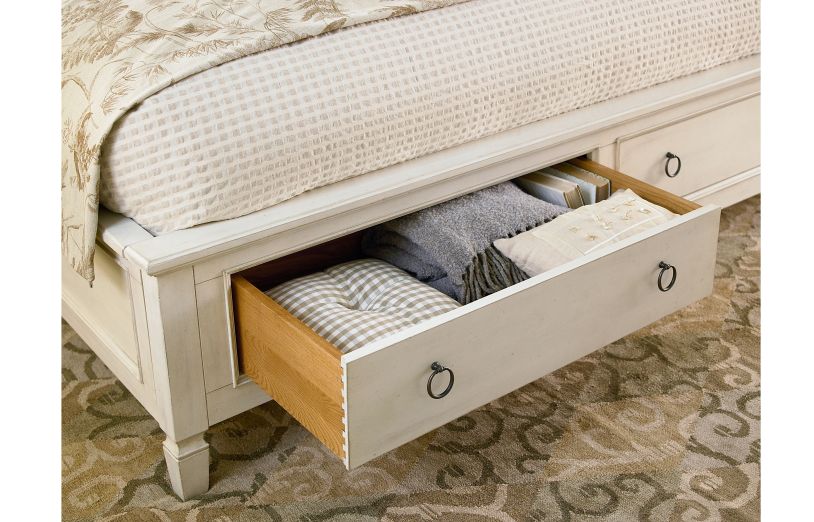
Universal Furniture Bedroom Storage Bed King 987260SB
Tags: McCreerys, McCreerys Home Furnishings, neutral, neutral design, neutral palette, rustic, rustic charm, rustic home, rustic interior design, rustic interiors, rustic look, rustic style, shabby chic, shabby chic design, shabby chic interior design, shabby chic interiors, shabby chic style, vintage, vintage design, vintage furniture, vintage interior design, vintage interiors, white, white color palette, white color scheme, white furnishings, white interior design, white interiors, wood, wood design element, wood elements, wooden, wooden elements, wooden furniture
Posted in Color Schemes, Interior Design 101, Interior Design Elements, Interior Design Themes | No Comments »
Thursday, April 21st, 2016
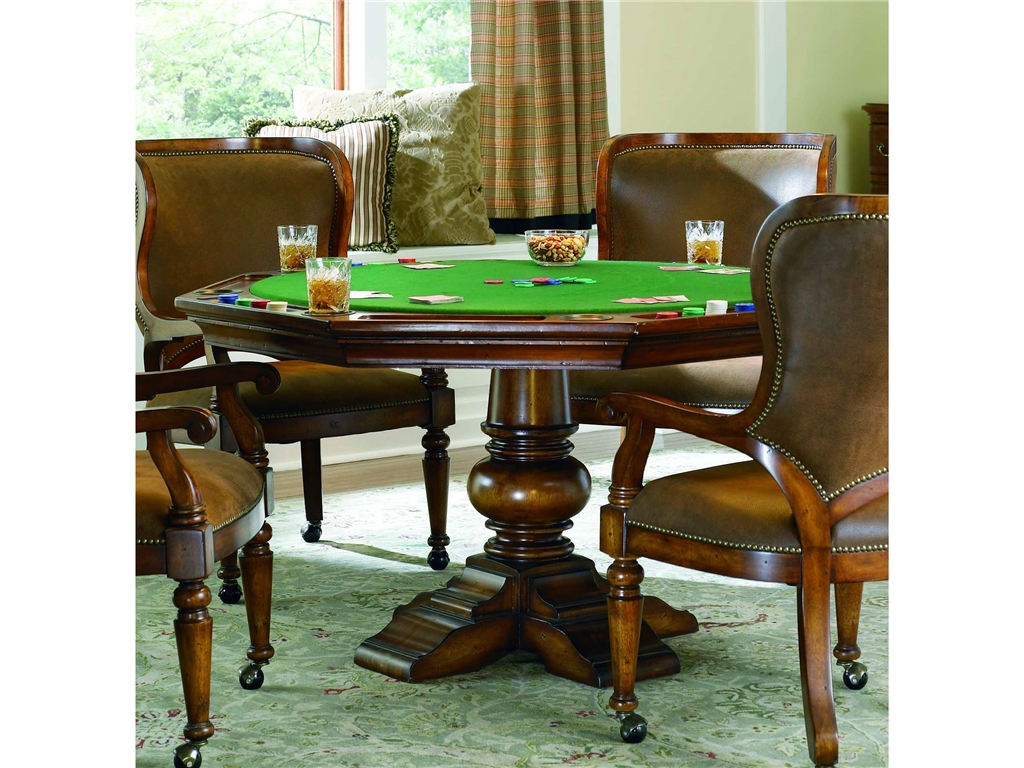
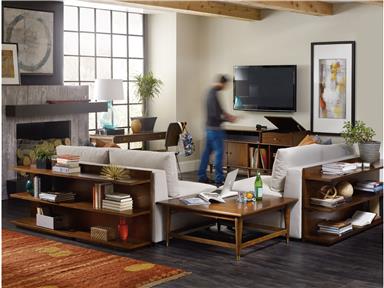
Make the media room more exciting with the Hooker Furniture Bar and Game Room Waverly Place Reversible Top Poker Table. Your poker nights will never be the same again!
Media room is a term that has undergone major evolution. It is now a generic term used for any space that is used for different purposes. This often contains a huge HDTV, surround sound systems and the most comfortable seats. Friends and relatives convene there to watch movies and sports shows. This is also the center for parties where a gazillion guests socialize
Media Room Means Social Life
Someone who wants to enjoy life will need to consider setting up a media room. This is not just your regular home theatre, though. This is a dedicated area – not just for an awesome cinema experience but also for socialization in its purest form.
So, yeah, you watch the games, enjoy some movies, bring in some popcorn and soda yet the social experience of it all is when the chatting and laughter begin. This is when the kids go loco and the lights go down. Here, the outside lives of participants are suspended as they turn off their cell phones and sit down to have a grand time.
The purists consider the media room as home theatre experience to the max. Some would even go out of their way and set up brighter projectors, the most advanced digital surround sound systems, and flat panel displays. The result, of course, is a room that is no less than the best cinematic experience provider for your family.
Creating the Media Room
Hooker Furniture Home Entertainment Studio 7H LP Record Player-Gaming Entertainment Console 5398-55464 is a cradle of entertainment.
Again, a media room isn’t there just for movie experiences. This means that you also have to arrange furniture into a conversation setup. This can be broken down later when the screen needs to be faced once more. Flexible seating is an absolute necessity inside a media room. Consider comfortable sofas, loveseats (for smaller families), or room recliners.
Next, find a screen size that will be huge enough for everyone to see. Set it up at a good angle so that everyone will be comfortable as the viewing experience begins.
If you are not sure about what to buy, measure the diagonal of your preferred screen size. Be able to sit back from the TV at a distance of 2-3 times the measurement you just took. This will optimize everyone’s viewing experience.
Aesthetics is another element that you need to think about. You need to have sound-absorbent aesthetics in your media room. Use the fluffiest sofas that you can find. Find draperies and carpets that will subdue the reflections coming from the sound system.
With regard to the overall look of the room, you must make sure that the room won’t look like a techie control center. Remember the interior finishes that are applicable to your new media room. See if you can set up remote controls but make sure they won’t go through walls and cabinet doors.
Be cutting edge. Have the media room stream movies, offer internet, and provide every possible content each day. Lighting is also a huge part of making the media room a successful project. Settle for subtle lighting that will best preserve the picture quality. There are new projection screens, though, that can now perform well even under higher ambient lighting conditions.
Put light or windows by a pool table or the bar but make sure that you can control them when it is time to dim the lights for the upcoming film showing. Just imagine how you feel when the lights go dim inside the movie theatre and that’s the amount of excitement that you are supposed to bring in to your new media room.
Set the mood for the ultimate cinema, gaming or socializing experience. Technology is just a small part of the media room. See that all other design elements are also properly set up.
Tags: decorating the media room, designing the media room, McCreerys, McCreerys Home Furnishings, media room, media room design, social get-together, theater room, TV room
Posted in Interior Design 101, Interior Design Elements, Special Rooms In Your Home | No Comments »
Wednesday, April 20th, 2016
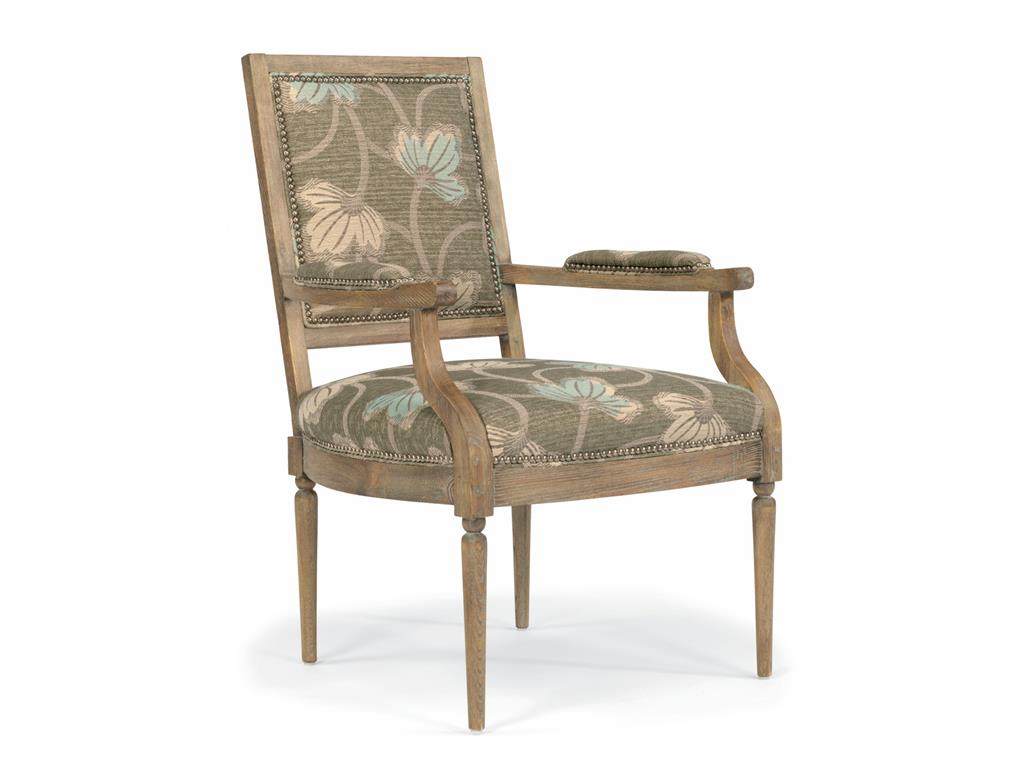
Flexsteel Living Room Fabric Chair 0102-10 showcases floral fabric fused with the beauty of wood.
One of the most noticeable comebacks happening in interior design these days is the return of strong patterns and prints. Large scale designs are being paired with oversized florals as well as the trendiest colors.
Let’s begin with poppy which is a bold floral design that is printed digitally to a linen or poly-linen base. This is a great choice for cushions and upholstery. It is also a fashionable material for drapery.
Natural fibers continue to be featured on many furniture showrooms – and for a good reason. The trend proves that organic looks will remain and that eco-friendly lifestyles are here to stay.
Falling In Love with Florals
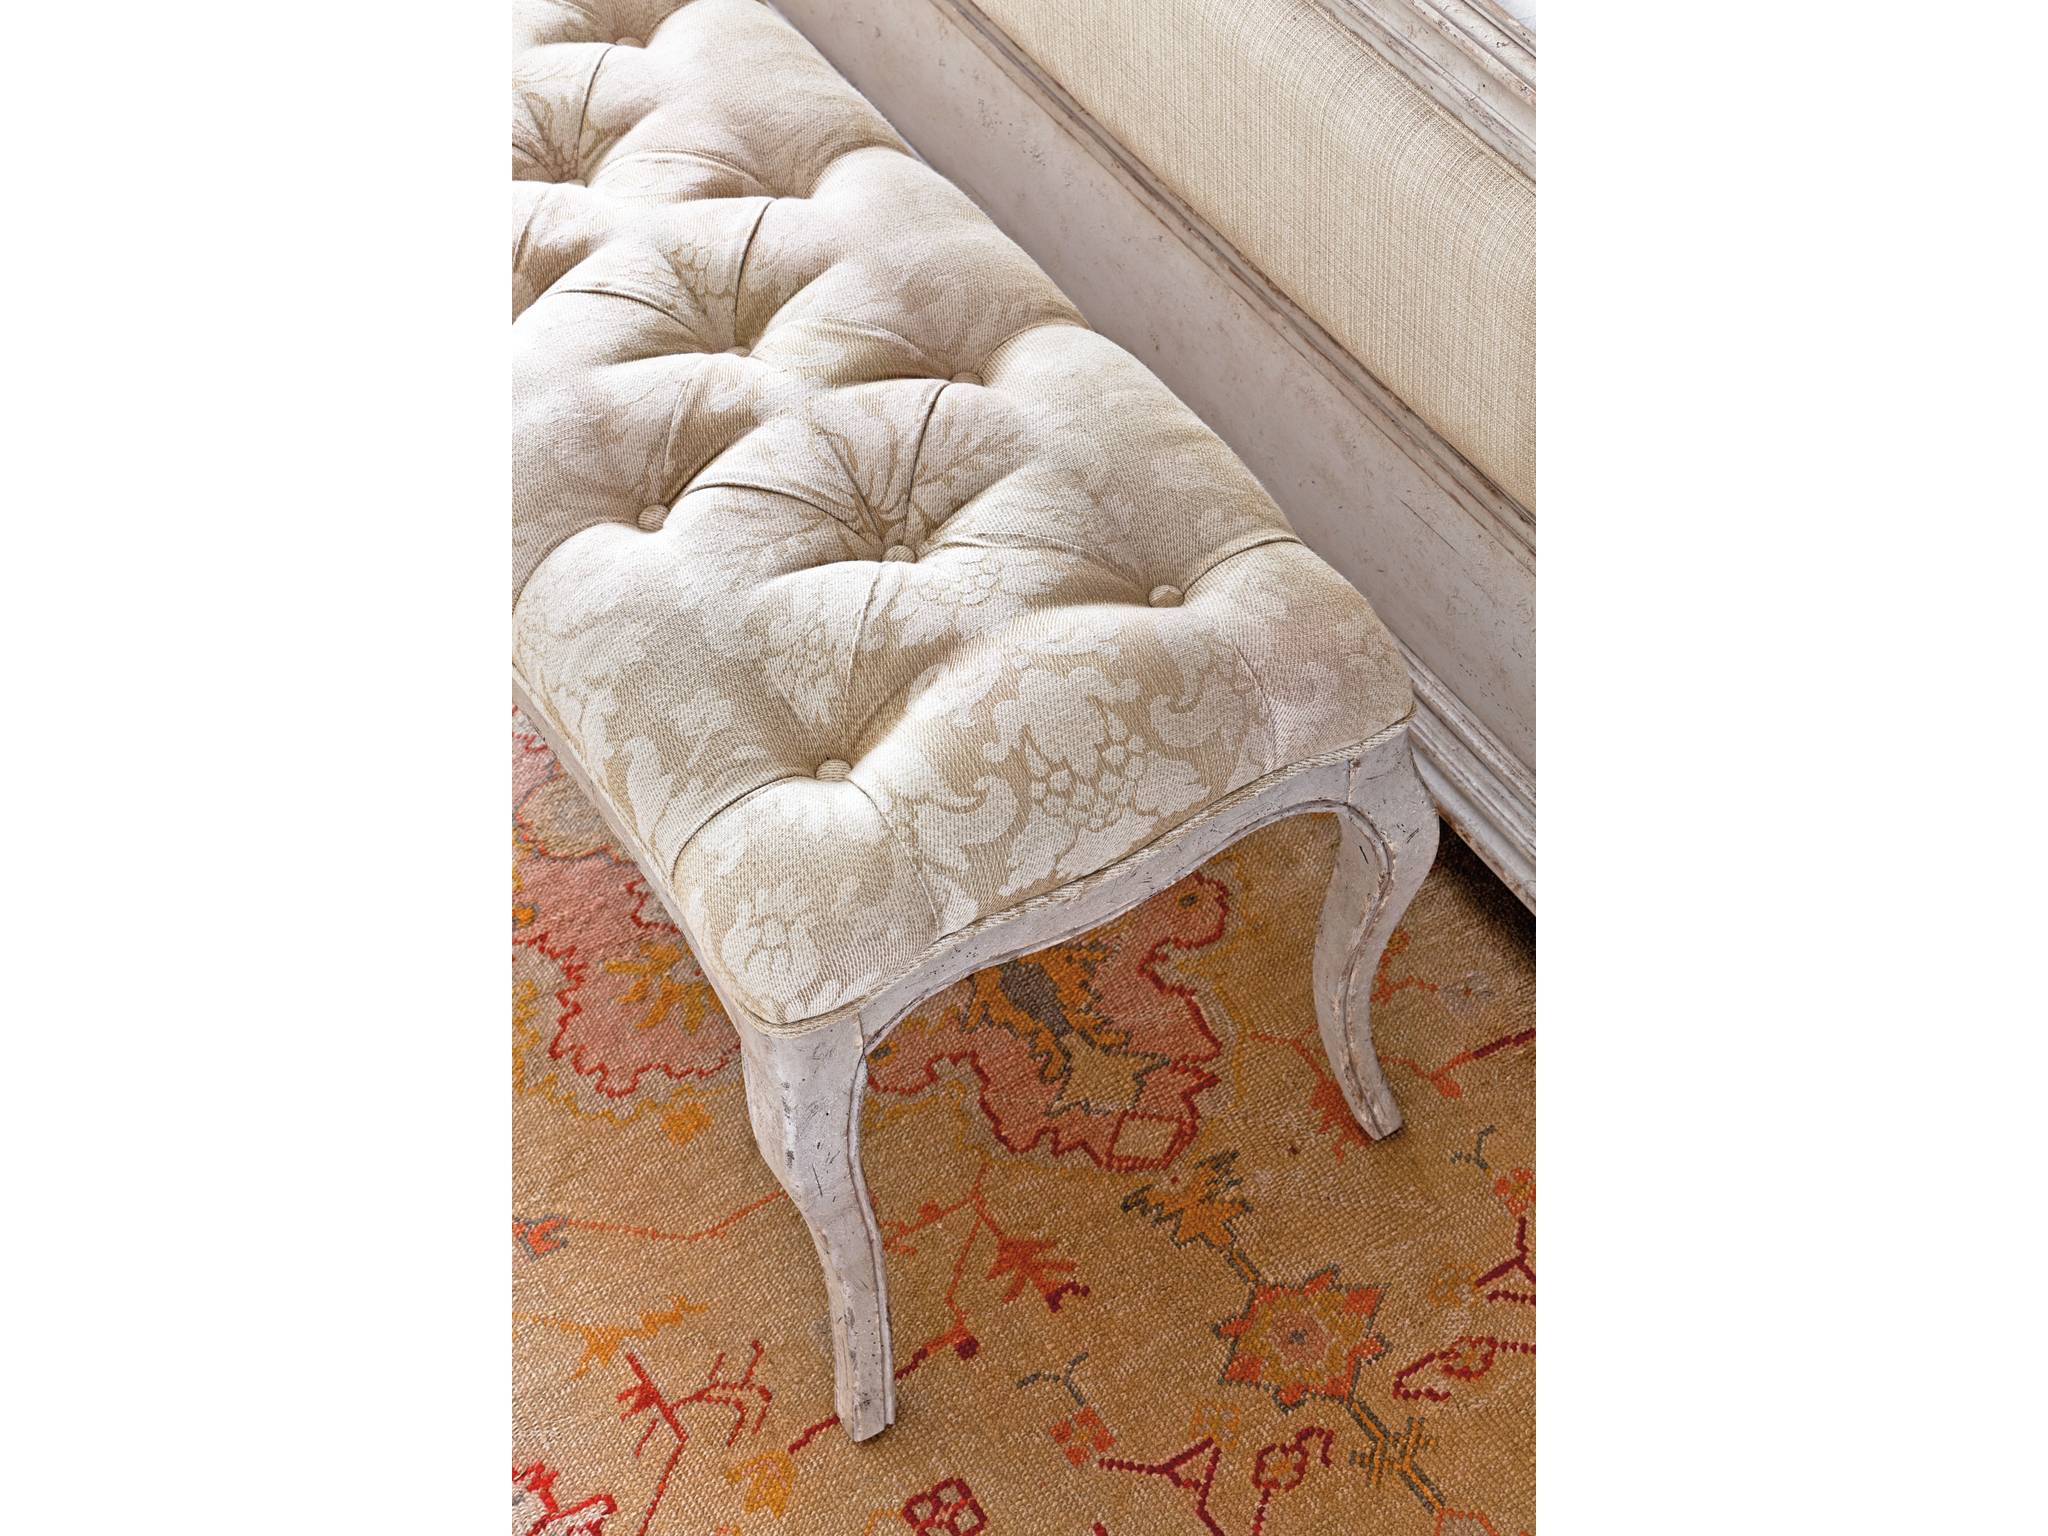
Stanley Furniture Bedroom Chaise Banquette 222-23-72 shows shabby chic perfection.
And so it happened – you have fallen in love with the beauty of floral upholstery and fabrics and now you are wondering how you can bring it home. Floral prints can be too loud, others may say, but this is only if you are not careful.
So what should you do?
If you are thinking of how to match floral upholstery with other interior design elements, then you are not alone. There are many before you whose spirits have been dampened by the wrong use of florals. And now they are still rattled by the very idea of combining it with furniture, lighting, etc.
Now, the first step is to look for graphic prints. You must start somewhere so begin with the simple prints. A single, large-scale graphic print rug can go a long way in terms of making good use of florals in your home. If large-scale prints are still bold for you, then settle for medium and small-scale prints that have been fused to make a room pop.
A floral print armchair, for instance, will balance graphic curtains and an equally graphic rug. In this case, you can afford to use neutrals in solid hues for the rest of the room.
Next, if you happened to fall in love with a bold floral sofa, then don’t rack your brains trying to find out what would go with it. Pair it with white and call it a day! White or any neutral color (cream, wood or beige would also do) for your walls and accessories would balance that big, bold floral sofa. This is the widest space that the sofa could breathe in so provide just that.
Third, find out what colors are included in your floral piece. Pull a color from the group of colors used then create a scheme from there. Just make sure that you get the exact shade used on the florals. Ask for a swatch of the floral print as you shop for other pieces inside your home.
The background hue can be used as a wall color and one of the vibrant colors can be used as solid upholstery or curtain color. Choose also an accent color from the floral hues. Use this on your pillows and accessories.
Grounding the bold look offered by florals is easy with leather. The ever reliable leather is there to provide the necessary weight in a room. Add the floral print and you’ve created a seemingly unbalanced look yet one that is beautifully grounded.
Repeating the motif for the rest of the rooms would not hurt.
Lastly, you can also go wild and pair florals with animal print, the latter being the staple piece as it can work with anything. Try animal print on a small rug or on your living room ottoman. This, when paired with florals, will be an eclectic yet glamorous ensemble. This pairing will surely alter the look and feel of any room in your home.
So go ahead, fall in love with floral upholstery. It can be bold or subdued, it’s really up to you.
Tags: bold, bold design, bold interior design, bold statement, chair, floral, floral design, floral interior design, floral upholstery, flower upholstery, McCreery's Furnishings, McCreerys, McCreerys Home Furnishings, patterns, seat
Posted in Accents, Interior Design 101, Interior Design Elements, Interior Design Themes | No Comments »
Wednesday, April 20th, 2016
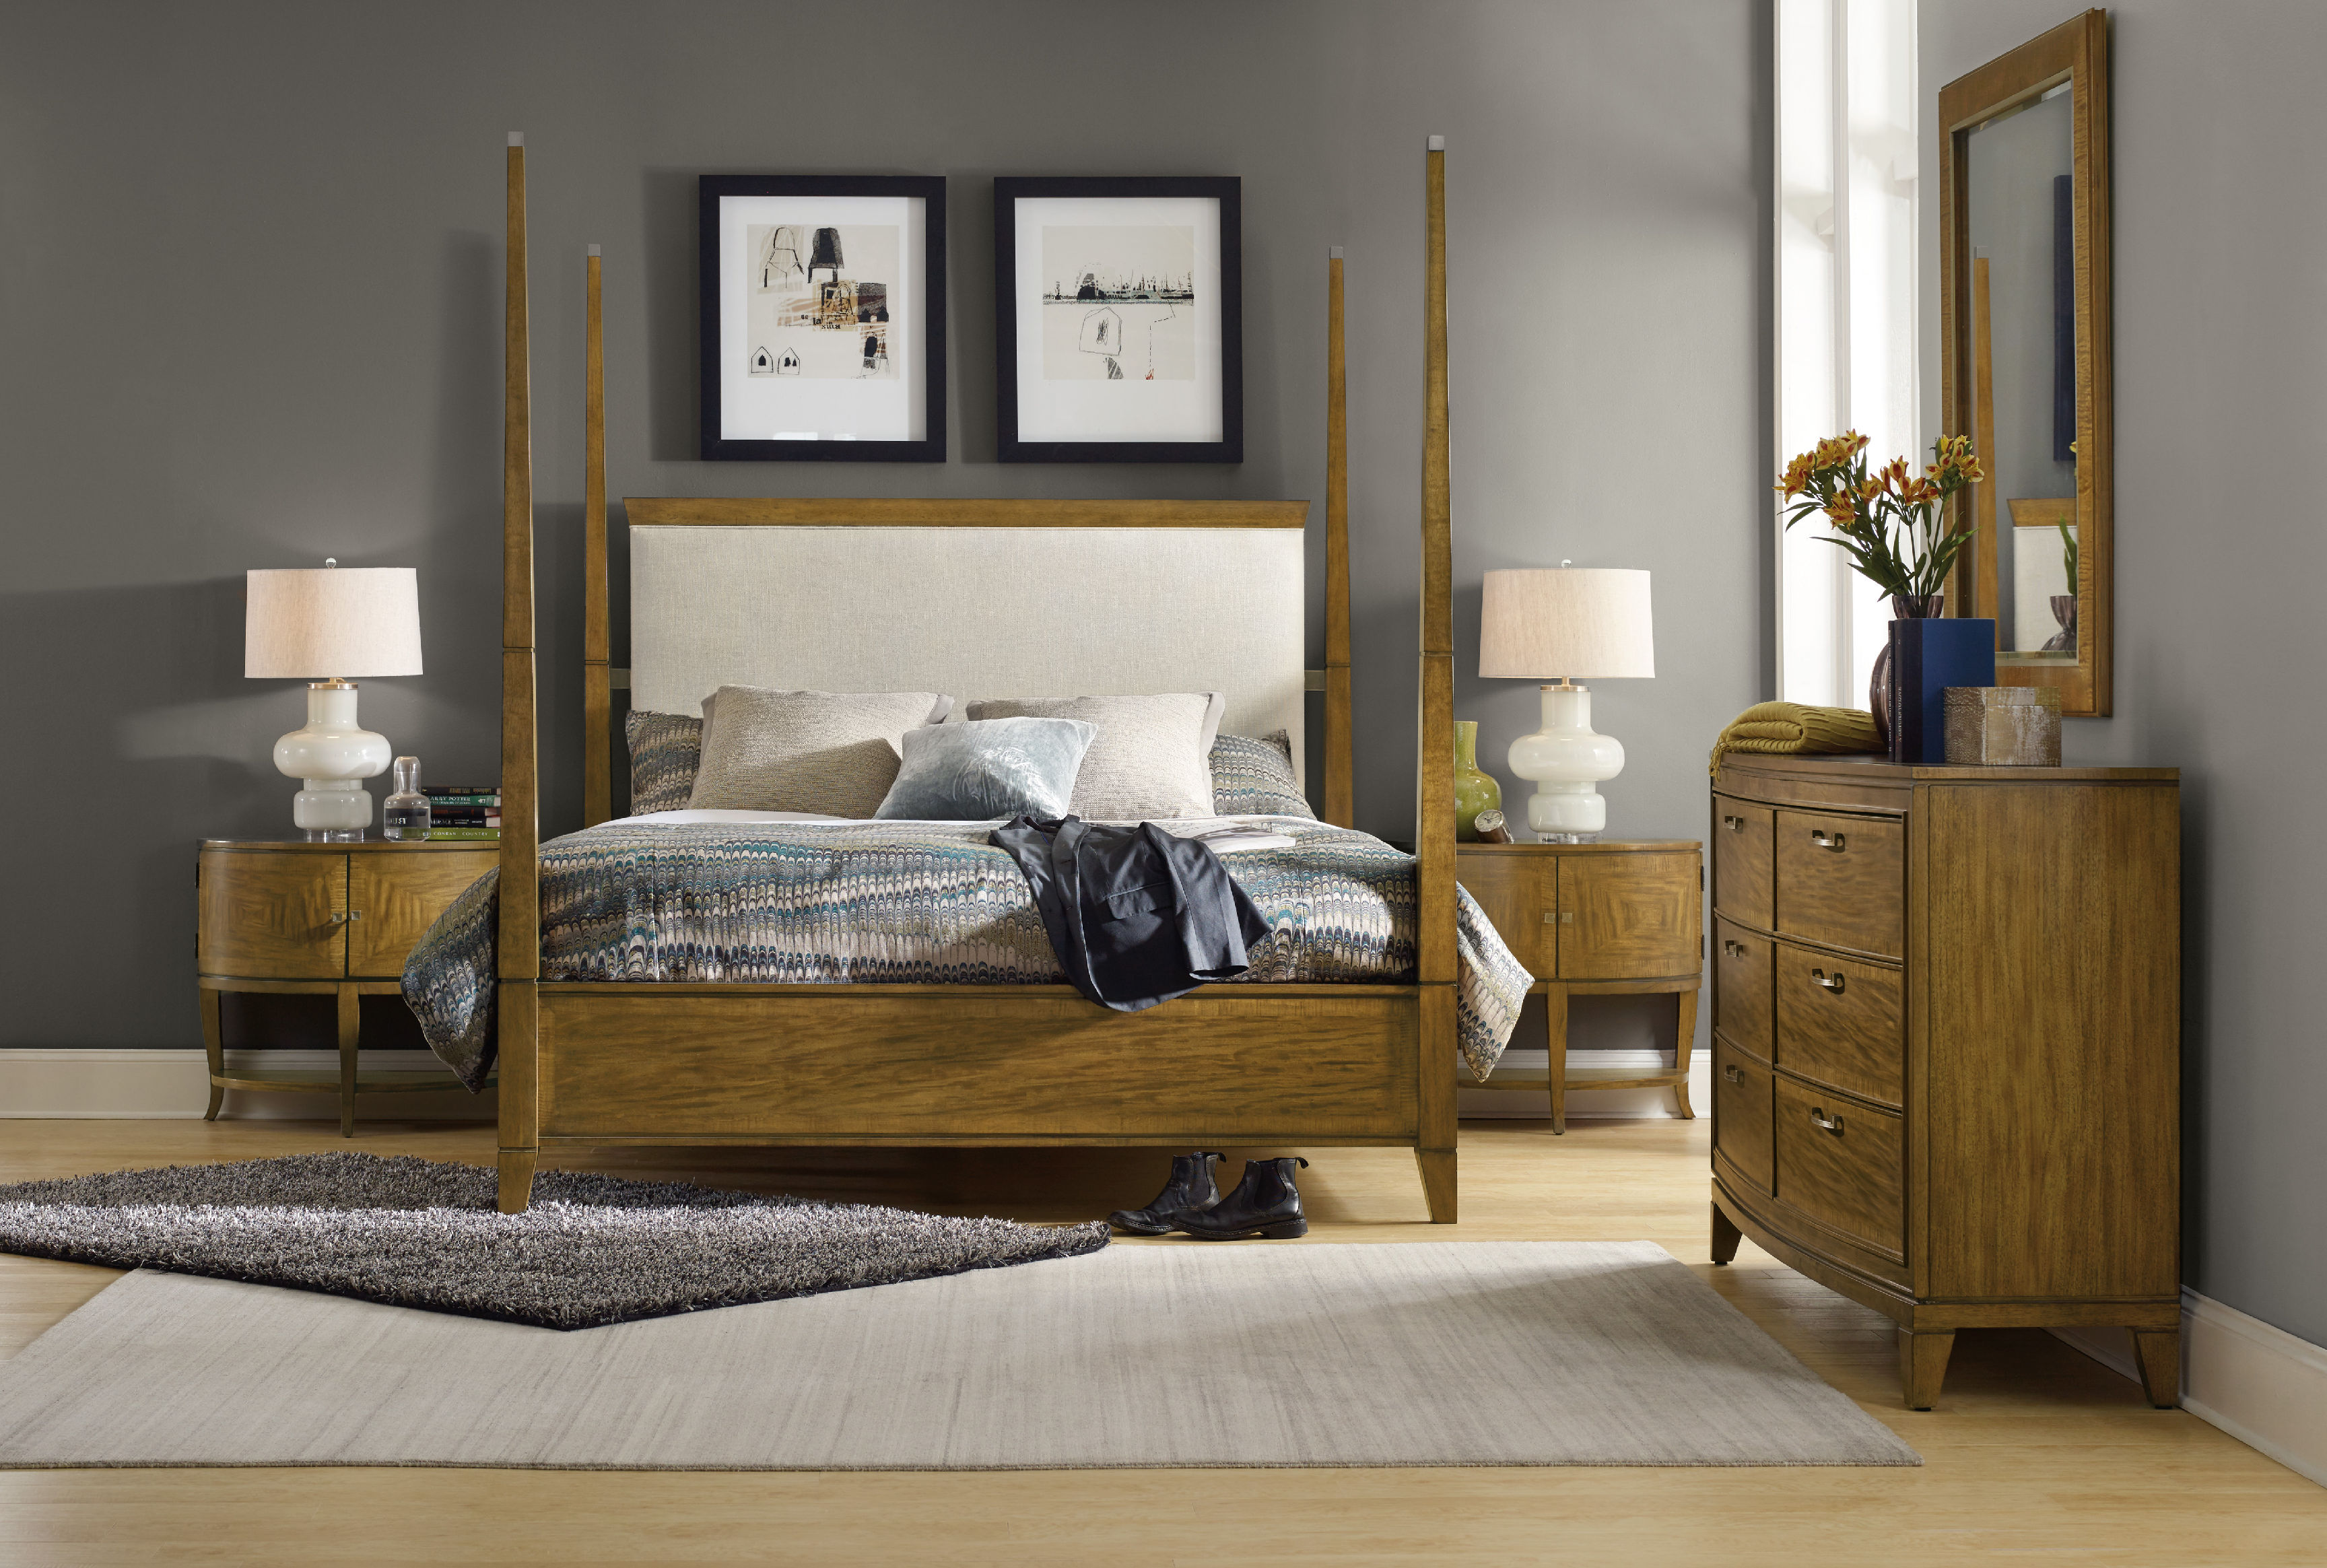
Hooker Furniture Bedroom Retropolitan Queen Poster Bed 5510-90650-MWD
The four-poster bed is known as no less than the king of beds. The reference to royalty came about because of the fairy tales told about princes and princesses, kings and queens who slept in this kind of bed. Apart from this, it was also originally created for use among nobles in the 13th century.
The four-poster bed’s materials and shapes evolved over time. Everything began from the ornate carvings of oak and the most luxurious tapestries. Pretty soon, shimmery silks were used as well as embroidery and velvets.
The Four-Poster Bed Today
These days, the four-poster bed is still highly sought by a lot of people. If you are looking into owning one, you have to make sure that you know how to dress one. Draperies spell tradition while swags are equal to contemporary styles.
Four-poster beds have already evolved from the old canopy beds. These were called tester beds which were manufactured mainly for functional reasons. Curtains used to hang from the ceiling yet they eventually became frames that supported an overhead canopy.
The canopy kept the critters from thatched ceilings from falling directly to the bed.
Bed canopies used to be made of solely of wood, often of heavy, carved oak. These were used with drapery panels. Later on, fabric took over and the wood canopy disappeared. The former was preferred because of its lighter look.
On a few beds, the outer canopy remained while others completely removed the said feature. The four supports remained because of the psychological comfort they offered. This is still one of the reasons why four-poster beds are still popular.
For a more traditional approach in dressing up your four-poster bed, you can pair the upholstered headboard with some draperies behind it. Partial panels can also be installed on both sides of the headboard. Fabric canopy is set inside a shaped wooden frame with fringed valance on all three sides.
Another thing to remember with the four-poster bed is the amount of yard and type of fabric that you are going to dress it up with. Choose from sheer, solid-colored linen, woven, or printed fabric.
Simplicity is also a great way to dress up your four-poster bed. Use gauzy fabric and tie it to the bed frame through the little grommet holes.
A valance can also be used at the ceiling together with headboard drapery. This will result in partial canopy. The turned bed posts fit right up to the valance at the head of your bed.
Loose swags like a piece of fabric that is draped over the bed frame are probably the easiest way of dressing up any four-poster bed. This is a casual approach that makes use of sheer, gauzy cotton, or any other reversible fabric.
Instead of just swag, a bed can also have a pair of draped swags. These can create the much-needed balance in the bedroom.
Creating the Lit a la Polonaise (French name for Polish bed) means you need to create an overhead crown. This is a romantic look that displays the most beautiful frills. Attach the fabric right at the crown using ties. A pocket also can also allow the fabric to become swirling swaths right around the supports.
You may also take advantage of the rail supports. Adding drapery panels is one of the most popular choices in dressing up four-poster beds. A flexible way to alter the bed’s look is to tie the panels right to the support posts. They can also be opened up to make a headboard. Use fabric with ample weight for all drapery panels. Use metal grommets with sewn heading as well as a medium-weight fabric.
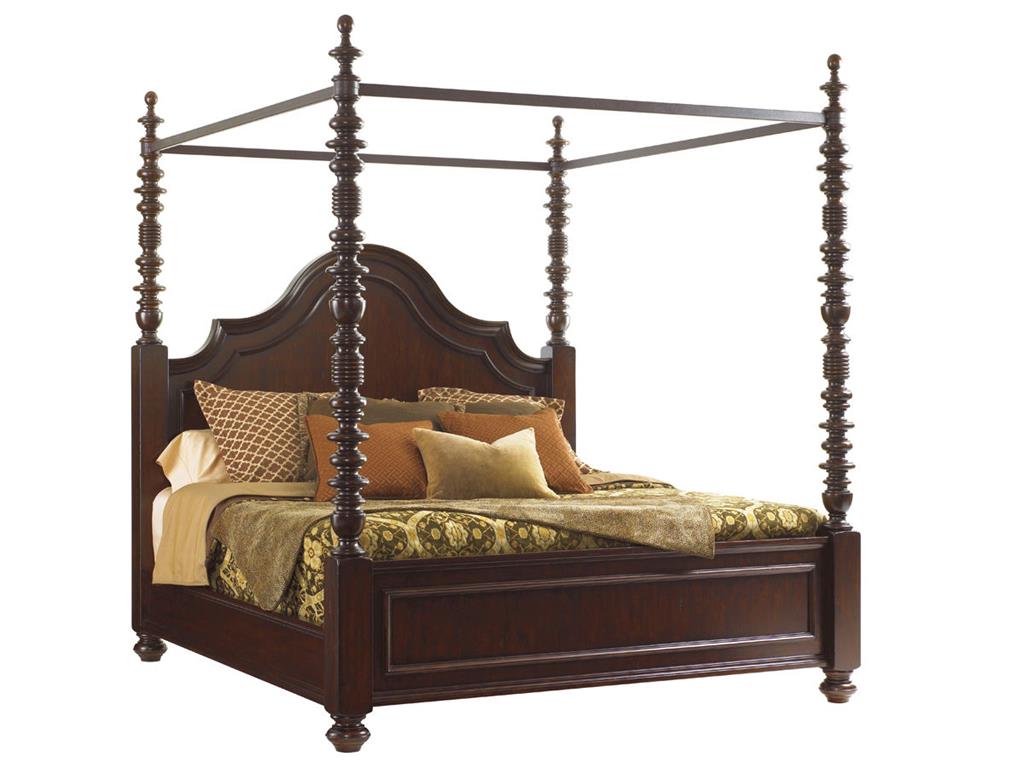
Tommy Bahama Home Bedroom Candaleria Poster Bed 6.6 King 552-174C
Tags: bed, four-poster, four-poster bed, history, McCreery's Furnishings, McCreerys, McCreerys Home Furnishings, romantic bedroom, romantic setup
Posted in Bedroom Design, Interior Design 101, Interior Design Elements | No Comments »
Tuesday, April 19th, 2016
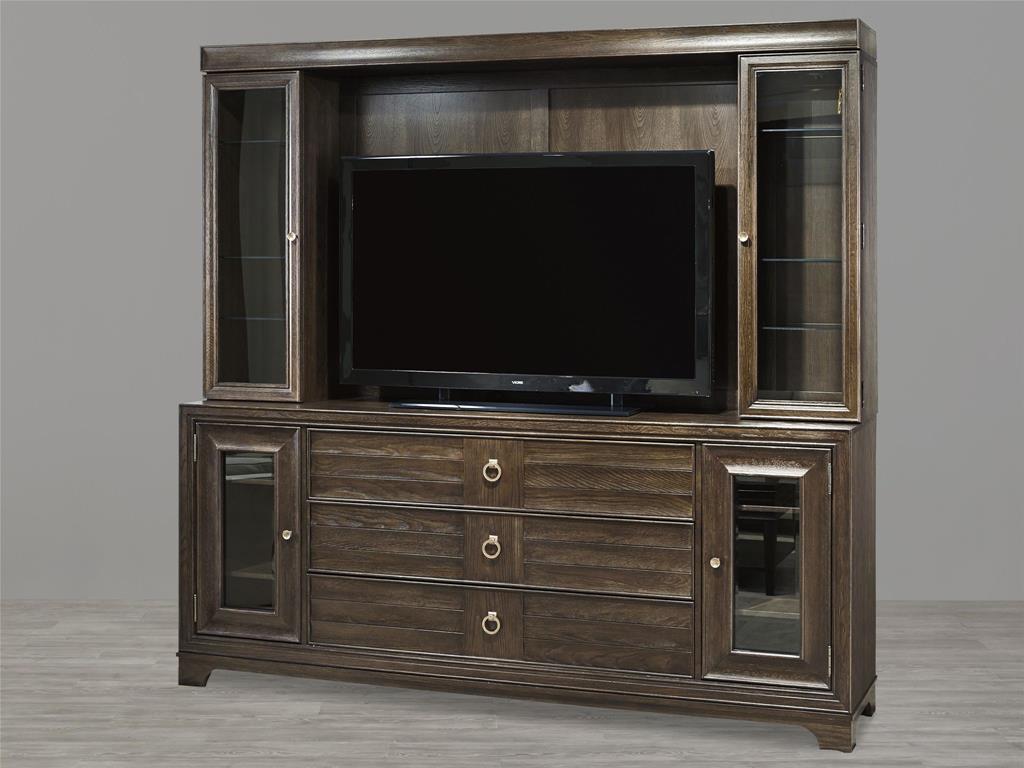
Universal Furniture Home Entertainment Entertainment Wall 475966HE is the perfect reason to take down those old wallpapers.
There would always come a time in a homeowner’s life when the wallpapers need to go. This could be because they are moving to a new home or just because the paisley or striped designs no longer create an interesting background. It could also be because a child has outgrown the cartoon-themed wallpaper in his bedroom. Whatever your reasons for taking the wallpapers down, it really doesn’t matter – what matters is that you do it correctly.
Yup, It’s Going to be Messy
There is no way to sugarcoat the difficulty of this job. Wallpaper removal is far from easy. It is messy, tedious and even time-consuming. There are no products out there that can make the whole project easier more so when you have no idea where to begin. So, yes, it is not going to be a fun job.
Taking down the wallpaper needs more time that you can imagine. It is not a task that you can finish in an hour or two. If you can, allot the entire weekend for this project. Use day one to take on the messier parts of the job then the next day to prepare the walls for the new paint or a different set of wallpapers.
Protect the Floor and Trim
This is step one of the process – tape plastic onto the baseboard. Be sure to create a watertight seal before covering with more plastic. Top the plastics with towels so that the dripping water will be absorbed later on.
Wallpaper removal is equal to sticky and wet so be sure to protect the floor, woodworks and furniture. Remove outlet covers, vents, switch plates and such. Mask the openings using tape and plastic.
Tear and Pull
Now it’s time to tear and pull down the wallpapers. Begin at a corner of the ceiling as this is the area where wallpapers tend to be loose. Lift the edges using a putty knife. Pull off the wallpaper using an even pressure. You can do this step without using water (just yet).
The backing will then be left and this is the part that you will soak with soap and water. The longer the wallpaper stayed on your walls, the more difficult it gets to take ‘em down. You may have to apply water several times for the backing to absorb more moisture. If it becomes difficult to remove the facing, then use a scoring tool.
Use Hot Water with Caution
Using a floor mop or a sponge, apply water to the backing. Use the hottest water temperature that your hands can tolerate. Allow the water to absorb into the backing by letting the application stand for 15 minutes.
It may be difficult to do this without destroying the wall surface especially when you are working with drywall. Never expose such surfaces for more than 15 minutes.
Plaster walls can take a higher level of hotness. Do the wallpaper removal in small sections.
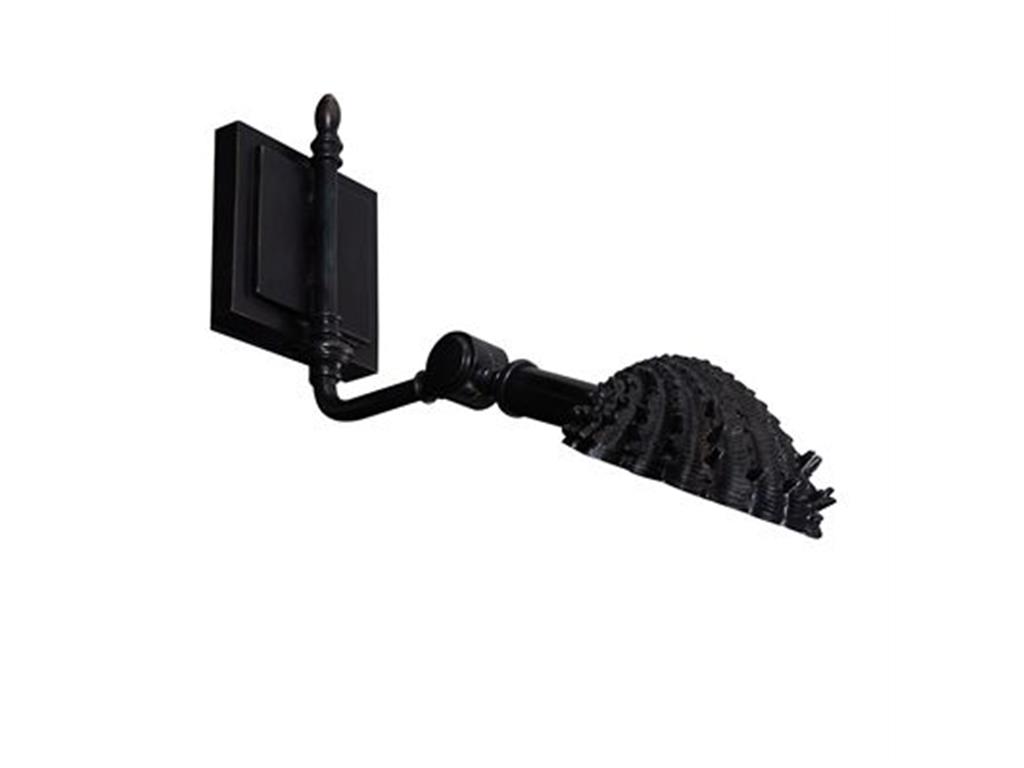
Maitland-Smith Lamps and Lighting Brass Wall Sconce 1954-353
Remove Every Paste Speck
Spray some gel stripper onto any remaining paste. There is no need to apply a lot so don’t worry about spending too much. Rinse with water till it is smooth. Using a putty knife, scrape off the glue then wash the walls using sponge and water. You can finish your work as soon as the walls become squeaky clean.
Should water and soap fail to give you that clean look, you may also consider using chemical strippers. These are wetting agents that keep the water from totally evaporating when you are removing the paste. These are enzymes that can break down the paste’s molecular structure.
Should these materials still fail, you may also consider using electric steamers. These are for stubborn cases.
Tags: how to remove wallpaper, McCreerys, McCreerys Home Furnishings, removing wallpaper, wall color, wallpaper, wallpaper design, wallpaper removal
Posted in Interior Design 101, Interior Design Elements, Wall Design | No Comments »
Tuesday, April 19th, 2016
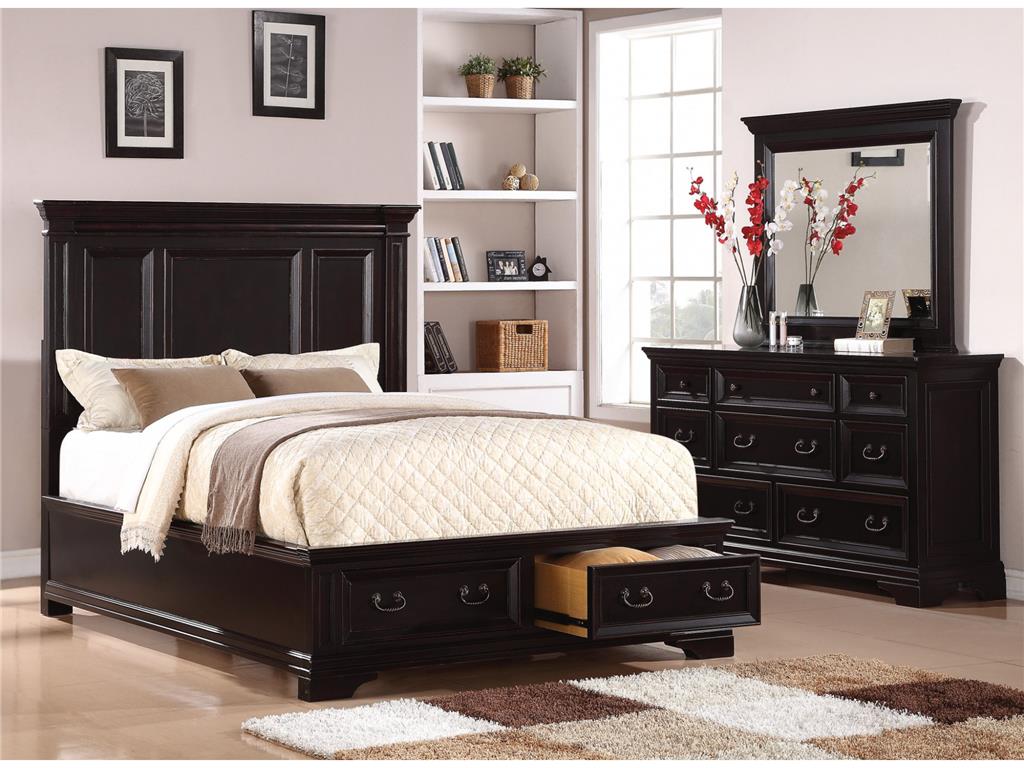
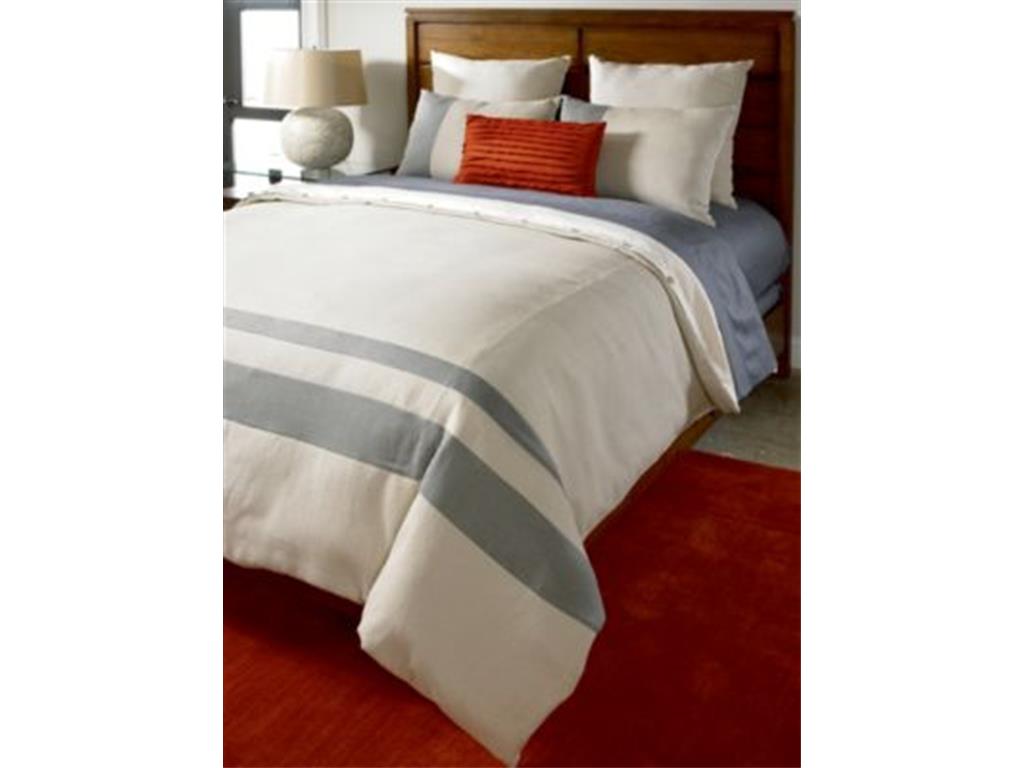
Flexsteel Bedroom Queen Panel Bed With Storage W1909-90QS is perfectly balanced by the red and white floral arrangement and other exciting accessories.
The combination of red and black may not be a mixture that you have given much thought in the past. You might just change your mind once you see the winning reasons why these colors can take your home at the center of everyone’s attention.
Turn Up the Volume
Upping the wow factor of your home could be as easy as choosing the red and black palette. This color scheme offers just one vibrant hue but it does not automatically mean that the other color can’t offer drama on its own.
Red or black, each of these colors can make a bold statement on its own. They can actually be used under any circumstance. So, when you are designing your living room towards a bolder look, be sure to consider this marriage of colors.
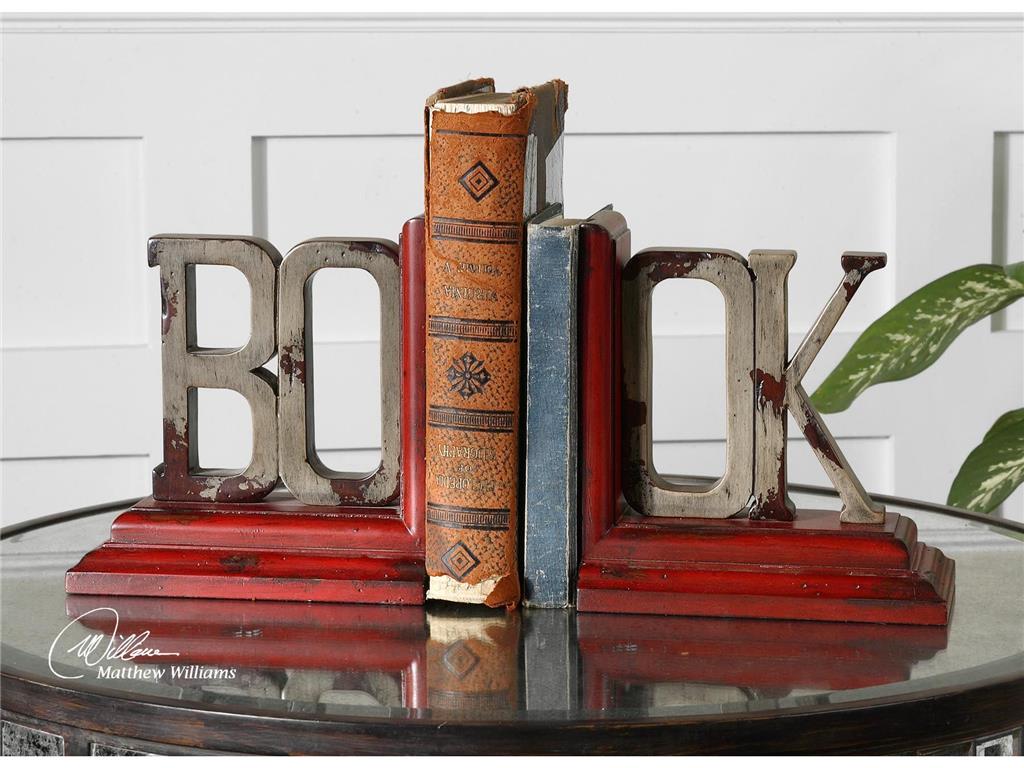
What’s a living room without these exciting Uttermost Accessories Book, Bookends, S2 19589?
Who’s the Boss?
Okay, so you have finally made up your mind and are now bent on using red and black, now what? These are both bold hues so one of them has to give.
Choose which one – red or black would be the dominant color. To choose which, take a careful look at the curtains and walls of the living room. See also the floor as well as the natural light inside the room. Is your living room used generally for simple family get-togethers or more of an out-of-office venue for your colleagues?
Whichever you end up choosing as the more dominant hue, make sure that you harmonize every aspect of your design. Consider salsa red in your living room if you spend more time there and if you perceive it to be a cheerful room with lots of foot traffic.
A more subdued and relaxing living room can make use of deep rose as the central color.
Balancing the red and black palette means using complementing colors on the more dominant color. The complementary colors should be used on your accents. For instance, if you used red as the dominant hue, then you may use the quieter gray on other design elements.
Put In Some Finishes
Metals and woods in the living room can also contribute to your red and black color scheme. The use of lacquered-black wooden furniture pieces adds intensity to any living room.
Do you like the shabby chic look? Then use pale gray on your furniture while accessorizing with the more exciting red and black mixture. Remember, the color of the furniture should balance the rest of the colors and elements that you decided to use. A heavily black room, for instance, can be beautifully balanced by paler shades of red.
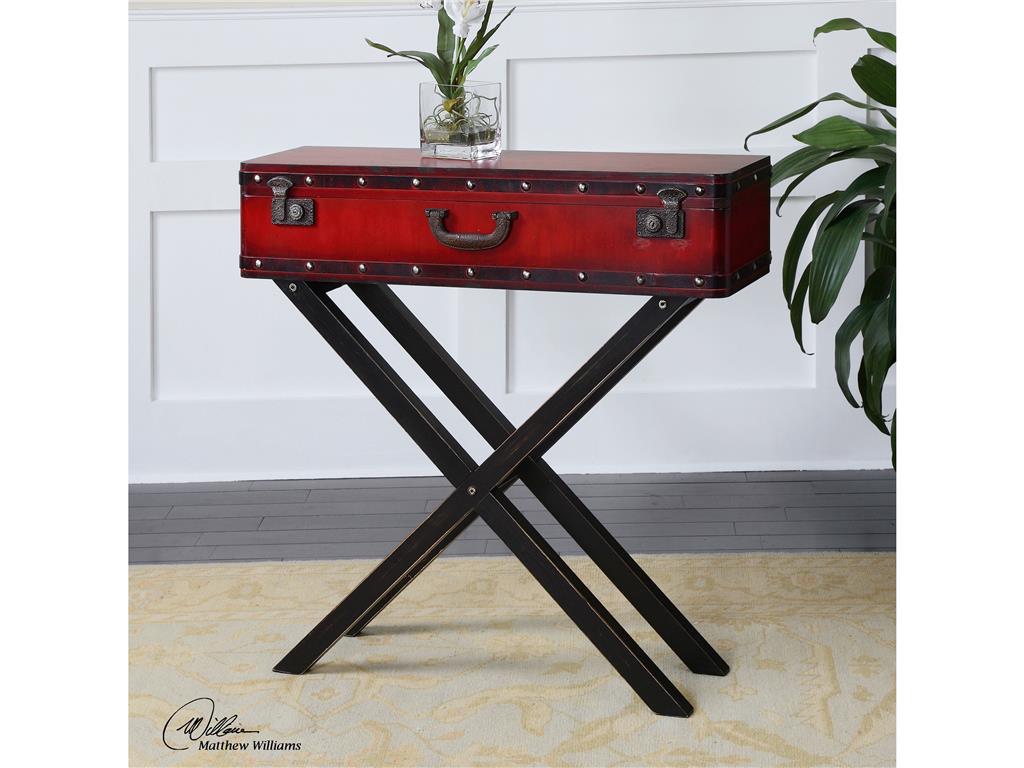
Living Room Uttermost Taggart Red Console Table 24379 does not need to beg for attention with its unique look and color fusion.
Just a Hint
Most of the time, when designers suggest red and black, homeowners have a tendency to wince. What they don’t realize is that this fusion need not be vibrant all the time. Don’t give up on these colors if you are the more traditional type. A hint of red – here and there – can sometimes do the trick. This is just as striking as a whole room filled with vibrant red. A simple red pillow propped against a plush, black sofa can be a simple combination that could also serve as the focal point in your living room.
The clever use of red and black can add the needed drama. The fusion can be used on the walls, floor and major pieces of furniture. If you prefer a less committed take on the red and black palette, then just use the hues on most of your accessories.
Let’s accept it –red is an eye-catching color. A red accent wall is the perfect backdrop for your beautiful black cabinet. These give the eyes a pleasant place to look at while taking the time to absorb the rest of the design elements.
Tags: black, bold, bold color palette, bold design, bold hues, bold interior design, bold statement, guidelines, McCreery's Furnishings, McCreerys, McCreerys Home Furnishings, mixing colors, mixing style, red, tips
Posted in Color Schemes, Living Room Design | No Comments »
Monday, April 18th, 2016
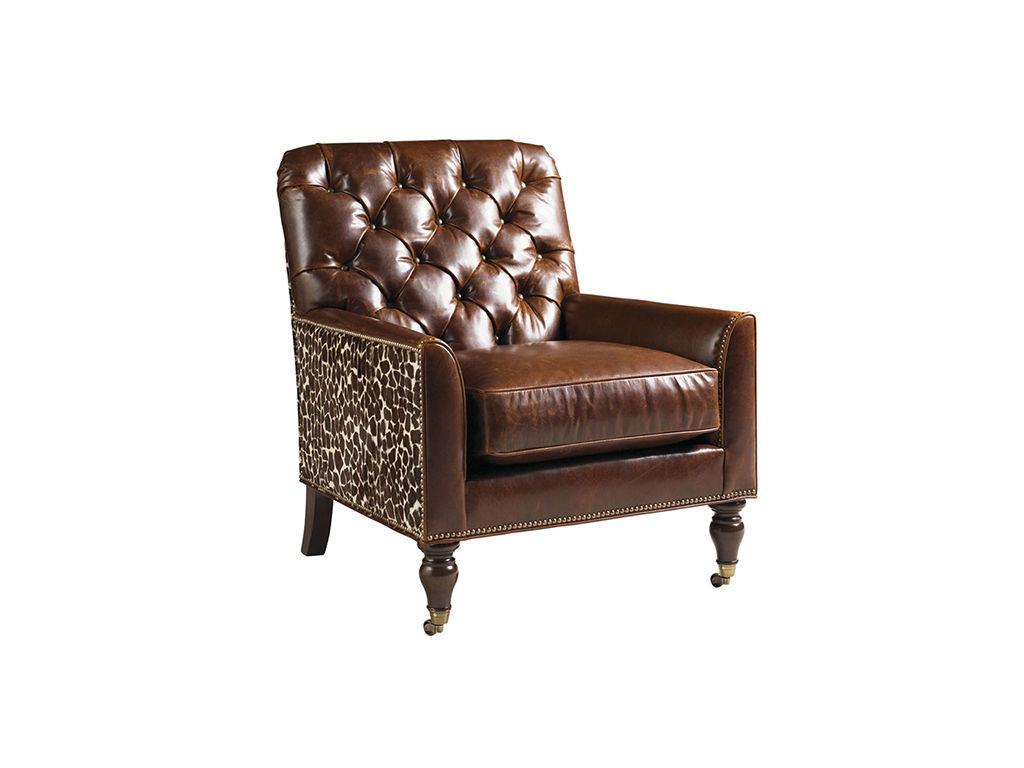
Lexington Living Room Sandhurst Leather Chair LL7534-11BB is the right subject to the frames created by the stencils on the walls. It also comes with stenciled giraffe hair-on-hide.
Have you ever dreamt of doing an interior design project for your home but ended up commissioning your friends or a professional to finish the task for you? ‘Ever wonder if you can actually finish a task that you can actually call your own? Now you actually can – there is a simple project that can be done by one person in just a few hours. Wall stenciling is a fun, hip and easy way to decorate the walls of your home.
It’s Also a Paint Job
Majority of acrylic and latex paints are great for wall stencil jobs. A nice opaque paint should be good but you have to prepare yourself in cleaning the stencil more often. Opaque paint tends to build up so if you are new to stenciling, you might as well resort to regular latex paints. Craft acrylic paints also work well on stencils.
Paints that won’t work with a stencil project are oil-based paints and spray paints. The latter is a lot more difficult to control though some have already used it with great success. Again, if this is the first time that you are using stencils, then opt for the time-tested paints.
A flat sheen base is the best surface for stencil projects. Glossy surfaces do not absorb the stencil paint as effectively as basecoat does. Plus, you can be assured that basecoat offers a quicker paint drying process.
Other than a basecoat, you can also have a craft acrylic or flat latex paint. It dries more quickly and has less tendencies of seepage.
You may ask for a spray adhesive from any of the craft stores. This can greatly reduce bleeding on your stenciling. Mist the back of the stencil in an airy area then let dry for just a minute. Never drench the stencil with this adhesive as it could transfer onto the wall.
Re-apply every few prints as it could lose its tack.
Using any kind of glitter is also not recommended for your wall stencil project. The usual results are smudging and bleeding and you wouldn’t want those.
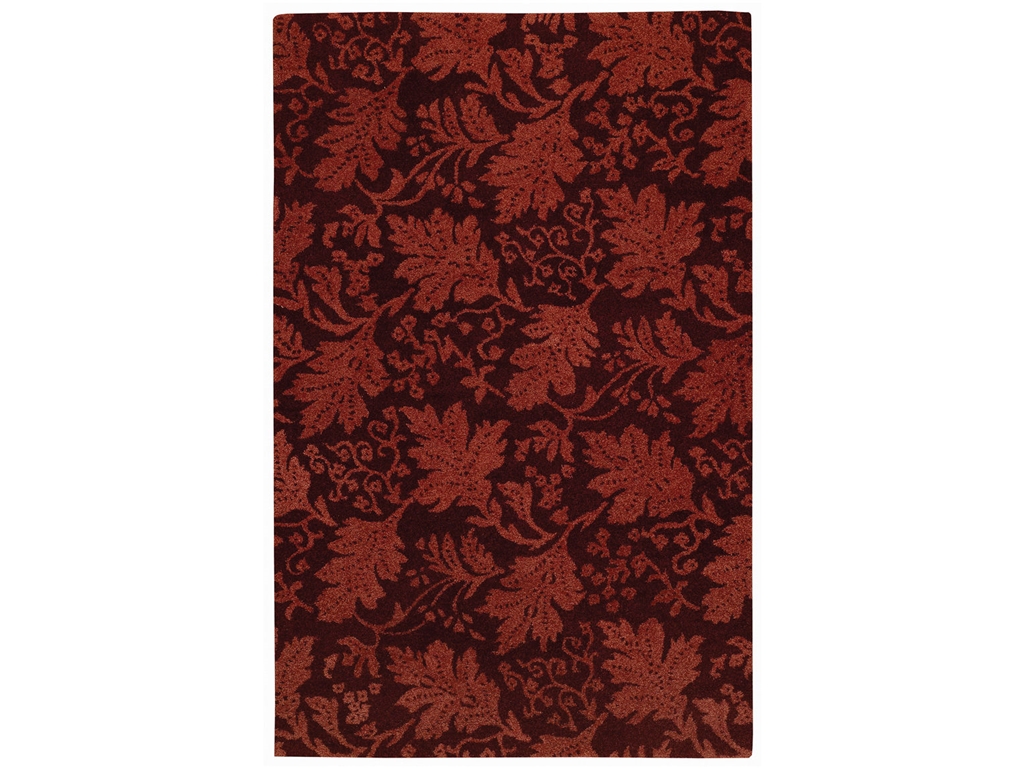
Capel Incorporated Floor Coverings Waller Oak Rug 9221RS05000800550 is traditionally-woven with stenciled leaf designs. This carpet shows how stenciling can be carried over to other interior design elements.
The What Ifs of Texture
There are some really rough textures out there that offer peaks and valleys depending on your desired wall outcome. Should you have existing walls that are textured, then stenciling might not be a project that you can look into at the moment. There are, however, some light to medium textures that can still accommodate stenciling. Some use textured plaster as background then stencils are used on top. Use leaf or branch stencils rather than the usual straight lines in order to work well with the existing texture.
Working with textures means you use but a little paint on the brush. The paper towel is your new best friend as it can be used as a means of loading off excess paint. Use dabbing or rubbing motion when stenciling.
Do not force the paint to the stencil edges. Use a dense foam roller if you have to make sure of a relatively dry application.
Materials and Tools
These are some of the common tools that you will need –
Investing in quality stencil brush should be one of your priorities. You may have the best color and texture of paint but if you end up with a shedding brush, then all your energies would be futile. You may practice on a huge piece of board at first till you master the technique that you are going to use.
Stenciling can be a great part of your interior design project. Just make sure to balance it out with neutral furniture pieces that will make your design task a huge success.
Tags: dressing up blank walls, McCreerys, McCreerys Home Furnishings, stenciling, stencils on walls, wall design, wall stencil, wall stencils
Posted in Interior Design 101, Interior Design Elements, Wall Design | No Comments »
Monday, April 18th, 2016
Thomasville Bedroom Slumber Ensemble Set (Super Queen) TV-BD1-40 shows an exciting fusion of bold and neutral colors.
The bedroom, unlike living spaces, can make use of hot hues on walls. Living space walls normally reflect the trendiest artwork and accessories unlike the bedroom where in-the-moment palettes are most in. The 80s bright neon look, for instance, would be an interesting color to splash across the bedroom walls. Pink and dove gray combination, on the other hand, makes for a relaxing room. If you want a more recent color combination, look for them in fashion magazines. What usually appears in clothing stores and on runways are almost always translated to bedding.
For those who have a bit of trouble when it comes to sleep, colors that are serene or restful is the way to go. For those who do not have sleeping issues, then you are the few who can try something bolder. Spending more time inside the bedroom is a lot more fun if the colors are fresh and they match your personality.
Rich Hues
Choose to add color and texture in one go with the grass cloth wall covering. Pick a color (or color combination) that is vibrant so that the rest of the room is left simple. Say, you chose flaming red as the color; then have the bed and the rest of the furniture in a more subdued color. You can, however, carry over the red to your lampshades, pillows, and bedding.
Painting the walls and trim with a bold, bright hue can give the bedroom a cozier, more cocooning effect.
The Hanging Chair
If you have ample room for an extra chair, then you might as well have one that shows a lot of flair. A hanging basket chair will surely catch anyone’s attention.
The One-of-a-Kind Keyhole Arch
If you are jumping into the remodelling bandwagon, then you might as well do something mysterious or unique for this project. Adding a nook or a semi-secret corner can be done in style. Just add a keyhole arch to separate the smaller area. This should still be able to allow the passage of light into the main room.
Use Layering
Try a different sort of style when you are out to change the bedding. Mix and match patterns and colors. Since the bed is the biggest object inside the room, make it a point to think about what you would put there. Any pattern or color that you place there will immediately catch the eye of anyone who visits the bedroom. Use a smaller scale of patterns on the sheet while using a larger scale pattern on your coverlet.
Accent pillows can take the extra large scale prints.
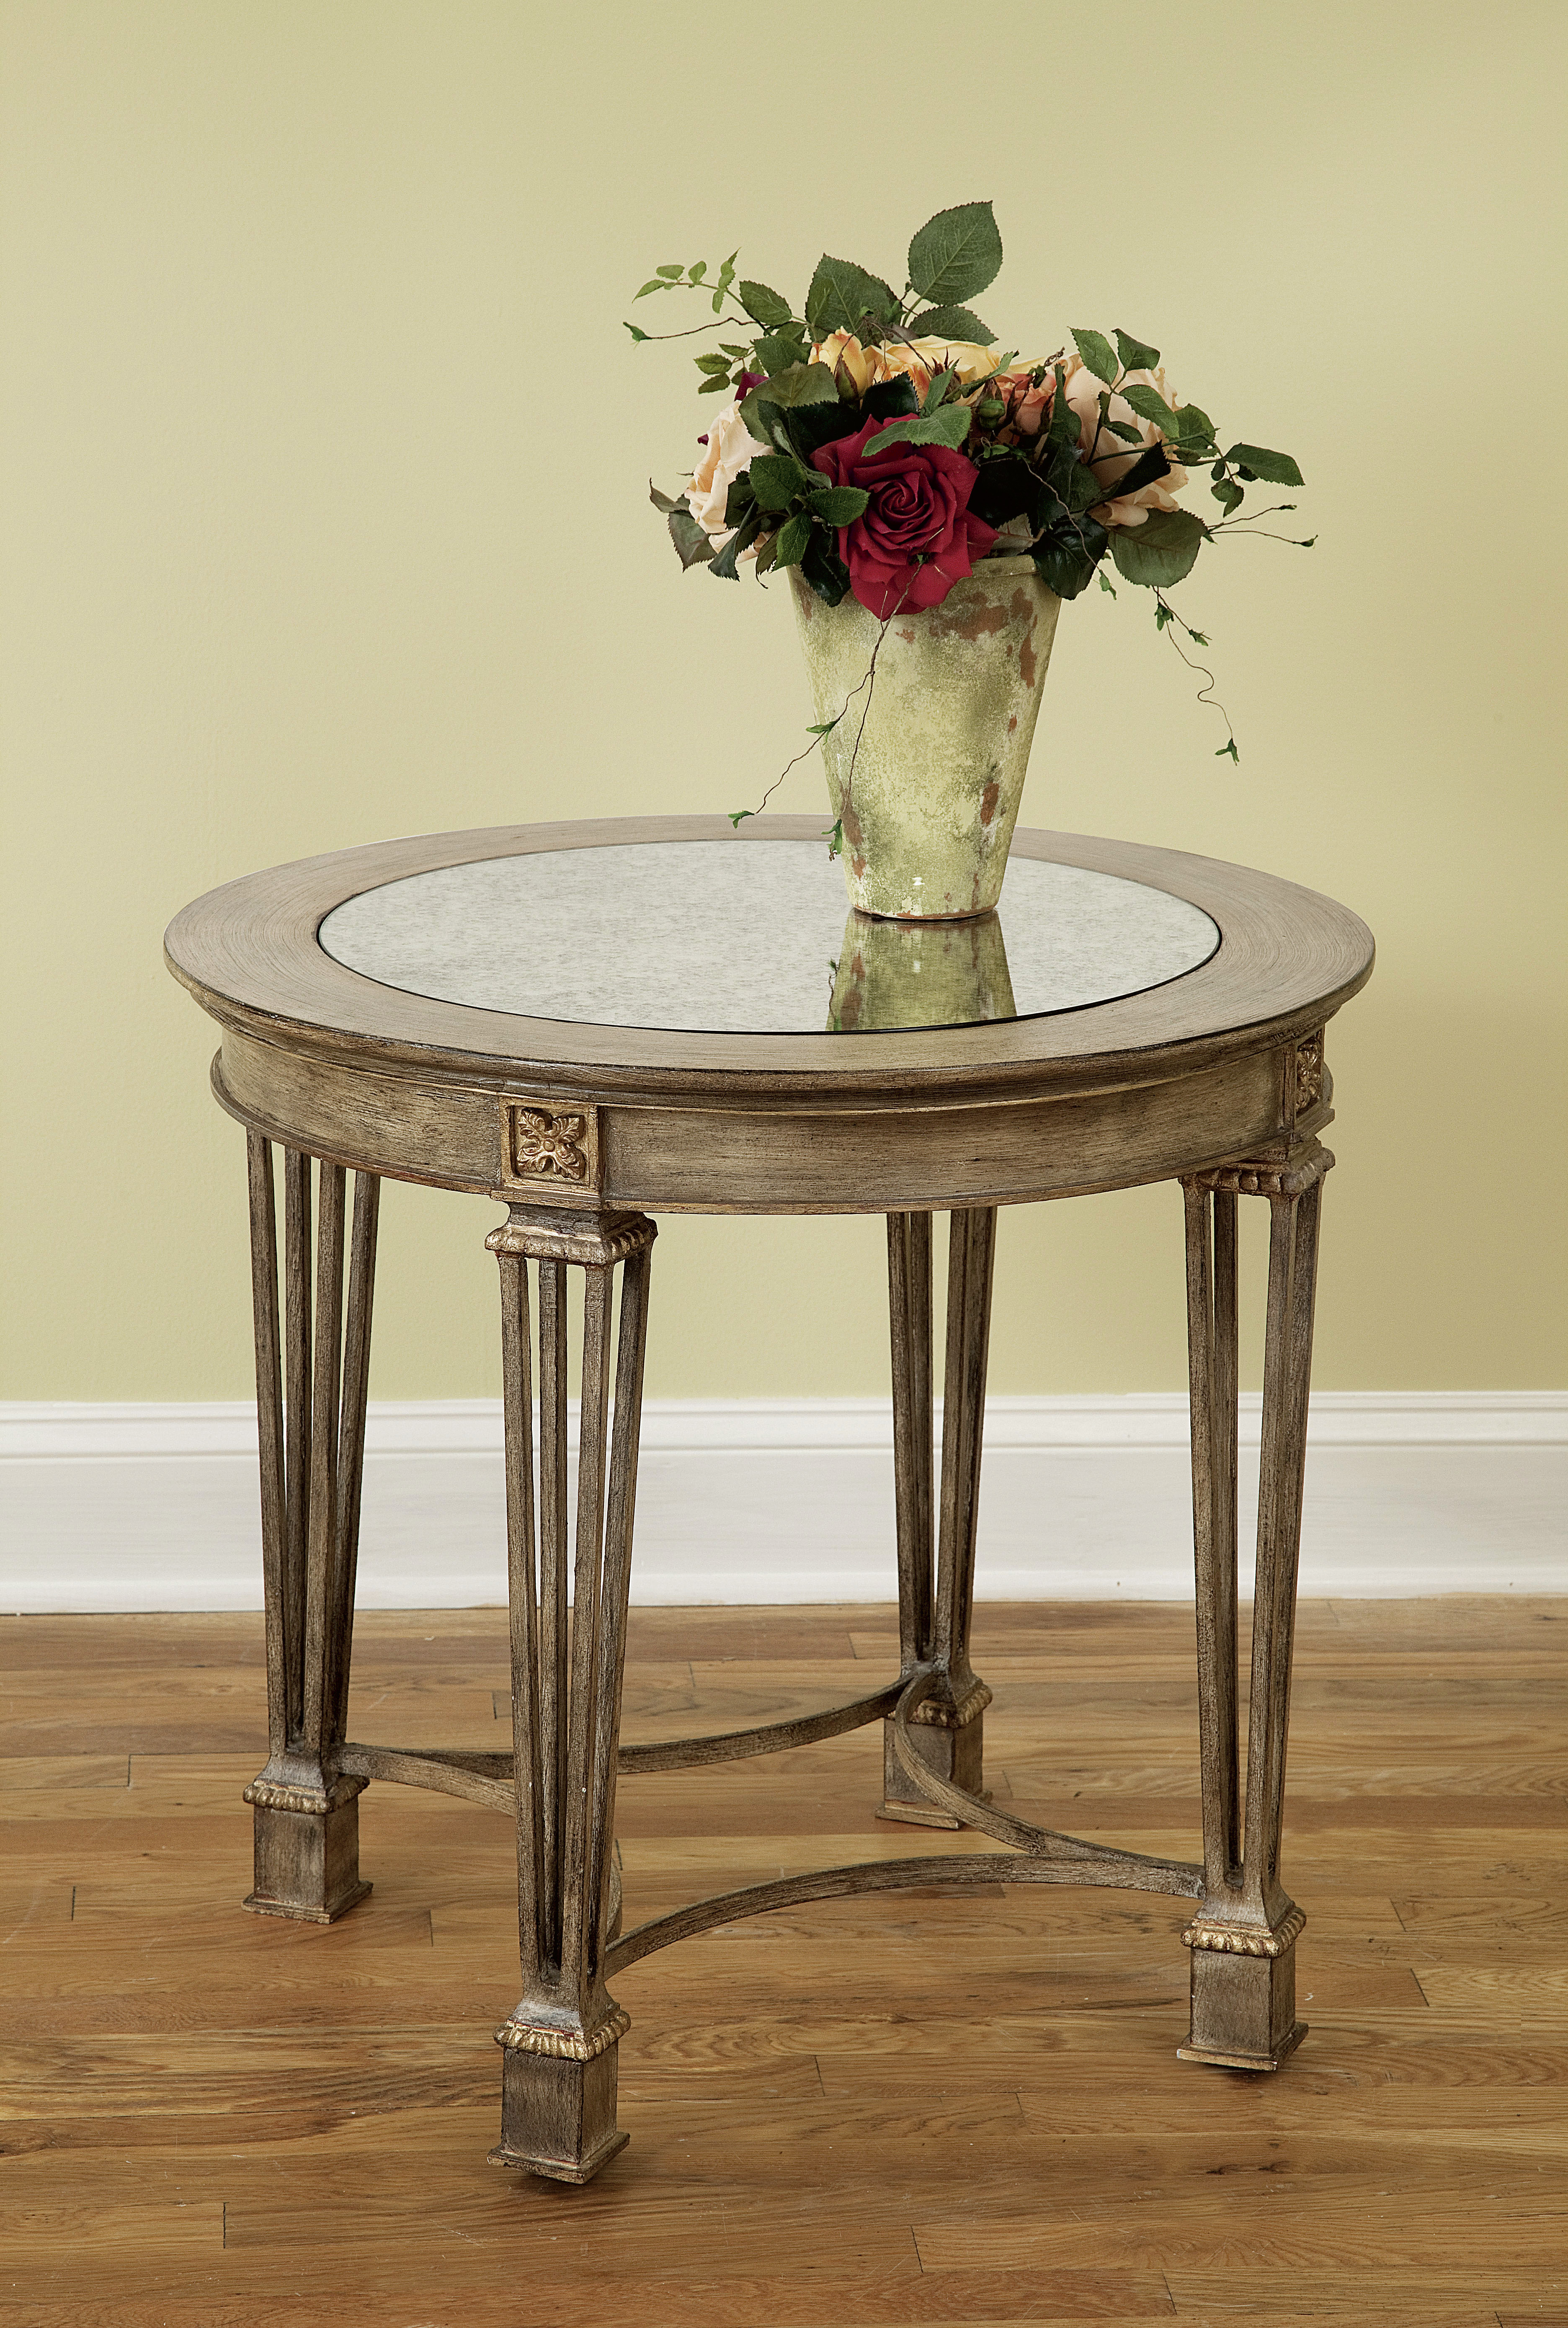
Floral arrangements create an interesting backdrop to an otherwise boring bedroom nook. Featured table is from FFDM’s Biltmore Collection.
Beautify the Windows, Too
Don’t be satisfied with plain blinds for your bedroom. You can afford to be more flamboyant when it comes to your bedroom shade so you might as well choose fun fabrics.
You may begin with the plain, neutral-colored shades then sew on some interesting fabrics. Just be conscious about the layers that you add since these can make the shades opaque. See also that the fabrics won’t make opening and closing the shades a lot more difficult.
Add Some Bedroom Art
It would also be nice if you can commission a wonderful piece of art. You can save up for one artwork or you can create a simple gallery right on your bedroom walls. Most artists work from a single photograph then they develop their theme from there.
You can set up a real headboard, a wallpaper headboard, or you can simply cover a not-so-inspiring part of the wall with curtains.
You see, there is no need to limit your vision with regard to the inspiring
bedroom that you are creating so unleash the artiste in you.
Tags: art, artwork, artwork on walls, bedroom colors, bedroom furniture, colors, displaying artwork, layering, layering in interior design, McCreerys, McCreerys Home Furnishings, patterns
Posted in Bedroom Design, Color Schemes | No Comments »
Sunday, April 17th, 2016
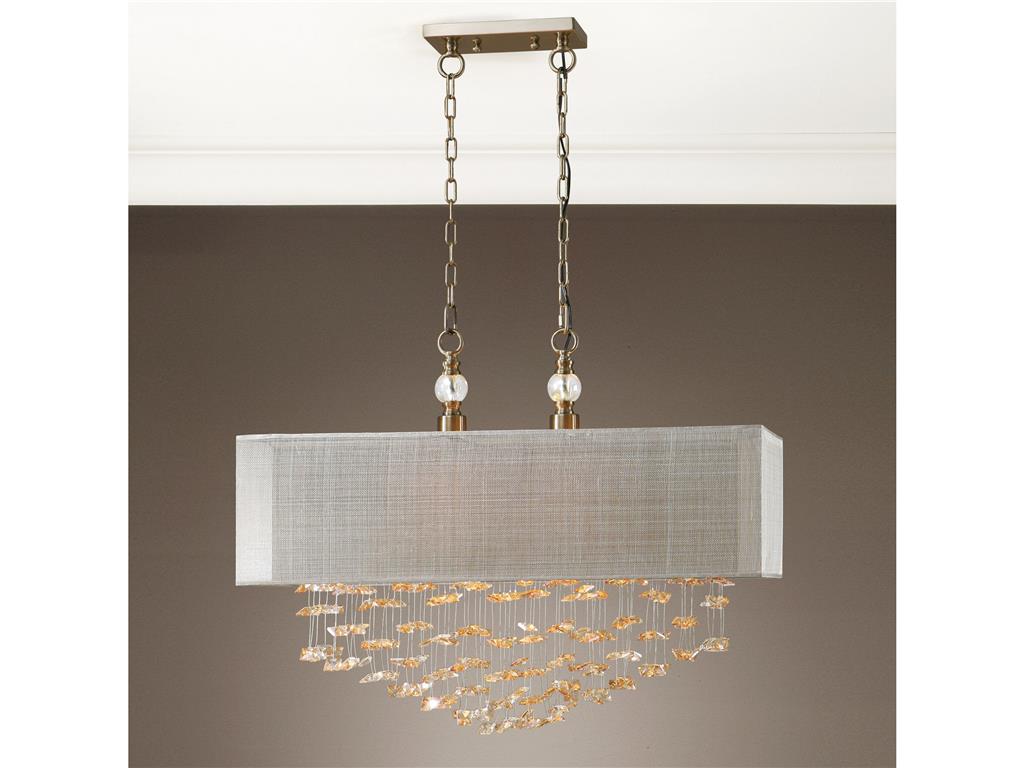
Lamps and Lighting Uttermost Santina 2 Light Shade Pendant 22033
Adding a powder room right on the main level of your home offers that assurance to everyone that they have a ready access to a toilet and sink. There is no need to climb up the stairs in order to powder one’s nose. A two-storey home that offers a full bathroom or powder room is a welcome idea to someone who has serious injury or an elderly who is not fond of climbing up the stairs anymore. Now everyone’s grooming activities can go on without embarrassment and interruption.
You can start your powder room project by assigning a section of the underneath stairs. This is that small space that is often left unused. If this is too small for you, make the powder room no less than 60 inches in width and about 60 inches tall. Remember that there is a code that asks for a minimum of 30 inches for the toilet and no less than 30 inches of space on each side of the toilet seat. This is set up at this manner so that those who require assistance can move freely.
Having ample budget and space should give you the freedom to create a full size bathroom. Again, having the bathroom at the main level is a great way to go. This offers utmost flexibility in the chance that you have elderly members in your home.
Get Down, Get Busy
The first hurdle is over if you already know where to situate the powder room. Install a doorway that is no less than 34-36 inches wide. This provides ample room for mobility aids like walkers and wheelchairs. Pocket doors also work because they do not eat up much space.
If the room won’t allow a large door opening, then your best option is to have a swing door instead. Swing-away hinges can maximize the door opening but make sure it opens away from the toilet. This feature allows enough room for anyone who wants to turn around without having the need to close the door.
Most swing doors are installed with lever handles. This is because levers offer convenience to people with limited dexterity. Round or latch-type handles, after all, require more grasp and pressure to turn.
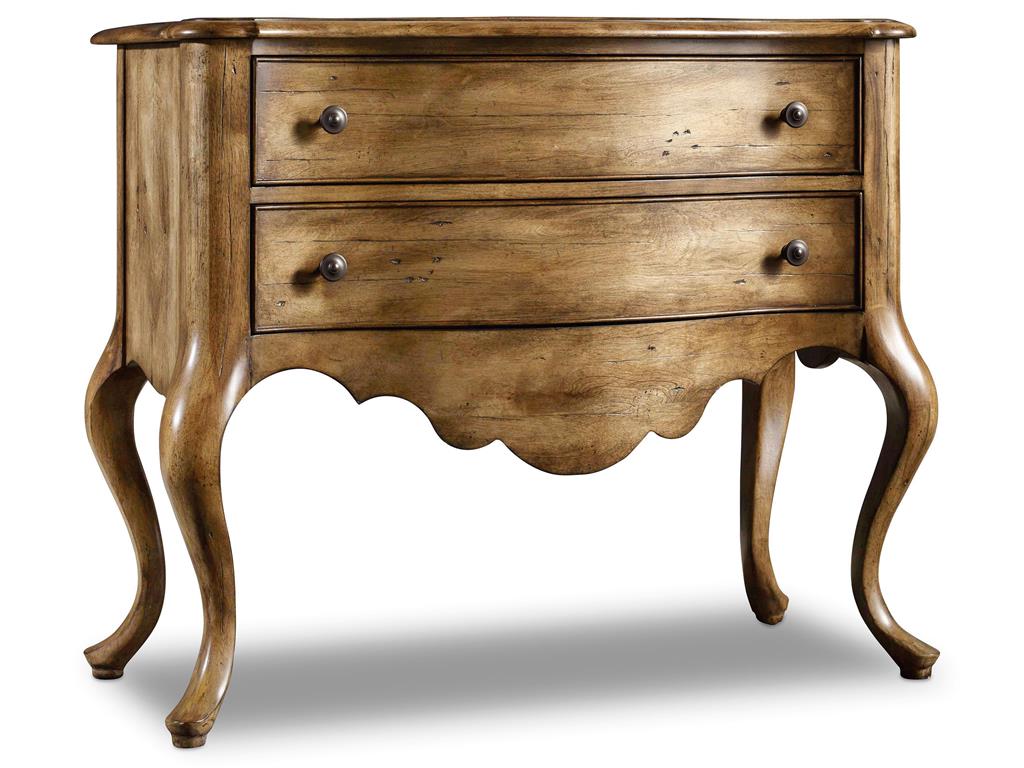
Hooker Furniture Bedroom Archivist Two-Drawer Bachelor Chest
Vanity, Vanity, Vanity
Depending on the kind, vanities offer storage even in a small room. There are wall-mounted vanities and there are also those that offer leg clearance to those in wheelchairs.
Pedestal sinks also work well in powder rooms. People who are in a wheelchair can approach the sink from the side or the front with ease. This also allows for someone to stand waiting for his or her turn nearby.
Pedestal sinks also have an undersink space where you can store powder room essentials as well as a step stool. This step stool comes handy for homes with young children and toddlers.
The vessel sink, on the other hand, can be seated or recessed on a countertop. They have various designs and multiple choices for accessibility. Keeping the space open underneath the counter offers leg clearance for wheelchairs. The modification of the counter’s depth also gives users access to fixtures underneath.
A vanity that has angled sides can offer a wider floor space for those who use walking aids. Be sure to place the vanity in a spot where there are minimal obstructions. No powder room is considered complete without a luxurious vanity mirror. This dramatic mirror adds drama and personality to a typically dull and small room. Adding a floor to ceiling mirror can also make a small powder room appear and feel larger.
Other powder room essentials include pendant lighting and a dresser. The former offers a relaxing ambience while the latter is the go-to piece when it comes to storage.
Tags: bathroom vanity, decorating the powder room, designing the powder room, McCreerys, McCreerys Home Furnishings, powder room, powder room essential, vanity, vanity table
Posted in Interior Design 101, Special Rooms In Your Home | No Comments »
Follow us on our social media
© McCreery's Home Furnishings | All Rights Reserved | Privacy Policy