- Follow us:


Saturday, August 27th, 2016
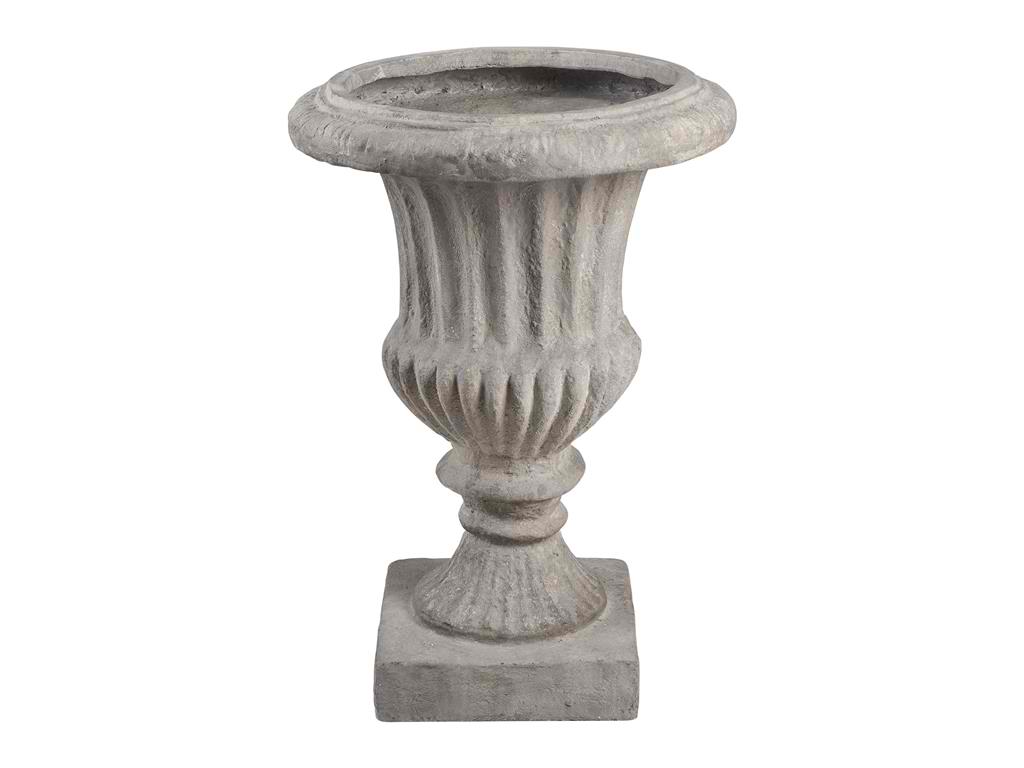
Uttermost Accessories Beaman, Planter 20114 is a staple piece in patio design.
Patios and walkways are wonderful assets that your backyard could offer. They bring wonderful benefits to you and your home. There are many ways that you could use your patio. First, it can be an entertainment area, a party zone, or simply an oasis right on your backyard.
A Relaxing Entertainment Spot
There is nothing more comfy than resting in the backyard during a warm summer night while sipping a cool drink. The kids are out playing in the lawn while you enjoy their peals of laughter.
A patio can greatly enhance this experience. Complete the scenario by adding the most comfortable patio furniture set. This should become an oasis, one that you could unwind in.
The Party Zone
You will definitely feel wonderful as you fire up the grill and have a barbecue party going. Add all the grilling essentials that you know and the fun and convenience would definitely be amped up.
Add Value
Adding value to your property is as easy as installing a walkway or a patio. You get to enjoy the benefits that patios offer for as long as you live in the property. These benefits extend all the way to that time when you are ready to give up your house and move to a different home.
Potential buyers will surely be awed as they see the beautiful aesthetics of your outdoor haven. Your home will be doubly desirable with the patio sitting where bare concrete would have been.
Hooker Furniture Living Room Melange Flowered Drum Table 638-50011
Assuring Safety
The safety of your home also goes up if you install a walkway and a patio. Mulch and rocks are often used as a path all around houses but these can cause accidents in both adults and children. Peace of mind can be achieved once you make the conscious decision to install a walkway and a lovely patio that goes with it.
Dress Up the Patio
Sure, the patio can be a haven but it isn’t so until you find the right furniture pieces to set it up. Think of banquet seating inside a kitchen. Now imagine this set up on your patio. Invest in a bench, some chairs and a dining table. Be sure to integrate the look of these pieces with the rest of the house.
Match the shapes of the table and the patio. A round table will look great on a cute, round patio. Add a tall fence to have a more private and cozy feel.
You can also eliminate useless spaces behind furnishing or in corners. You can afford ample space on the patio for a small table and a pair of chairs. This is a great setup for those date nights.
Patio with Bright Colors
Small patios are advantageous since they are better able to show off bright colors than large patios. These playful colors don’t look as overwhelming on a cute patio which means you can go ahead and use bright blues and greens. Ottomans can also match the patio décor while providing an extra seat for a person or two.
Nature can also offer lush colors such as green potted plants and colorful flowers.
Set Up Open Sight Lines
Choose seating that comes with open back. This should keep the sight lines flowing and it should visually expand the patio. Choose to keep the color palette basic, even unassuming. Use pastels such as green or blue on a bench and its partner, the coffee table. Distress the furniture for more laidback look.
You can also use narrower pieces such as a bench paired with a long, narrow table. Have these on the patio and you get a great choice for those dine-out nights.
Tags: designing the patio, McCreerys, McCreerys Home Furnishings, patio, patio and walkway, patio design, patio design elements, patio essentials, patio furnishings, patio furniture, patio style, stylizing the patio, tips
Posted in Accents, Accessories, Outdoors Style | No Comments »
Friday, August 26th, 2016
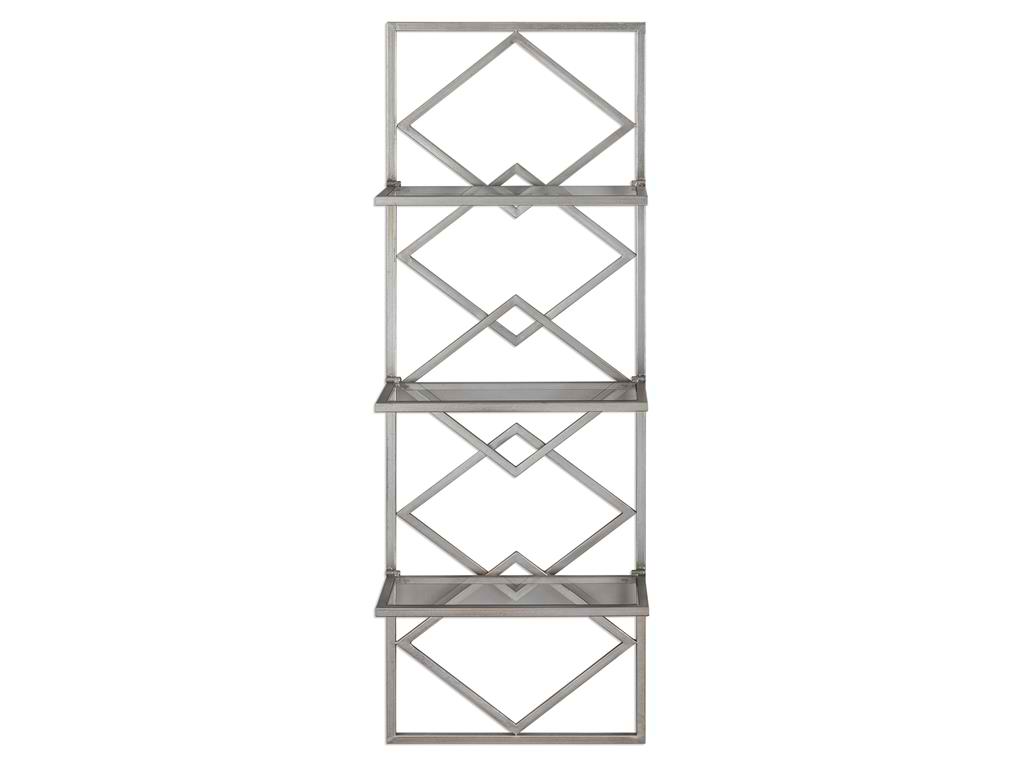
Accessories Uttermost Silvia Silver Wall Shelf 04033 can hold bathroom accessories.
Bathroom cleanliness is quite important to homes and more so to facilities. Unsanitary restrooms could be home to germs that can bring about allergies and a host of other diseases. This is the very reason why the bathroom should be cleaned every single day.
Repeat customers could be the cause of unsanitary bathrooms. Effects of unsanitary bathrooms could extend to employee productivity as it has been proven that unclean bathrooms can cause lower productivity. As a result, various aspects of the business can be affected by something that is as simple as a bathroom cleanup.
Germs can bring about allergies and a whole host of diseases. Begin cleaning from the vents and ceilings. Have them dusted for cobwebs. Make sure the dust from those areas reach the floor.
Next, have the mirrors and other wall pieces dusted, cleaned then polished. Make sure the hand dryers are disinfected, too. Use a disinfectant to clean partition doors. After these, move on to toilet bowl disinfecting. Disinfect the inner and outer parts of the bowl. Don’t forget the base.
Be sure to empty out the trash receptacles of paper towels and sanitary pads. Remove gum and other stuck dirt on the floor. Mop the floor and use a disinfecting solution.
Lastly, wipe hand plates, door handles, and kick plates.
These tips should help you clean the bathroom like a pro or at least know how to check right after a professional commercial cleanup.
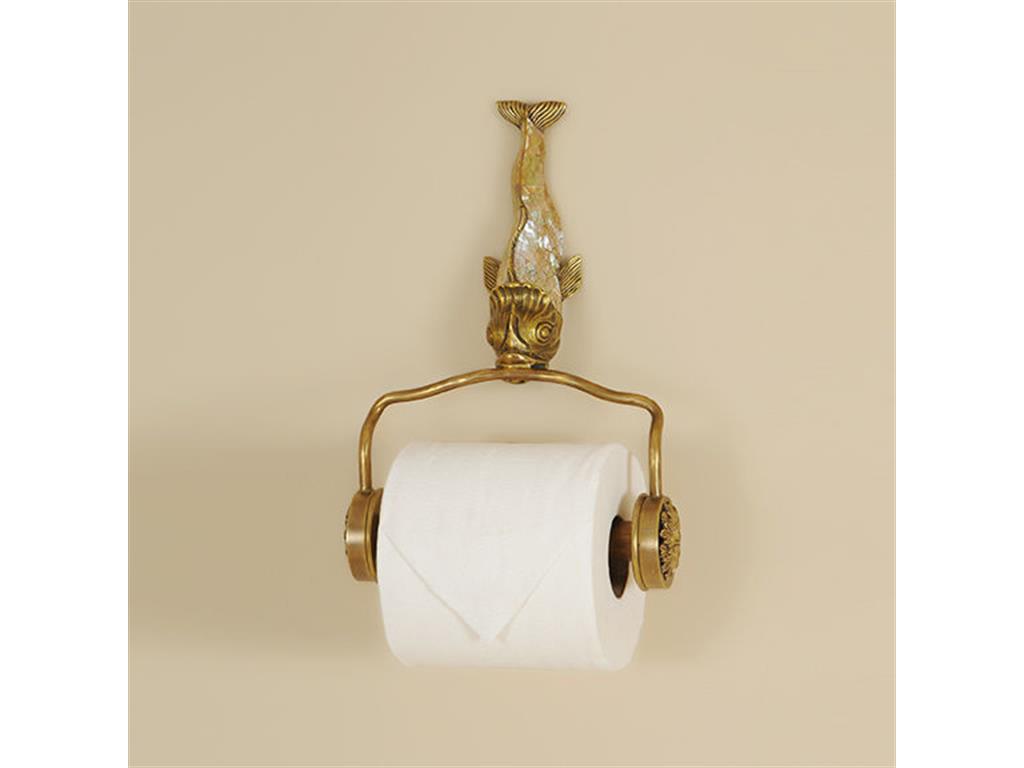
Maitland-Smith Bathroom Cast Brass Fish Tissue Holder 1254-350 makes tissue dispensing a lot more exciting.
Clean the Stained Bathtub
There are two things that you need to remember when cleaning a stained bathtub in hotels and other such areas – first, you have to know which stain removal technique you would use and; second, find out which products would be right for the tub.
The most common bathtub materials are enameled metal, acrylic and porcelain. If your bathtub looks like plastic, then it is most probably acrylic. If it looks non-plastic, it is porcelain, iron or steel.
To be able to tell the difference between porcelain and enamel, all you have to do is to stick a magnet on the side of the tub. If the magnet sticks, then it is enamel.
If you are removing stain from a porcelain tub, you might want to buy a pumice stick. This can scour the surface and could get rid of stains on porcelain toilet bowls. This scouring stick costs just $2.
Removing the stain from enameled tubs can be a bit more difficult. Pumice stick should not be used in such cases because they can leave permanent scratches. This is also true with anything that is acidic so say no to vinegar and bleach.
Abrasive powders may be used but be sure to test a part of the tub before you go all out on your cleanup. Use such powders sparingly, though. For tougher stains, make a paste with the powder then allow it to sit for half an hour before you rinse away.
If you want to be on the safe side, use the ever reliable hydrogen peroxide. It is cheap and it can make the bathtub look sparkly clean.
‘Out to clean an acrylic tub? Then know that this type is more prone to fading, scratching and cracking. Since this is so, avoid anything that’s abrasive. Use cream cleaners, again, allowing it to sit for half an hour before the actual cleanup.
Mildewy Walls and Flooring
Another serious, dirt problem in the bathroom is mildew. You can work like crazy each day, cleaning and scrubbing, but if it still stinks, then you have to look for the culprit. More often than not, it is mildew.
Find an anti-mildew solution then gently scrub the area. It helps if you let the solution sit for a few minutes before rinsing it off.
Tags: bathroom interiors, bathroom style, cleaning mold and mildew, designing commercial bathrooms, home cleaning, home cleanup, McCreerys, McCreerys Home Furnishings, spa bathroom, spa-like bathroom, tips
Posted in Bathroom Design, Home Maintenance, Interior Design 101, Interior Design Elements | No Comments »
Thursday, August 25th, 2016

Maitland-Smith Lamps and Lighting Antique Brass, Brass Wall Lamp 1943-130 is a unique replacement for the usual painted wall.
Interior painting is no less than the most popular home improvement project in the world of interior design. This is understandable as it is an easy and affordable way to freshen up the look in rooms. Painting can also be done by family members as a weekend project as it does not require specialized training. What you need is just a little patience, some practice and a few tips.
Prep the Surface
The most successful paint jobs begin with surface preparation. This means you should sand, scrape, patch, and filling cracks, dents and holes. Basically, any surface imperfection must be solved. This is the dirtiest part of the project but it is also the most crucial. Do something wrong during this phase and something worse could come up later.
Primer Tinting
The next important step is to prime the wall. Primer can block stains from bleeding out. It also makes single coat possible as it also improves the adhesion of the paint used. Peeling and blistering could also be the result of non-priming.
There are now paints that come with primers yet nothing covers as great as a dedicated primer.
Plastic drop cloths are a cheap way of protecting furnishings and the floor from spatters. It may be wiser to invest in canvas, though. Canvas is durable and is rip-resistant. It offers a flatter layer compared to plastic which means you won’t have to worry about tripping that much.
Canvas drop cloth can be folded around doorways and corners which is another advantage compared to plastic sheets. Also, most plastic drop cloths are not reusable.
Canvas can last a lifetime.

Uttermost Accessories Bronze Leaves Wall Art Set5 04063
Utilize the Paint Grid
Painting can take days so if you have more to do tomorrow, there is no need to go through brush cleaning each day. Simply roll off or brush the excess paint then wrap everything in food wrap. Double up the plastic to make sure that air is sealed out then have the roller sleeves and brushes placed inside the fridge. This should keep them fresh, avoiding paint dry up overnight. You can even store the brushes and roller sleeves for as long as a week if you are about to tackle an ambitious job.
The following day, just remove the gear from the refrigerator then use after 30 minutes.
Roll the Paint
A neater approach to rolling paint is to have it roll directly from the five-gallon bucket with the use of a paint grid. This is a rectangular plastic or metal screen that can be hooked on the rim of a bucket. Fill the bucket to about 50%, dip the roller, then roll it against the plastic or metal grid. This should remove any excess paint.
Use an Extension Pole
Get rid of the stepladder and use a telescoping extension pole instead. This comes in various lengths, with some extending as long as 18-36 feet. Longer extension poles are great in painting 8-9 foot tall ceilings.
As you shop for extension poles, make sure that you find one that has a non-slip, soft grip and a metal core. Check also that the threaded end of the extension pole is made of metal. Plastic handles may become too flexible which could make them a tad more difficult to control.
Just Paint
Lastly, what else is there left to do but to paint? Go out, find your favorite color and see if it blends well with your chosen theme. Ask your family members or friends to help out so that this project becomes easier. Shop for the tools together, plan the project together, and of course, don’t forget to have fun!
Tags: accent wall, home painting, how to paint, McCreerys, McCreerys Home Furnishings, painting, painting guidelines, painting job, painting task, painting the wall, painting tips, tips, wall color, wall painting
Posted in Accents, Accessories, Color Schemes, Interior Design 101, Interior Design Elements, Wall Design | No Comments »
Wednesday, August 24th, 2016
Tommy Bahama Home Dining Room Cayman Kitchen Table 531-870
Whether you have decided to remodel your kitchen or are building one from scratch, countertop is one of the pieces that can make or break your kitchen’s look. You might feel overwhelmed as you take a look at the options that are in the market. The range of countertop surfaces range from the renowned butcher block to terrazzo and glass. Here are some of the most popular –
A Host of Choices in Granite
Granite offers pretty mottling and a wide array of patterns and colors that are beautifully found in nature. This countertop is able to withstand the harshest knife scratches, splashes, wear and tear, even heat.
The downside to granite – just like any other stone countertop – is that it needs to be sealed more often; this is so stains can be avoided. Also, since it is heavy, you’ll need sturdier cabinet materials to support its weight.
Granite price is at $35-$100 each square foot.

Maitland-Smith Bathroom Cast Brass Lion Soap Dish 1254-339 will look great against a new kitchen backsplash.
Quartz: Engineered for Beauty
Crafted quartz chips and resin comprise what’s known as quartz surfacing or engineered stone. This is a cross between stone and solid surfacing. This is an engineered product which is why there is a variety of patterns and colors that you could choose from.
Quartz is relatively expensive but when you look at it in the long run, it is a worthwhile investment as it can last for a very long time. Costing $40-$90 for every square foot, it is something that you need to plan for in terms of budget and installation.
The Glamour of Marble
Very few materials can come close to the beauty of marble. It is luminescent and it offers distinctive veining that’s elegant.
Marble stands up very well to heat because it is perennially cool. This is also the reason why bakers prefer it for their pastries and dough.
Marble is susceptible to stains, though, even when you have it sealed. This is why it is not advisable to use this material throughout your kitchen. Limit its use to just one or two areas as it easily chips and scratches.
Marble costs $40-$100 per square foot.
Solid Surfacing Spells Zero Maintenance
Solid surfacing, often generally referred to as Corian, can be maintenance-free. There is no special cleaning or sealing required. It can be susceptible to burns and scratches though these can easily be sanded out.
There are extensive color and patterns choices, with some even looking like natural materials. Experiment with the most vibrant hues like tomato red or turquoise.
A downside to solid surfacing is its artificial look. It may be maintenance-free but it does not stand too well to sharp kitchen tools and hot pans.
Modular, Inexpensive Tiles
Porcelain and ceramic tiles have almost a limitless array of options for styles and colors. Tiles work in most bathrooms and kitchens, with the design ranging from country to anything as majestic as the Old World.
Tiles can withstand sharp cuts and heat, they can even resist stains. They may chip or crack easily but they are quite easy to replace.
Make sure that the installed tiles are sealed so that grout and bacteria won’t grow.
The cost for every tile is at $10-$80 for every square foot.
Laminate: A Kitchen Mainstay
This kitchen countertop material is made out of paper and resins. It is basically particle board that used to be regarded as unstylish but this has been slowly changing over the years. The latest styles are now able to mimic butcher block and natural stone. The greater news is that laminate surfaces are a lot more affordable than most materials.
Laminate surfaces are prone to burns, scratches and staining. The layers can even peel once exposed to moisture and wear and tear.
Tags: countertop choices, countertop options, granite countertop alternatives, kitchen countertop, kitchen countertop materials, McCreerys, McCreerys Home Furnishings, non-granite choices, non-granite countertops, tips
Posted in Interior Design 101, Interior Design Elements, Kitchen Design | No Comments »
Tuesday, August 23rd, 2016
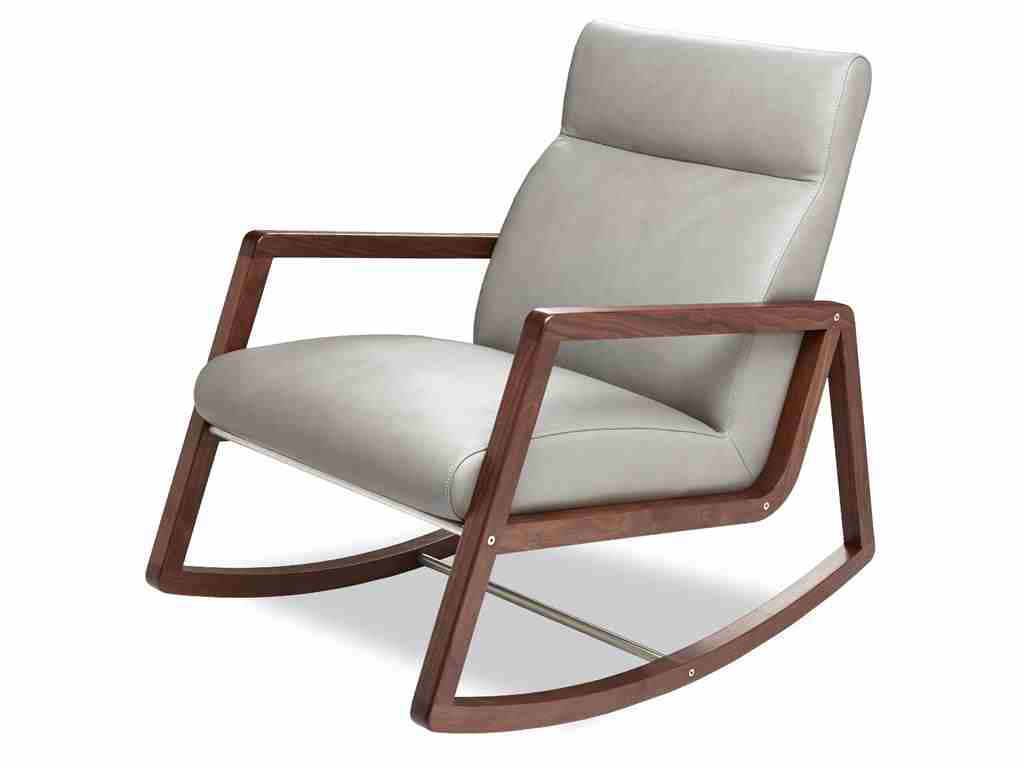
American Leather Living Room Nolan Chair NLN-CHR-ST
When it comes to babyproofing your home, it is always best to be on the know. Parents – especially moms – tend to worry about how to protect their children from all sorts of danger – even in their home. Experts believe that children aged 1-4 are likelier to be killed by poisoning, drowning, choking, and burns. It is not surprising, therefore, that moms tend to be hands-on when it comes to interior design and other aspects pertaining their home.
Home safety can be an overwhelming project but for moms, it is something that must be done – fast. This means that place must already be babyproofed by the time the little one begins to crawl or climb.
Here are some recommendations on how you can keep your child safe in your home –
Buy Safety Gadgets
There are now baby monitors and other gadgets that are sold in the market which can help you keep your little one safe. You can either hire a professional childproofer or you could research then shop for the safety devices.
Remember, though, that these gadgets are no substitute for the parents’ eyes and ears. You should still personally supervise your kid’s safety.
Wear the Baby’s Shoes
An effective way to know which things could endanger your child is to look through his or her eyes. Have a baby’s eye view of your home.
Think – if you were a baby or a toddler, what would look tempting? Which things can you easily reach? You can then figure out which drawers, cupboards or furniture pieces you should childproof.
The more that your baby walks and climbs, the more that you will need to reevaluate your safety plans.
Store Away Poisons, Knives, etc.
Carefully stow away hazardous chemicals and sharp kitchen tools. If you can get a lock for your kitchen cabinets, then do so. Use small gates to limit the kid’s access to potentially dangerous areas of your home. The most dangerous spots include the bathroom and the kitchen but the living room could also present dangers such as possible electrocution or strangling.
Keep an eye out for smaller objects such as paper clips and coins. Have the office desk – or the office itself locked.
Be watchful also when you have some visitors. Childproofing your home is no guarantee that your cousin will do the same. She could be carrying small items such as lipstick, pills and other stuff that could endanger your little one.
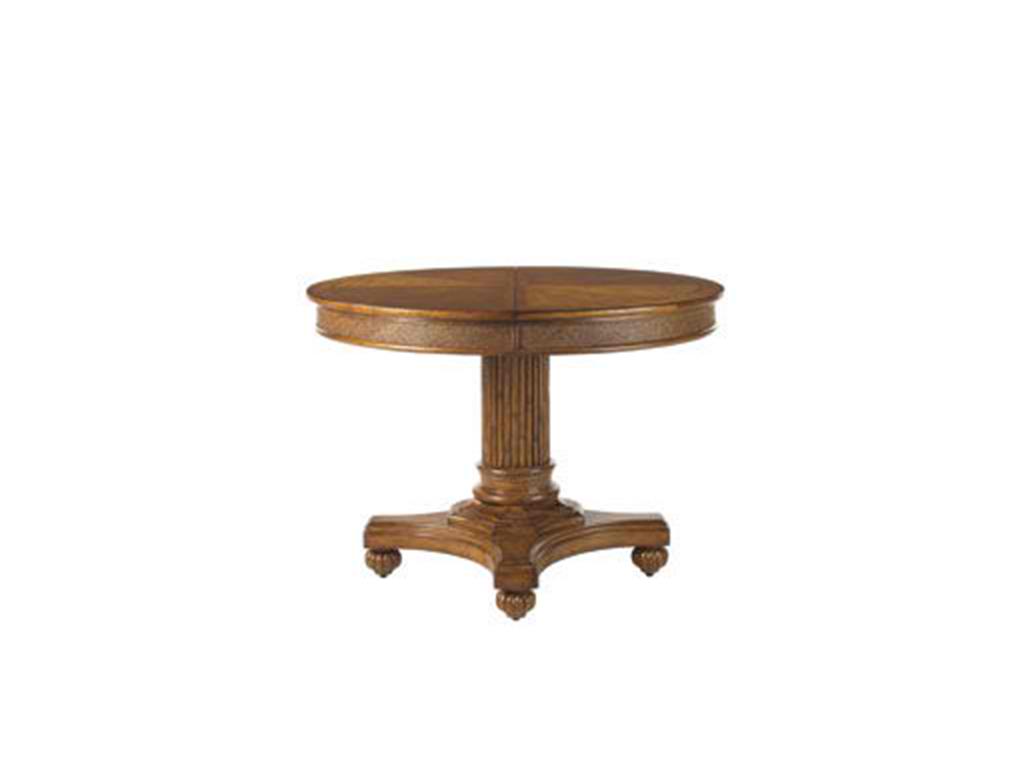
The Canadel Dining Room Round Table with Legs TRN5454LA-1 has rounded edges which makes it perfect for childproofed homes.
Choose Natural Wood Furniture, Eco-Friendly Mattress and Fabric
Moms should seek out all natural wood furniture for their kids whether they are shopping for cribs or beds. Quality solid wood can be hardwood or softwood. Children’s beds come in different designs, finishes and frames that will meet your child’s needs.
Make sure the cribs come with guard rails and the bed with toddler rails. Choose drawers and cabinets that come with rounded edges. These are safer while still being stylish.
Babies need firm support for them to sleep safely and soundly. The crib is supposed to be used for three years. There are three kinds of mattresses for babies – foam, innerspring and organic. The third type is best because it is made with all-natural materials such as wool or cotton.
As for the changing table, you will need to buy something sturdy since the average diaper-changing prior to a child’s first birthday is about 2,400. Make sure this furniture comes with a guardrail or a safety strap.
Another nursery piece is the rocking chair. Babies simply love the rocking motion that this furniture offers so make sure to buy a comfy one since the mom’s the one who’ll do the rocking.
Basically, the furniture that you should invest in is something that meets or even exceeds government safety standards. These products should have been tested for durability and safety.
Tags: childproofing guidelines, designing kids' rooms, designing the nursery, home for kids, McCreerys, McCreerys Home Furnishings, nursery design, nursery essentials, nursery furniture, tips
Posted in Interior Design 101, Interior Design Elements, Special Rooms In Your Home | No Comments »
Tuesday, August 23rd, 2016
FFDM Summer Home Collection: Allowing natural light to stream in during the day can save you a lot of money on energy.
Do you believe that your house is a system? You can easily save money and even improve the performance of your home if you are willing to take cost-effective measures. These steps can significantly reduce building load, eventual appliance and furniture repairs, etc.
Target the Exteriors First
The most effective way of improving your home’s energy efficiency is to look at your walls, doors and windows. Make sure that the walls are well insulated. Only when these are already considered green should you begin looking at other systems such as lighting, heating, cooling and appliances.
Set Up Effective Insulation
Minus effective insulation, a home will have heat flowing profusely out of the walls. This is especially catastrophic during winter. See to it that you use the least amount of energy, though, in heating or cooling the house.
Houses without wall insulation or has wall cavities should have blown-in insulation. This will up the level of comfort and cost-efficiency so if you still have uninsulated walls, it’s best to look into having a professional installer do the job. For homes with damaged or old insulation, on the other hand, should undergo insulation upgrade.
Meet the Energy Auditor
You can begin your path towards green living by talking to an energy auditor. This green home professional has expertise in choosing the right insulation materials such as fiberglass, foam or cellulose. Such materials can help keep heat or coolness inside the walls of a home. The keywords that you need to remember are these – properly installed. This means the insulation was installed by a contractor using the right assessment and installation tools. The contractor, for example, uses infrared camera to check for void in walls.
Improve or Replace Windows
If the windows in your home are already old and leaky, then this may be the time to have them replaced with energy-efficient types. If you’re not willing to say goodbye to your windows just yet, then you could look into weather-stripping or having storm windows.
Window replacement may not be a cheap project but it definitely saves you money in the long run. This could also improve the level of comfort in your home.
Plant Trees and Shrubs
If you are living in an older house with obvious poor insulation and damaged windows, then know that having good landscaping can save a lot of energy while you’re still planning the huge architectural project. Deciduous trees that are planted on the west side of the house could help block infrared radiation. See also that the insulation is upgraded and your home meets Energy Star requirements.
Check the Old Furnace
Furnaces that were built before 1992 have a standing pilot that wastes about 35% of fuel. It is also possible that such furnaces are almost at the end of their service lives.
Invest in a condensing furnace as this offers an annual efficiency of no less than 90%. This kind wastes less than 10% of the natural gas and could help save 27% on your heating bill.
Furnaces that were installed beyond 1991 are probably annual fuel utilization efficient. If you’re in doubt, you can always ask the help of an energy auditor or a heating service technician.
Check the Hot Water System
To improve the hot water system’s efficiency, begin by turning down the temperature to about 120 degrees Fahrenheit. Be sure to insulate the hot water lines so that they won’t cool off too quickly. Lastly, use only low-flow fixtures for baths and showers.
Green living may be a lot more difficult to maintain but it has its perks. You save money and you become an ally of Mother Nature.
Tags: eco-friendly interior design, eco-friendly interiors, eco-friendly tips, energy efficient living, energy-efficiency, energy-efficient home, green home, green interior design, green living, McCreerys, McCreerys Home Furnishings, sustainable design, sustainable home, sustainable home design, sustainable interior design, sustainable lifestyle, sustainable materials, tips
Posted in Interior Design 101, Interior Design Themes | No Comments »
Monday, August 22nd, 2016

FFDM Circa 12602
In our kind of economy, you might be tempted to skip small home repairs. This is also the case with professional cleanups and inspection jobs. Minor repairs may appear, well, minor but if you keep putting off such projects, you could end up with thousands to tens of thousands. The $200 that you save today could easily turn to an expense of $3,000 the following month.
Invest a Little Dough
Consider allotting some money for small home repairs. Again, these seemingly small tasks could easily morph to huge, expensive jobs later. If you want to be ahead of many homeowners and save some money in the process, then you should be ready to take on even the smallest repair jobs. An ugly duckling house could be the next swan if you are willing to roll up your sleeves and do a little maintenance work (or at least be willing to pay for the repairs).
It is a known fact that most homeowners have no idea what to look for when it comes to crucial repairs. Majority cannot see past an unpainted door, thick shrubbery and the like. In their eyes, the best homes are those that are beaming with activity, were pricey when it was offered in the market, and is pleasing to the eye (to begin with).
Necessary Cosmetic Work
When talking about cosmetic repairs or improvement, these are projects that do not require major construction tasks. For instance, installing new carpeting may be categorized as a cosmetic improvement in a home. On the other hand, the repair of a rotten bandboard is a repair project that cannot be handled by a non-professional.
Here are examples of cosmetic improvements that every home needs –
If you are able to do all these kinds of work by yourself, you’ll soon find out that your savings will compound annually. Obviously, you should leave some kinds of repairs to the professionals.
An example is electrical repair. Even if you think that replacing fuse is fairly easy, it is best to leave it to a licensed electrician.
House Repairs for Staged Homes
There are two kinds of pre-loved homes that are being sold in the market – one is the kind that is already painted, with grounds well-kempt, new carpets and such; while the other one is the kind of property that has deferred maintenance.
The second type is a home that is often in need of painting, carpeting, lawn repairs, etc. Examples are homes during the ‘70s with badly-damaged paint, kitchens with rotten cabinets, and rooms that are out of date. It could also be a home that still houses stove, refrigerators, and dishwasher.
The real estate market is a competitive one. If you are actively looking for a property at the moment but don’t have ample budget for a brand new home, then you have to know which repairs you need to address later on.
Caution
When buying a whole house that needs repairs, make sure that you hold an inspection. Allow a competent professional to do the assessments for you. For example, you may ask different experts such as a plumber, electrician and an engineer to look at specific areas in the house.
There are a couple of reasons why thorough inspections must be done before you begin further construction or interior design projects. First, cosmetic repairs may just be indications of more serious problems deep within the house. A wall that needs painting, for instance, could be the façade of a water-damaged inner wall.
The next time you encounter a minor house repair, you already know why you shouldn’t delay.
Tags: crucial home repairs, home remodeling, home repair, home repairs, important home repairs, McCreerys, McCreerys Home Furnishings, remodel, remodeling a home, renovation, renovation and remodeling, renovation budget, renovation guidelines, renovation project, renovation tips, tips
Posted in Home Maintenance, Interior Design 101, Remodeling | No Comments »
Friday, August 19th, 2016
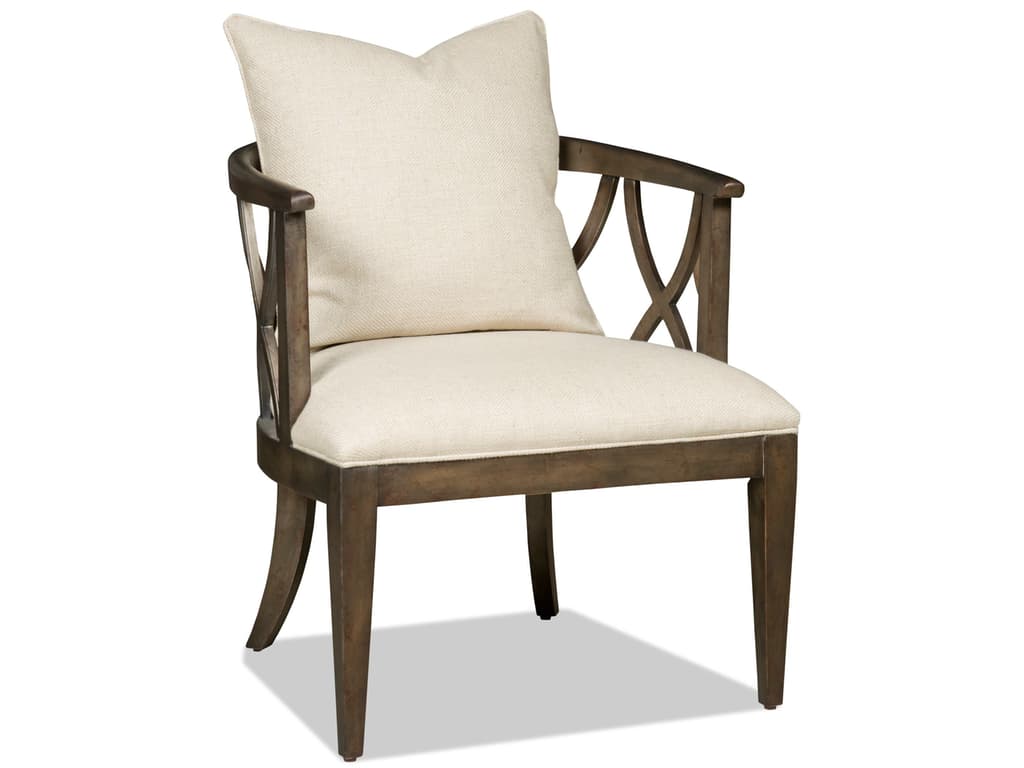
Enjoy the view as you sit on this Hooker Furniture Living Room Accent Chair. What could be more restful?
You might have recently installed a deck or refurbished quite an old one. Whatever your purpose in exploring deck choices and ideas, you’d soon find out that there are thousands of possibilities when it comes to materials, style and cost. Looking through these options is just half the fun finishing the deck and relaxing thereon is the ultimate eventuality.
Proper Deck Furniture
The decision-making pertaining to deck furniture is likely to be inspired by the deck style. Have you opted for a modern, sleek, or geometric style? Then, by all means, have the same theme for your furniture. Modern deck furniture is sure to complement the contemporary deck. Just make sure that you contrast the deck’s hard lines with curvy furniture. A great choice here is cast-aluminum furniture pieces. These are lightweight pieces that are modern yet curvy at the same time.
Should you be looking for something more substantial, then you could use wrought iron which is more durable and heavier. It also comes in every possible style from modern to Victorian.
A deck that is more rustic or traditional needs the more grounded wooden furniture. Again, your options are wide and varied which includes redwood, teak, and cedar. These are weather and insect-resistant, durable, and rich in color.
When it comes to design, you would even have more choices from angled pieces to low-slung contemporary ones.
Finally, there are also great choices with wicker. Wicker styles offer an updated look and are often treated to create resistant weather. These are also highly mobile because they are so light.
Your Home as the Basis
Look to the lines of your home. These are inspirations that could tell you where to situate the deck. If you are creating your deck along with the birth of your new home, then make sure to extend the roofline so that the deck will get its needed shade.
Consider Your Privacy
It would also be nice if you put a privacy fence that could block the view. Instead of having the ground cleared when you add the deck, make good use of what you already have. That old tree might not be just another element of your yard. This natural thing could offer privacy when it creates a soft canopy. Have lush plants all around the edge of the deck so that it would be more secluded.
Add a Pergola
A pergola will give more functions for the deck. It offers a cozier look plus adding that much-needed shade. Enhance the look by adding hanging baskets, light fixtures or planters.
Planting in hanging baskets is a fuss-free way of saving money while offering great colors for the deck.
Add Water Features
There are a lot of background noises that could potentially annoy your restful afternoons and weekends. You can solve these potential problems by adding any water feature for your deck. The sound of trickling water can make a huge difference on how much peace you would eventually enjoy on your new deck.
Evergreen trees are the first choice when creating privacy. They can effectively block any view while offering a green, lush, natural backdrop. Dense evergreens can also help in filtering the noise. There is an evergreen that is suitable for almost any garden. Pick from a wide variety of sizes, colors and shapes including the columnar types which don’t grow any wider than two feet.
Construct a Trellis
More on lush greens – go ahead and up the level of privacy being offered by trees and a pergola. Add a trellis to make the deck even more enjoyable. Have vines planted along the deck then watch them as they grow all the way up to the trellis.
Tags: deck, deck and porch, deck design, deck furniture, deck privacy, deck styling, decorating the deck, designing the deck, dressing up the deck, McCreerys, McCreerys Home Furnishings, pergola, tips, trellis
Posted in Furniture, Outdoors Style | No Comments »
Thursday, August 18th, 2016

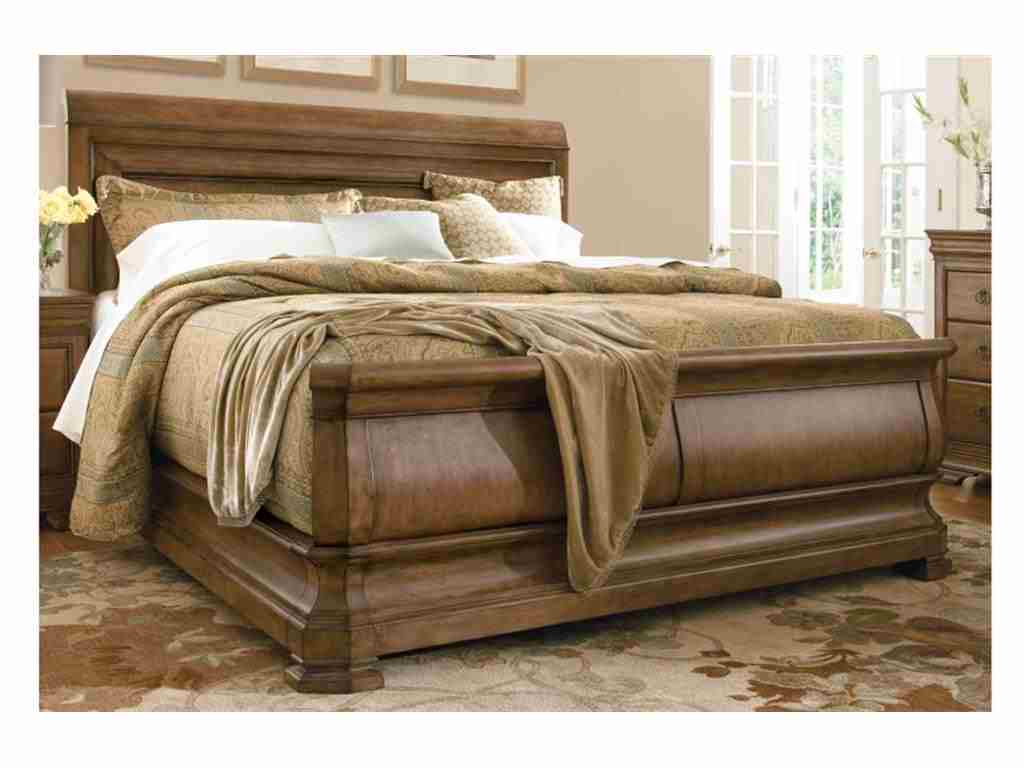
Thomasville Bedroom Manyara Media Hutch 46211-365 nestles beautifully beside this bed and its colorful bedding.
There is no doubt that the bed is the key furniture piece inside the bedroom. This is also easily the focal point. There are traditional rules in arranging bedroom furniture but, of course, these aren’t hard and fast rules. Most of the time, the decision is based on common sense and the owner’s preference. If you want some guidance, though, here are some that you could consider –
The Bed Opposite the Wall
Traditionally, homeowners tend to put the bed right against the center part of the wall. This is often opposite the bedroom’s main door. This kind of arrangement will automatically make the headboard as the center of attention.
There are cases when the room is not able to accommodate this kind of setup. In such instance, you should consider diagonal placement.
The Bed, Your Door and the Windows
Never place the bed right under a window especially when this window will be frequently opened. An open window can let in some uncomfortable drafts so it is best to position a bed between two windows.
If, on the other hand, you’ve got an air-conditioned or heated bedroom, this means that the windows are rarely open. When this is the case, you could go ahead and ignore this rule.
Don’t place the bed where it can obstruct the bedroom door or a walkway in the room.
Go Crazy with Furniture Arrangement
Think of non-traditional means of arranging furniture. Who knows, you could free-up space just because you considered making the bedroom a tad more interesting. An example is, you can place the bed right in front of a window. This should give the room a more dramatic feel. It could also be placed diagonally – while this takes up extra space, it is a unique placement that will stir things up a little. If you want to maximize floor space, have the bed situated sideways along one of the walls.
Walk-In Closet or Not
If the closet is big enough but you would like to free-up some much-needed floor space, then place the chest of drawers right inside the walk-in closet. Doing all this will give you a chance to add more furniture pieces like a writing desk, that flatscreen TV or some functional seats.
Whether you are out to decorate a guest room, master bedroom, or children’s room, these tips matter, plus here are some more that you can follow –
Universal Furniture Bedroom Louie Ps Sleigh Bed 5.0 07175B has delicious neutrals that can blend well with other earthy themes.
Tags: bedroom essentials, bedroom furniture, McCreerys, McCreerys Home Furnishings, tips
Posted in Bedroom Design, Furniture, Interior Design 101, Interior Design Elements | No Comments »
Thursday, August 18th, 2016
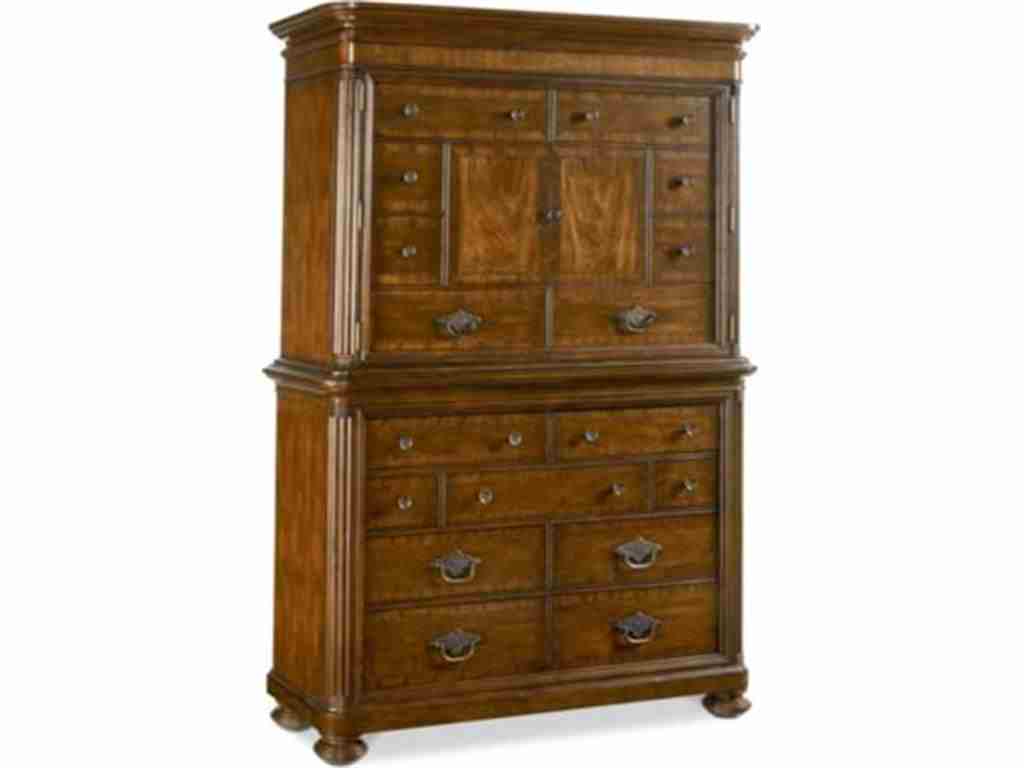
Thomasville Bedroom Manyara Media Hutch 46211-365
If you are planning a closet makeover, you should always begin with measurements. You need to measure your current closet. Find out the hanging requirements as well as your storage needs.
Clear out the closet if you want to have the new system installed. This is a great moment for you to look through your items and find those that you no longer use. Once you find those, you can decide if you would want to donate to charity or to hand them down.
Planning the Closet System
A closet system can be the perfect solution to maximizing storage space. You can make use of hanging bars, drawers and a cubby storage. These are tools that can help you organize clothes and accessories.
More Shelves Isn’t Always Better
There is the common notion that more shelves are better. There are instances when this isn’t the case. Shelves can also take up a lot of space especially if you didn’t take the time to plan the ones that you’d use in your home.
Use shelves and stack them in an orderly manner. If you don’t, you would end up using up precious storage space. Invest in shelves that were designed to carry most of the items that you need to be concealed from your line of vision.
Get a Closet Armoire
If you don’t have a lot of closet space, you can invest in an additional storage unit. A freestanding armoire is just the right piece. This can take the place of the usual cabinet. Use wire shelving inside the armoire to maximize storage. You can also achieve a clutter-free room if you learn to classify your clothing pieces. Foldable garments should go inside drawers while those that you can be hung should be, well, hung.
Tiered shelves should house the sweaters and other seasonal stuff at their highest layer. Others that are used more often should be placed in those easy-to-reach drawers.
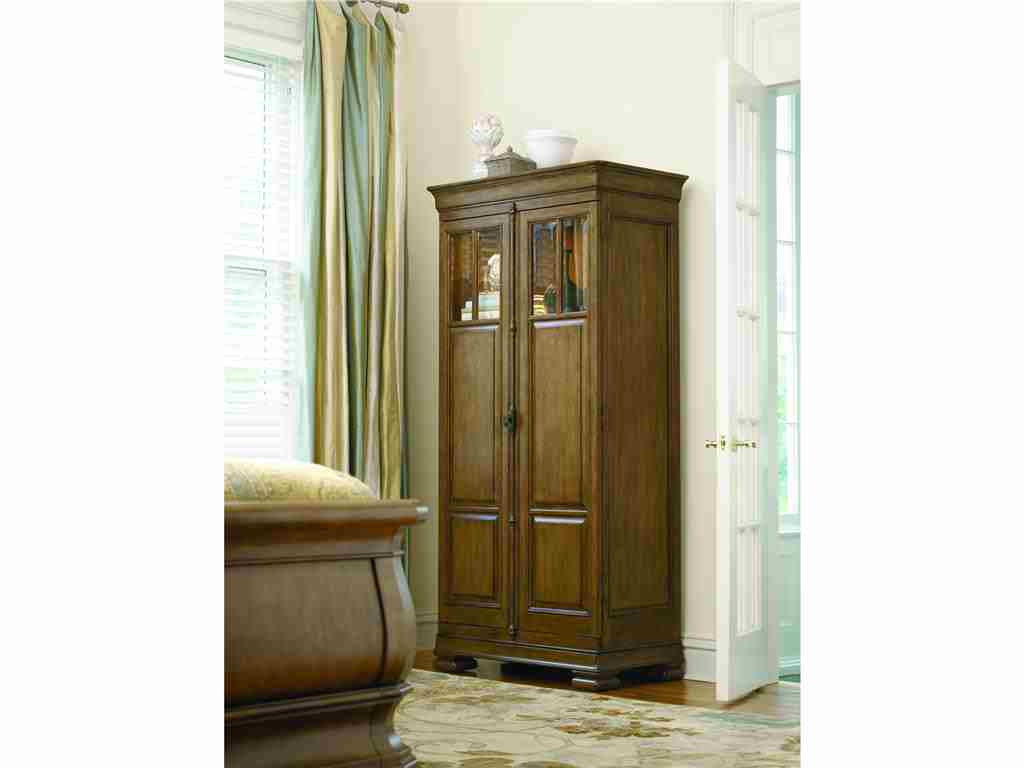
Universal Furniture Bedroom Tall Cabinet 071160
Manage Your Space
Having a small bedroom means you should consider putting the dresser in the closet. Maximize the space by having shelving units above it; doing this will allow you to maximize the vertical space that closets can offer.
You need to measure every inch of space if you have a limited area to work on. There is also the choice to install an over-the-door storage for accessories such as belts and shoes. These items may be small but these are the ones that usually hog your closet space. Have underclothes and socks folded and placed inside neatly-stacked bins or baskets.
Uniform hangers will also provide a tidy and neat look for your closet.
What About a Kid’s Closet?
Planning a kid’s closet should be no different. There should be fabric storage bins that can make the closet look neat, presentable and organized. You can make use of dual rods on both sides of storage tower. This can be used as an extra hanging space for pants and shirts.
Apply picture labels in front of these bins so that the kid(s) will be able to stick to the set up organization system.
Organizing through Folding
Folding may take a tad longer to accomplish than merely hanging clothes but it can also be a tidy way to organize your clothes. Here are some tips on how you can fold your favorite dresses, blouses and pants –
Tags: armoire, cabinet, cabinet organization, closet, closet organization, how to organize a cabinet, McCreerys, McCreerys Home Furnishings, organizing the closet, space planning, storage, storage advice, storage planning, storage systems, storage techniques, tips
Posted in Furniture, Interior Design 101, Interior Design Elements | No Comments »
Follow us on our social media
© McCreery's Home Furnishings | All Rights Reserved | Privacy Policy