- Follow us:


Tuesday, January 3rd, 2017
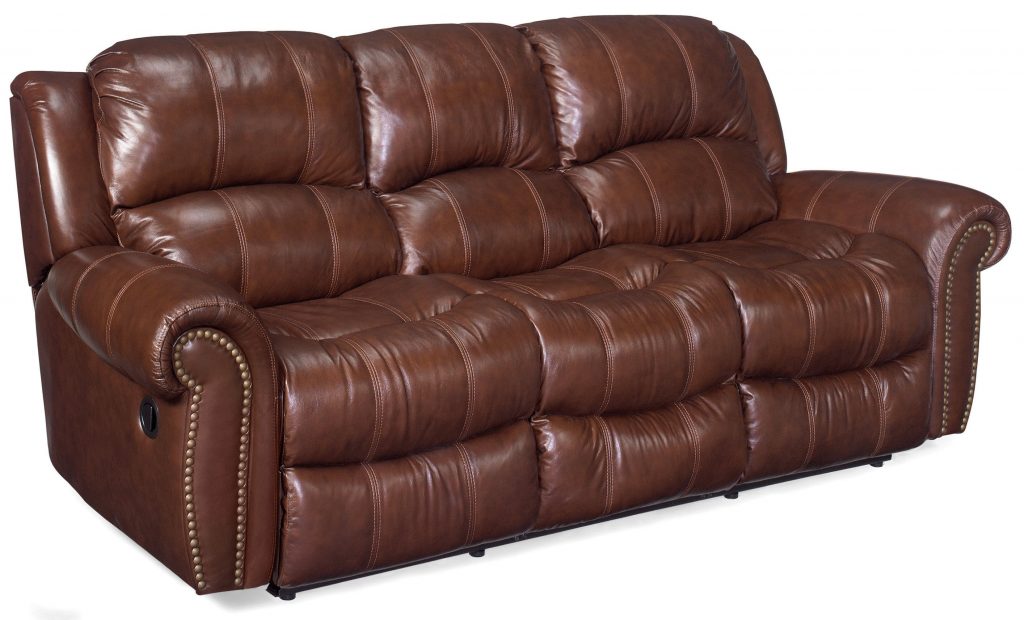
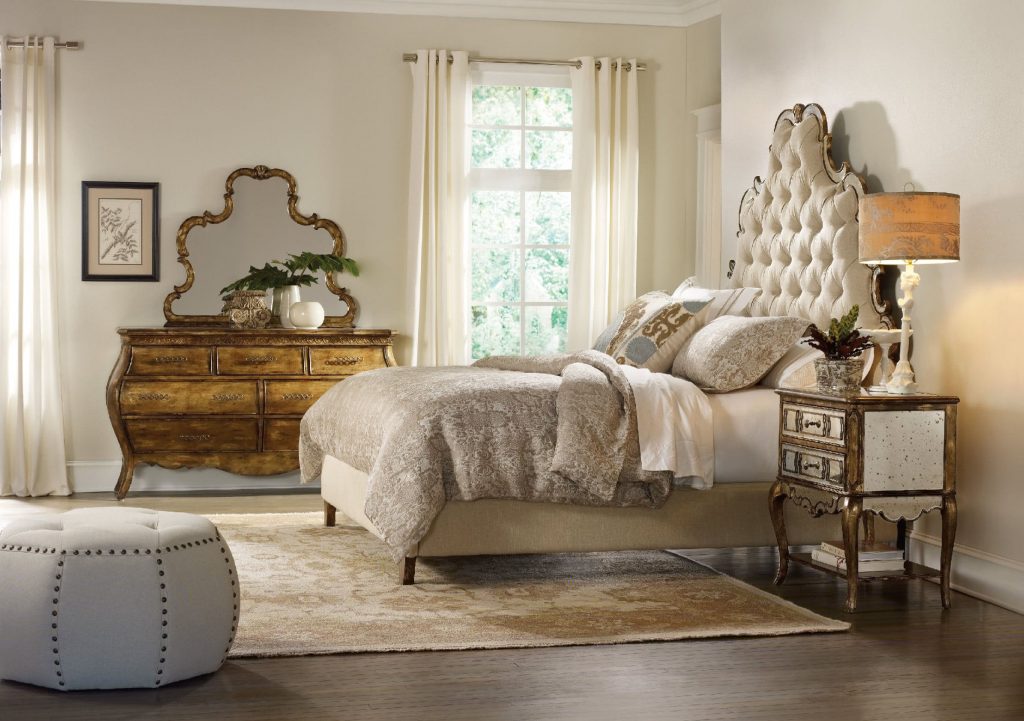
Hooker Furniture Living Room Sebastian Sofa (with 2 Recliners)
Upholstered furniture go through the same rigors as cabinetry and other pieces of furniture. The only difference is that you may not always notice the dust that settles on upholstered pieces. Brushing or vacuuming every week in order to remove dust as well as avoid colors becoming dull is one of the many effective ways of caring for leather and upholstered pieces.
Why Care for Leather?
In the first place, why? Leather is a beautiful, natural product. This is one of the few materials that allows the piece to breathe while delivering warm and unique characteristics.
Leather beautifully displays traces of where it came from – the scars, brands, growth and creases show it all. These add character to the couch and do not affect the overall quality of the furniture piece.
Leather is resilient, durable and has a patina that develops over time which increases its appeal.
Tips in Leather Care
Begin by protecting your leather couch from direct sunlight. It is best to use leather pieces indoors or any area that would allow them to sit without being touched by the rays of sunlight.
Dust can be removed from semi-aniline, protected or pigmented leather through vacuuming. You can then follow this process by wiping them with a slightly damp piece of cloth. You can also use mild soap if grease has accidentally touched your leather piece.
Follow up with buffing using a soft, dry cloth. Avoid rubbing or wetting excessively.
Next, it is common for leather to have natural oils and perspiration coming from the hair and skin. These can have an effect on the leather couch’s finish. The degree of this said effect can vary from one person to the next. Cleaning is best done where the bare hands, arms and heads usually rest. Do this a couple of times each week.
You can also use leather protection cream to better protect your leather couch. Apply it to both new and used leather from two to four times every year. There are also soft leather cleaners which can be used more often as needed. When cleaning, make sure that you don’t rub the cleaner, instead, use a soft, wiping motion.
Another problem with leather couch ownership is when ink marks stain the lovely piece. Find a ball point pen ink remover that could penetrate more deeply than the usual cleaners. When the stain is a tad more serious, it may require you to ask for professional help.
When it comes to hide food, here’s a word of caution – do not use it to polish your leather couch. Instead, use the usual leather creams and cleaning solutions.
Nubuck, suede, and aniline leathers ask for specific care since they all lack protective coating. Find products that were specifically manufactured for these kinds of leather finish. Make sure that you follow the cleaning instructions thoroughly. Be sure to test on an unseen part of the couch before you begin the cleaning process.
Another warning when it comes to owning leather furniture is to keep it away from any heat source. Keep a distance of 30 cm from the leather couch and the radiator (or any other heat source).
As for liquids, quickly find some absorbent paper towels then dab the area where there was a spillage. Use clean towels to completely dry the area afterwards.
Plump the back and arm cushions as well as the seats and fixed pads so that they maintain their shape for years. Should you notice any crease especially on the seat area, be sure to smooth them out so that it won’t become a permanent problem.
Lastly, just be gentle when sitting on your leather couch so that it will be with you for a long, long time.
Tags: caring for leather, leather care, leather couch, leather furniture, leather furniture care, leather maintenance, McCreerys, McCreerys Home Furnishings
Posted in Furniture, Home Maintenance, Interior Design 101, Interior Design Elements | Comments Off on Caring for That Leather Couch
Friday, December 16th, 2016
Cynthia Rowley for Hooker Furniture Living Room Walker Exposed Wood Chair would look great on a painted flooring.
Wooden floorboards are one of the most beautiful features of many classic homes. If you are not able to stain or varnish your floorboards, then a fresh coat of paint should give the rooms in your home a new look. White or an off-white color can give any room a lighter, cleaner look and feel. ‘Wanna be more unique? Then use a brighter color.
There are paints that are specifically manufactured for floor painting. It is best to find one of these since they are developed to endure a huge amount of wear and tear.
Floor paint is wear and tear resistant so you won’t have to worry about heavy foot traffic, peeling, chipping and flaking. Floor paints are also made to resist stains and spills.
Check the floor paint since some require primers and sealers. See the label or the tin can. Apply a primer on the knots, too. Be sure to buy a primer that’s also compatible with your floor paint. Find out which areas need fillers. More often than not, floors have knot holes, huge cracks, scratches and other such issues.
Bring back your floorboards to life by sanding, then polishing and eventually painting them. These could become low maintenance flooring depending on their frequency of use. High traffic areas are, of course, more prone to damage. Those that have light traffic need minimal cleanup.
Painting the floorboards is a low cost answer to making a statement in a room. It is pretty straightforward once you consider the rules –
Assess the Current State of the Floorboards
You might need to sand the floorboards. For consistency, it is best to hire a professional industrial sander especially for heavy sanding.
What You’ll Need

Capel Incorporated Floor Coverings Biltmore Select Bidjar Rug 1773RS Regal Blue
Prepare the Floorboards
Begin your painting project by moving the furniture out of the rooms. Allocate ample time for you to finish the task. It isn’t a great idea to paint the floor a bit at a time.
If you see beading or edging all around the edges of your floor, then take them up. You might end up replacing them or sanding them; this all depends on how much worse the edging is.
Always sand wooden flooring before you begin painting – remember this cardinal rule – whether you are dealing with bare, varnished or painted wood. If you want to do the sanding project on your own, then see if you could hire a disc sander. This equipment would spell less elbow grease for you. Smaller floorboards with few issues could do with a hand sander.
For your safety, make sure that no nails are sticking out when you sand the surface.
Next, find out any holes that need to be filled. Ordinary wood filler could be used for this job. Then prime the floorboards and prepare to paint.
Be sure to do the job during the warmer months with very low humidity. Majority of floorboards need at least two paint coats. Raw timber could take more coats.
Let’s Paint
After you have sanded, filled and sealed the floors, you can proceed to do the painting task. Using a paint roller, apply the paint then allow the floors to dry for no less than eight hours. For a more durable paint job, leave the floors overnight. It might be necessary to leave your room till the paint dries or you can hire any commercial dryer.
Lastly, paint the neighboring rooms with colors that come from the same color palette. Link all the rooms in your home to create a flow throughout.
Tags: floor painting, floorboard painting, McCreerys, McCreerys Home Furnishings, painting floorboards
Posted in Flooring Design, Home Maintenance, Interior Design 101, Interior Design Elements | No Comments »
Tuesday, December 6th, 2016
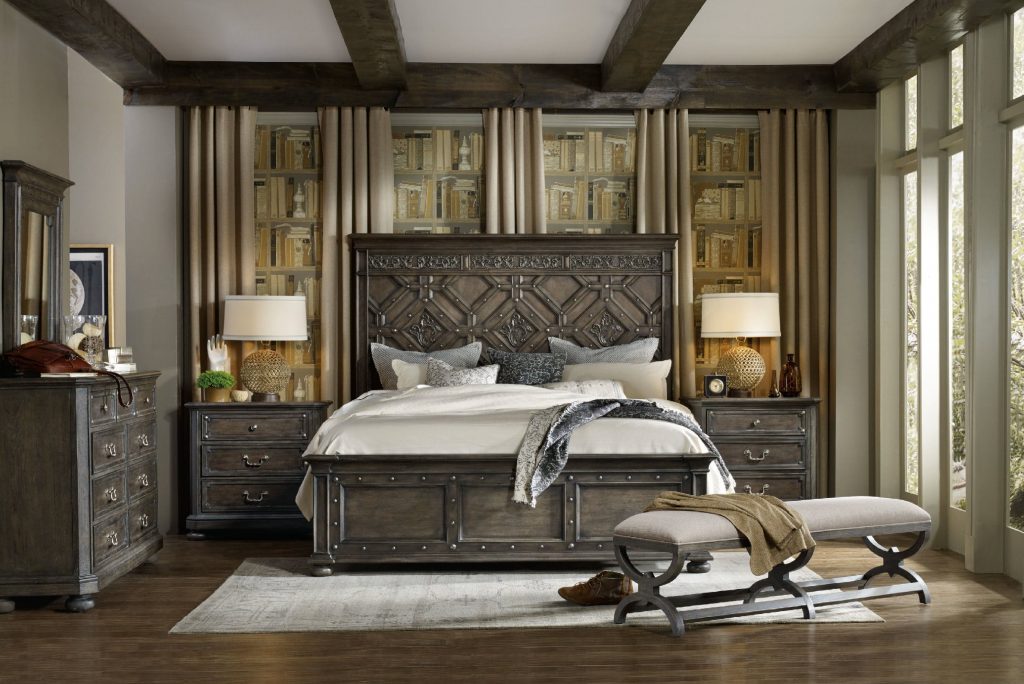
The Hooker Furniture Bedroom Sunset Point King Fretwork Panel Bed is an awesome guest room bed.
As cliché as it may sound, Christmas is literally just around the corner and it’s that time of the year to clean up and prepare the different rooms and areas in your home. You have to know how to divide the tasks among the family members and to make it a fun project rather than a dull one.
Prepare the Guest Room
Christmas also means hosting parties. This means welcoming guests to your home so you also have to prepare the guest bedrooms. Even when you’re not expecting guests, it is best to always expect the unexpected during the holidays. It is common for relatives or friends to suddenly show up so they could celebrate the festive season with you. It may also become impossible to drive home every single guest who will go to your place so, at times, it becomes necessary for some people to spend the night with you. This, all the more, makes guest bedroom prepping a must.
It is also imperative to change the sheets to make sure that the beds smell fresh and clean. Use a gentle detergent in washing duvet covers and sheets. Wash them separately from your other pieces of clothing; this is to avoid having small items caught among the sheets.
Another step in preparing the guest room is to vacuum and polish. This becomes doubly important if the guest room is not used most times of the year. Rooms that are unoccupied for longer periods tend to gather dust so be sure to check them and clean up.
Put a potted houseplant in the room to increase the level of serenity inside that room.
Make space also for a wardrobe, a drawer or two, and a nightstand where the guest can place his keys, coins or some reading materials. Be sure to check the wardrobes as these become the home for mold when moisture somehow seeps in.
Learn to Prioritize
The perfect time to clean up is not hours before your guests arrive. Clean up the guest room drawers, linen closets, the dining room and the den days before the guests are expected to arrive. Remove any unnecessary items from coffee tables, countertops, ottomans, and other furniture. Should you run out of time, just bag the unwanted items and store them temporarily in the basement or in the attic.
The time to sort and arrange is when your guests say their farewells.
Consider Safety
An important part of preparing your home for your holiday guests is to invest in ample lighting. Exterior lighting should be working just as well as the interior lights. If you can, add motion-activated lights in bathrooms, hallways and bedrooms to ensure a zero accident holiday.
Prepare your home further by child proofing it. You might not have kids at home but your guests might bring theirs with them. Ask the parents to bring cabinet locks and baby gates if you’re not willing to invest in these items. Put all medicines and toxic cleaners inside cabinets. Be sure to hide lighters and matches.
Freshen also the smoke detector batteries. Run a fire drill when your guests arrive so that they know where to exit should fire ensue.
CYNTHIA ROWLEY FOR HOOKER FURNITURE DINNER AT EIGHT DINING TABLE with 2-18IN LEAVES: The dining room should be uncluttered and tidy during your guests’ visit.
Prepare the Kitchen
The kitchen is going to be a busy room this season so increase the storage and place a pot rack where hot, cooked foods can be placed before being brought to the dining room. Move the coffeemaker to the family room in order to avoid guests crowding the kitchen.
Place extra chairs and stools for people who love to chat even while you’re cooking.
Other Upgrades
Apart from these preparations, you can also upgrade the foyer by repainting old doors. Polish metal door hardware and hinges. Erase the scratches on stairs, hardwood floors and wood railings. Have a welcome rug placed at your home entrance. Lastly, add a storage bench where the guests can place their shoes and boots.
Tags: Christmas interior design, McCreerys, McCreerys Home Furnishings, preparing for winter, winter decor, winter decoration
Posted in Home Maintenance, Interior Design 101, Special Rooms In Your Home | No Comments »
Saturday, December 3rd, 2016
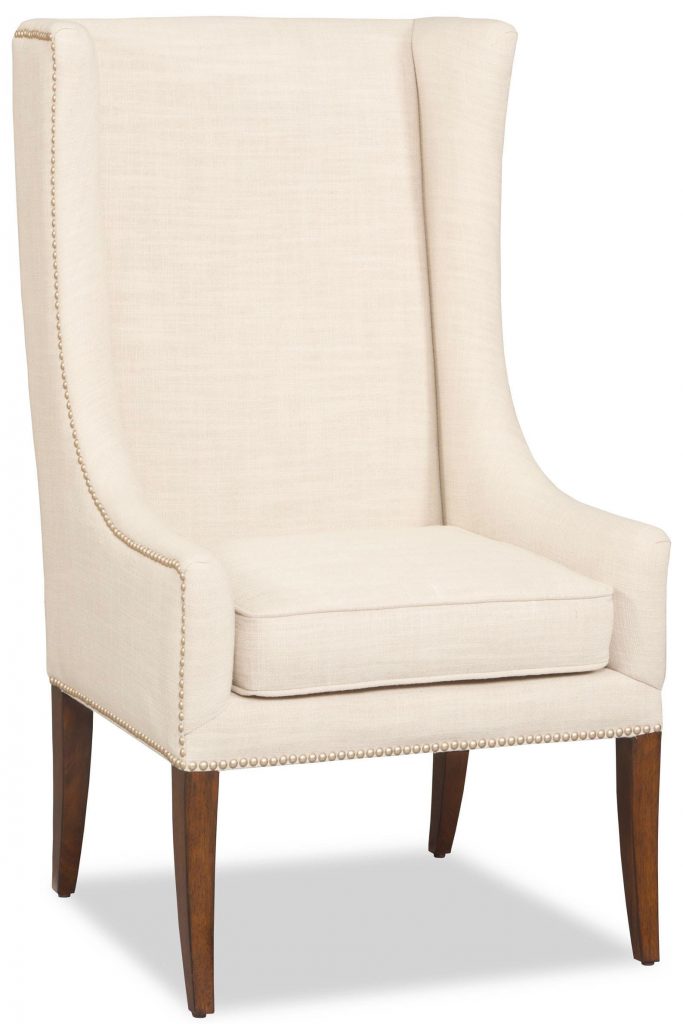
The Hooker Furniture Living Room Linosa Linen Accent Chair has basic lines and a simple design that are perfect for uncluttered surroundings.
Clutter isn’t a part of interior design so don’t think that it’s okay to leave the mess around. Whether the untidiness is due to poor habits or being a pack rat, the burden brought about by unclean surroundings could be staggering so it’s time to clean up.
Clutter clogs the smooth systems in your home. Because of this, you can be certain that costs will pile up pretty soon. Just imagine the amount of time lost in finding missing keys, receipts or cell phones and you would know how much – in dollar value – you lose.
The perfect time to declutter is – now – even when you can even peer through the piles of stuff anymore.
Look Downwards
Now let’s get started. From the beginning, look downward. Instead of trying to realize how large the mound of clutter is, try to look at the big picture then zero in on the more solvable areas. Begin with the kitchen counter, declutter the fridge, then the shelves, then find some drawers where you are going to store items that still have use within the next few days or weeks. Choose an item that you think would be a daily eye sore.
It pays to be happy about your small successes in cleaning. Do not expect to finish the project in just a day.
Slowly But Surely
Clutter can become intolerable over the weeks or months that it is left alone. Don’t let this dampen your cleanup efforts. Know that, slowly, you will eventually pile all boxes, box all small stuff, and put away those items that are used seasonally. Curing clutter takes time so don’t expect that there are shortcuts.
Remember the story of the tortoise and the hare? Just do this project steadily and you should be able to see the fruits of your labor soon.
Divide Decluttering Into Sessions
Attacking clutter means you have to use up energy, time and motivation.
Use a schedule. Working for just 2-4 hours daily, thrice each week is better than working for six straight hours on a single day. This is the most efficient time that you could schedule for your cleanup.
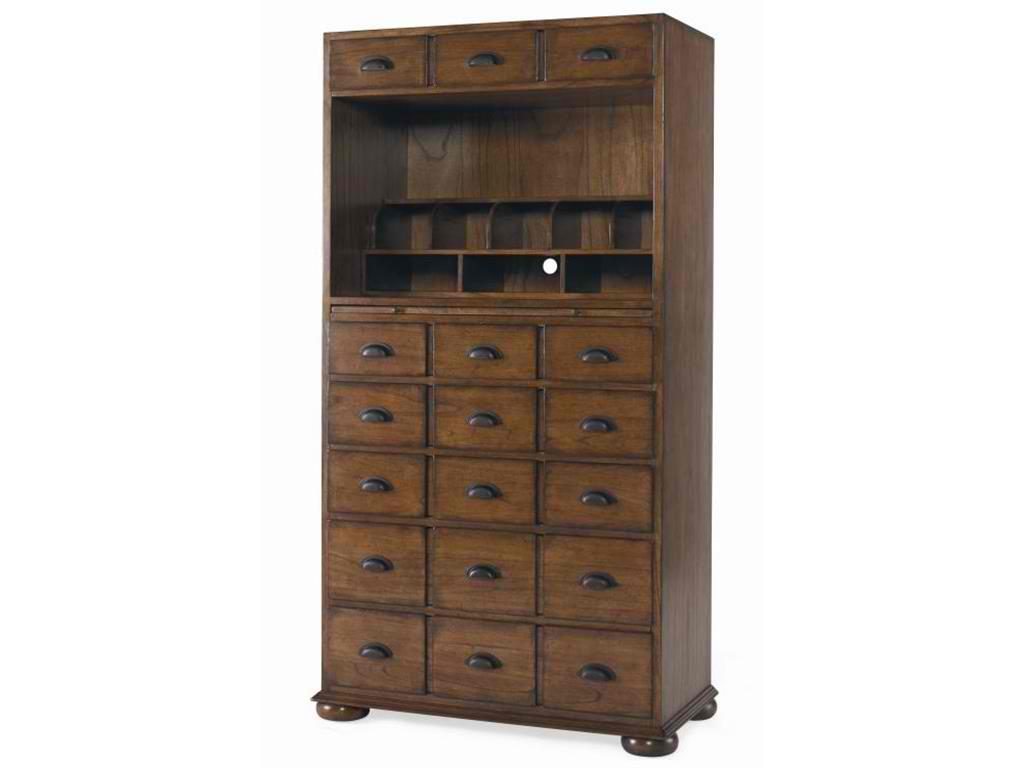
The Century Furniture Home Office Apothecary Desk T4H-765 has ample drawers for all your filing needs.
Change Your Lifestyle
Clutter accumulates due to a lot of reasons. Whatever your reasons were, it’s time to change and take on new routines. Poor housekeeping routines simply have to go. Sit down with your whole family then, together, create rules that will be strictly followed henceforth. Choose the one that’s most realistic for everyone.
Box and Banish Method
This is a method of decluttering wherein you clean up, not bit by bit but in a more drastic manner. To do this strategy, just gather all the clutter from chairs, drawers, tables, counters, ovens, the floor, even in bathtubs. Place these inside boxes or trash bags and have them stacked outside of your home. Work till the surfaces are clutter free.
Next, open every box one day at a time. Consider the items that were included in there. Decide, once and for all, if you will throw or keep the items that you see there as you check them, one by one, each day. All the items that remain inside the box after you carefully examined each need to go – no exception.
Imagine or Role Play
You can also use your imagination to declutter objects. Once you see an item that you’re having a hard time letting go, try asking yourself this question – If I’m buying this right now, how much am I willing to shell out?
This is a creative, psychological technique that you could use to remove unnecessary items from your home.
Tags: decluttering, McCreerys, McCreerys Home Furnishings
Posted in Home Maintenance, Interior Design 101 | No Comments »
Friday, November 18th, 2016
Hooker Furniture Dining Room Sandcastle Fretback Arm Chair – Upholstered Seat
Winter is just right around the corner. Pretty soon, you will be changing your wardrobe to wools and thicker fabrics. It is just as important to prepare your home for the upcoming winter chill. One of the delightful things about the holiday season is sitting or even curling up in your cozy chair as you sip hot chocolate while reading a bestseller.
Beating the cold temperatures is all about your indulgence with warm hues and cozy textures. You do all these while keeping your interiors still fresh and airy.
If you’re bent on designing around this upcoming season, here are simple tips to get started –
Use Winter Throws
Winter is a great time to pamper yourself using soft and comfortable textiles. Add sheepskin, wool , velvet or faux fur. If you did save up for a seasonal treat, then go ahead and invest in some cashmere throws.
Resist the temptation to leave these winter throws inside the bedroom. Other rooms also need the visual warmth that these throws can provide so spread ‘em out.
Be Sure to Insulate
Insulation isn’t just a fundamental preparation for your safety this coming season. This also crosses to the decorative realm. If you are living in a state that’s extremely cold during winter, then this is something that you should definitely prioritize.
Check all your doors and windows for any leaks. Find out if you need to add some blinds or window drapes in order to reduce heat loss. Your efforts will definitely pay off as you enjoy a warmer winter while your savings pile up on your energy bills.
Hugs and Rugs
Some area rugs are needful this coming season. They won’t just keep your feet warm, they’ll also add character to your home. Find rugs that suit your chosen theme or color scheme. You might also want to rethink your flooring materials since tiles or bare wooden floors are quite unforgiving during winter.
See if you can find Navajo textile area rugs as well as blankets. These will give your home a cozier and warmer feel.
Create Bedroom Layers
You should consider the many ways that you can make the bedroom warmer and fuzzier this winter. Just make sure that you won’t go overboard, though.
Use different layers of bedding such as comforters and quilt. Don’t just limit your winter makeover on the bed, make sure the rest of the bedroom also gets an overhaul.
Add unique lighting then fill the void corner with an exciting accent chair. Having a small bedroom is not such a bad thing after all.
The beauty of this Uttermost Accessories Winter White 35340 will make the starkness of winter less cold.
Use Greeneries
A tad of natural beauty brought about by houseplants and flowers are the perfect elements that would balance any seemingly cold look. The snowy world outside could also serve as an inspiration for your indoors. Use an all-white look for the backdrop then find greeneries to complete the style.
The snow white look could easily become a lifeless look if you’re not careful, though. Make sure that you don’t allow it to look too daunting or sterile. Give it a touch of nature by adding birch logs, white corals and pine cones.
Fire Up the Fireplace
What could be more magical than to use the fireplace to think about winter? The fireplace is a must-have during winter as it can fill the room with a different kind of radiance. All your winter décor won’t be as effective if the warmth of the fireplace isn’t felt.
In the absence of a fireplace, don’t fret. You can always rely on the romantic glow of candle lights. The flickering lights are just as dreamy so just set the candles up using lovely candelabra and you’re done.
Tags: designing for winter, McCreerys, McCreerys Home Furnishings, preparing for winter, preparing your home for winter, winter essentials, winter interior design, winter interiors
Posted in Home Maintenance, Interior Design 101, Interior Design Themes, Winter Season | No Comments »
Tuesday, November 15th, 2016

This FFDM Hyde Park piece has a small yet significant silver element that makes this drawer a beauty to behold.
It can be tricky decorating tiny spaces – even interior designers know this – but with maximized storage and correct usage of square footage come effective ambience presentation. So, are you ready to not make the same mistakes that many apartment owners ahead of you have made?
Never Underestimate Natural Light
Any small space must make good use of natural light. Maximize natural lighting in your home by properly placing mirrors on walls that are opposite windows. Doing so will help spread and reflect light in your home.
Choose woven blinds or sheer curtains if you want to filter the amount of sunlight that comes in. Limited light means you dramatize the paint hues as well as the furnishings that you have chosen. Overall, you get to brighten the mood indoors without spending a single dollar.
Let There Be Visual Movement
You can visually connect spaces in your home by using a unified color palette, this is if you have a home with many adjacent rooms. This creates a visual and overall story that will make the rooms appear seamlessly fused rather than having small, disconnected areas.
Use All Available Space
Bring out your creative side especially when to making good use of square footage. Find storage areas such as floor-to-ceiling shelves or a shelf above the window frame.
Kitchen = Clever Storage
Regular kitchen cupboards should be things of the past. While they may be visually appealing, they tend to crowd out space. Add bins under the kitchen sink, also some shelving units where they are unseen. If you have porcelain pieces to display, then that’s the time you invest in an awesome china cabinet.
To make the kitchen space airier, you might want to divide it from the dining area using a small divider.
The Office Nook
Make sure to use every extra space that you see when you have to deal with a small bedroom. You can create a small nook between two closets and turn that into a cozy home office. This is a workstation that requires low maintenance. Just add some shelves and a desk to complete the space. Display some books also.
Don’t forget that you’re still inside the bedroom so the bed should be the anchor piece in that space. Invest in one that won’t eat up the rest of the space.
Storage Space for Bathrooms
Use narrow, water-resistant shelves inside this room. Buy some canisters also which will hold cotton balls, cotton swabs, your favorite moisturizer, and other toiletries. Put the canisters under a lovely vanity table.
Find some wicker baskets which you can place on shelves for additional storage space.
Make Use of Multipurpose Space
This is unavoidable as was discussed in the fusion of an office nook and the bedroom. This same nook can also be situated inside the guest bedroom. Make the best of such situation by utilizing the surrounding walls.
A simple collection of shelves can make ample storage for all your stuff. You can then connect these pieces to the reading or home office nook that you have created.
That space beneath the stairs doesn’t have to go to waste. This can, in fact, be enhanced to become a stylish storage space. Add a shelving unit there so you can take advantage of this awkward space. You can also use this as a mini bar or a space for your book collection.
Light Paint Only Please
If you want to make any space appear bigger, make sure that you veer away from dark hues. Say no to black walls or any punch of dark color. Keep the rest of your space open and bright. Use light-colored furniture and accessories.
Tags: McCreerys, McCreerys Home Furnishings, natural light, natural lighting, office space layout, storage, storage advice, storage planning
Posted in Home Maintenance, Interior Design 101 | No Comments »
Monday, November 14th, 2016

This lovely wooden piece comes from FFDM’s Highlands Collection.’Talk of focal points!
Here’s a great reason to begin decorating for your home now – the end result of your project will enhance the mood in your home. With the right decisions come better sleep inside the bedroom, less stress in the living room and much joy in the kitchen and dining room.
Here are some ways to turn your home into a haven –
Establish an Effective Focal Point
One of the first things that you would notice when you enter anyone’s home is a furniture or architectural part of the home anchoring the rest of the design elements. This is the focal point.
It is your duty to create a focal point for your home. This should be something that is noticeable once you enter your home. It could be a large porcelain vase, an abstract painting, or a memorable souvenir from your travels.
Say No to Debris
What are you still doing staring at that pile of old newspapers on the floor? Pick ‘em up.
Piles of stuff on the hallway or the entryway must go. They all spell chaos and mess inside your home and that’s bad for productivity.
Have a place that is designated for every item. Place the most chic containers right by the door then find bins for incoming and outgoing stuff.
Create Ample Room
Anxiety builds where there’s too much stress or chaos. Reduce the clutter in your home by making space. Cut on all the non-essentials. Let go of unnecessary furnishings, magazines, files, picture frames, etc.
A magical way to create space is to paint one of your chairs or tables and let it blend or disappear into the wall. Painting the walls with a light color will also make the room look a lot more spacious.
Highlight, Don’t Flood with Light
It would be difficult for you and your family to relax during the night if there is a bright overhead lamp right in your living room. This is much like attending a concert wherein you are amped all the time. If you don’t want to be revved up all the time, then use spot lighting just for the areas that need brightness. For all the others, install dimmers that you can activate according to your mood.
Find and install full-spectrum bulbs for a more soothing and natural ambience.
Simplify the Color Scheme
Practice restraint when using colors and patterns. Mixing patterns means you must know how to keep the color schemes within bounds. If you are the type that likes a lot of colors, then be sure to keep patterns to a bare minimum or you’d risk making your home look like the venue for the next Iron Man triathlon.
A relaxing room should be one that’s devoid of too many patterns and colors. Find the most soothing hues then put in just the right amount of furnishings and accessories so that your place becomes more meaningful.
Love Mother Nature
In fact, you should love her so much that you are willing to bring her into your own home. Bringing the outdoors in means having pots of houseplants, some mirrors to reflect the natural light, and the biggest windows to accommodate the beautiful rays of the sun; the view should also include an interesting landscape and awesome trees right outside your home.
The Hooker Furniture Bedroom Vintage West California King Wood Panel Bed is the perfect focal point to your bedroom.
Turn Off Your Electronics
Put the TV set and the computers in areas where you are not supposed to relax. These are your home office and the entertainment area. Do not let these electronic appliances interfere with a good night’s sleep by putting them inside the bedroom or the living room. In their place, use throw pillows, lamp shades and the most calming colors that you could find.
Tags: adding colors to a home, creating a focal point, declutter, decluttering, determining the focal point, finding the focal point, focal point, houseplant, McCreerys, McCreerys Home Furnishings, nature, nature in interior design, nature-inspired design, nature-inspired home, outdoor view, tips
Posted in Home Maintenance, Interior Design 101 | No Comments »
Saturday, November 12th, 2016
FFDM American Cherry Collection
Here’s a challenge that many would-be homeowners typically face – a color scheme that would flow from one room to the next. This becomes harder to achieve once you’re told that repetition should not be overdone. The overall look of your home must still be dynamic but not to the point that it becomes confusing. The goal then is to achieve texture, value, hue, contrast and balance.
The Answer
To achieve a successful flow you need to learn the fundamental elements of design which are shape, color, scale, light, pattern, texture and balance. These components should be fused in way that’s still pleasant. It should feel like a flowing stream where the undercurrents are, well, underneath.
Vary the hues from one room to the next by changing the color intensity just within the contiguous color families. An example is greens and blues working together.
You can also create contrast on the walls by having the fabrics go against their color. Fabrics can also be related to walls through monochromatic varieties. When using a low-contrast palette, it is texture that will create visual interest.
When you want to create a beautiful scale, be sure to pick color accents that go against wall or floor colors. Don’t forget to feature artwork and other special items by making a focal point through the contrast of brightness or color.
Be sure to give every room its own distinct color personality so that you are ensured of a cohesive look and feel. If you’re the type who loves lots of colors, then it is still possible to achieve the flow by picking one color that will unify rooms. This unifying element could also be the woodwork on the doors, windows, molding, ceiling and baseboards. This connecting color does not have to be glaring.
You’re the Boss
Pick 3-5 colors (preferably your favorite ones) and plan how they would be presented in your home. What color would you assign as the background so that it will be shown more prominently? What colors will be carried from one room then to the other and in which areas will they appear?
Allow the current artworks, wall colors and furnishings inspire you.
Be Consistent
Just imagine that you’re taking a walk throughout your home and you’re leading your guests on a tour of sorts. What do you notice as you walk from room to room? Are the aesthetics and décor consistent throughout the rest of your home? Or are they too jarring that the guests tend to just look away?
If the tour made you realize that your house needs a little freshening up, then you might want to begin with the purchase of a rug. You can then find complementary paint colors, fabrics and accessories.
Begin with Carpets and Rugs
Go ahead and match two carpets for both the living and dining areas. This is most apt for an open space layout. Add variety later on then pick colors for your upholstery which you can use for both spaces. Gold and yellow are relative colors that are easy to use.
You can also use matching carpets by picking one color that is common for each. Red and gold look great together, in fact, they remind you of happy Christmas moments. Green and white are also a wonderful combination.
Area rugs that you use in your living and dining rooms can also be joined by a single color even when they have different designs and textures. A gray rug on the living room could have navy blue pinstripes while the dining room’s has an all blue rug paired with a gray mirror.
Tags: layout, McCreerys, McCreerys Home Furnishings, space planning, tips
Posted in Home Maintenance, Interior Design 101 | No Comments »
Wednesday, October 26th, 2016
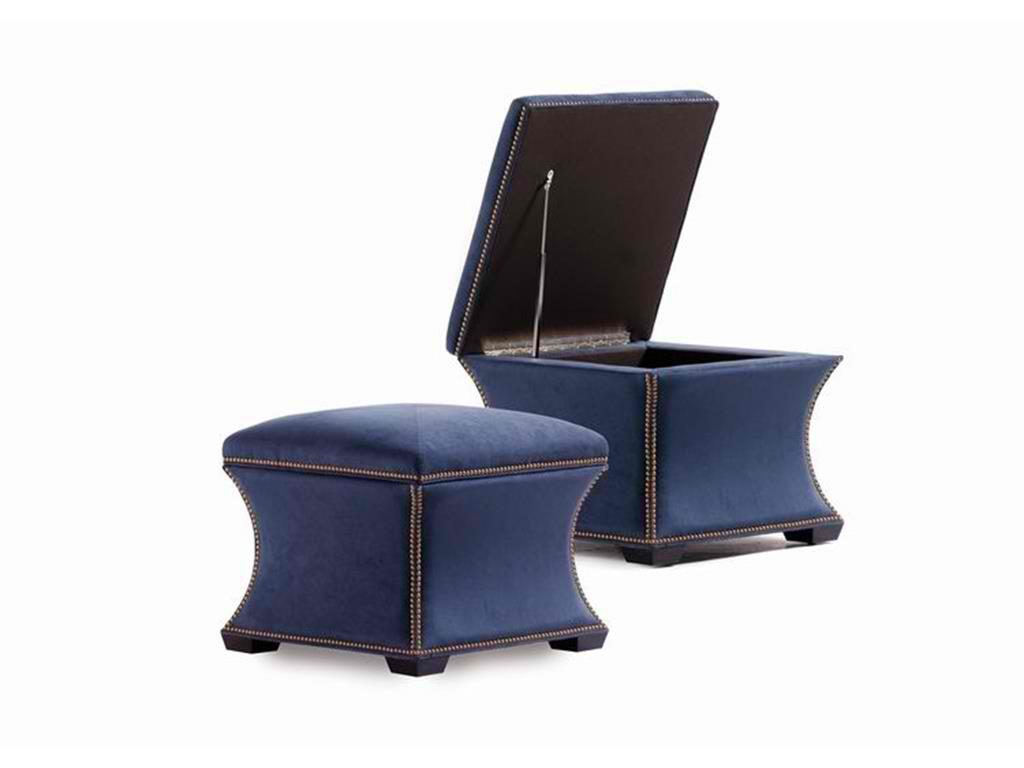
Look for furniture that could double as a storage unit just like this Jessica Charles Living Room Dare Storage Ottoman 81-SO.
When you’re about to move in to your new home, cleaning up is the primary task that you need to focus on. But this mostly means that it’s time to clear up stored items that have been accumulated over a long time – if not your entire lifetime. So you’re thinking of becoming more organized this time? It’s not impossible, but it’s not easy either.
Here are several organization methods that should help you with your cleanup goals –
Practice One In and Another Out
You may begin with this rule. As soon as you have decided on which things to bring with you to your new place, then you need to make enough room for it. There may be situations when this rule would not apply, though, such as when you’re starting with your first apartment and you still don’t have that many furniture and accessories.
This rule may not apply also when you’re about to move all across the country or the globe. It simply wouldn’t be practical to bring your prized furniture on the airplane or to have them sea freighted. Other than these scenarios, you can make use of this basic rule.
Consider which objects you would need to purchase and what furniture pieces you’d be keeping.
If you’re beginning to think that you’d miss a shirt, a pair of shoes or even a mug, then think if it is a part of a collection. If it’s not, then let go. Even collections need to be evaluated now and then.
Begin with Storage Spaces
Organization is equal to having ample storage space. With this in mind, then you should begin your organization goals with storage spaces. Consider whether your attic, basement, garage or closets would be able to hold some of your not-oft used pieces.
Purge items that have long been stored (a month or longer) and no longer have any use. Unclutter or free up storage areas – not just rooms. This means letting go of stuff that has long cluttered your cabinets, drawers, bins and other such useful storage units.
Organize, Don’t Just Store
What most homeowners think about when organizing their home is simply decluttering. An organized home is a home with ample shelving units, boxes, and cabinetry. Know how to align, stack and heap stuff in a neat manner. Even the greatest storage solutions are useless if you only dump your stuff in them.
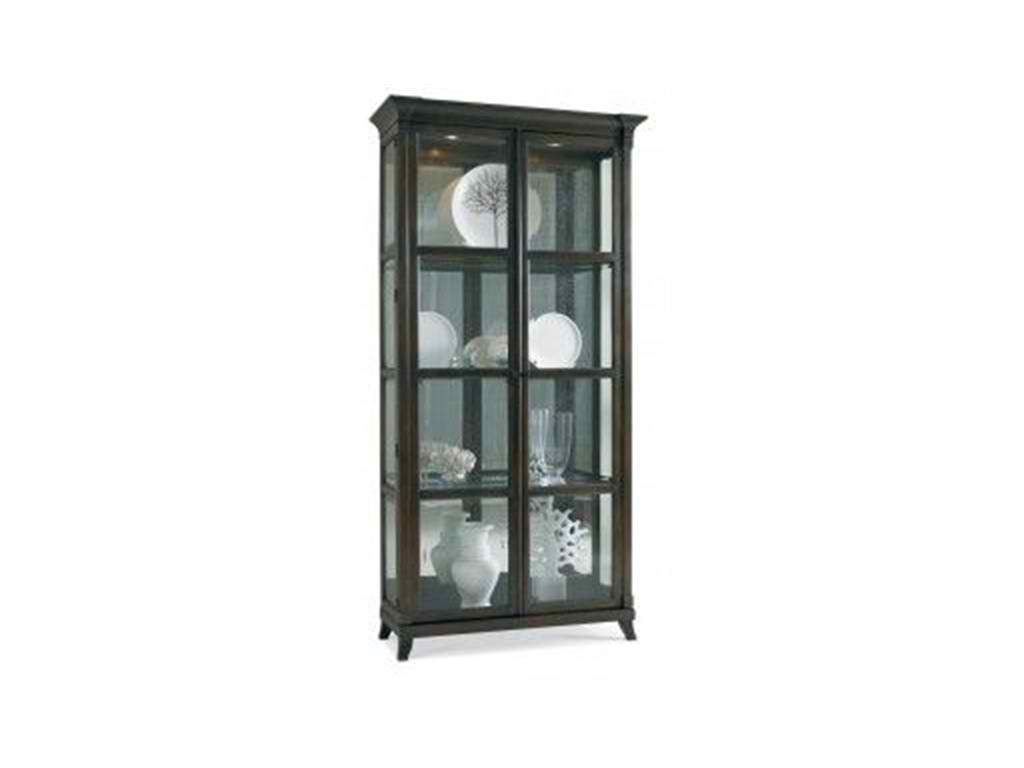
The Hickory White Dining Room Quinn China Cabinet 240-44M is the best home for your glassware, cutlery and porcelain ware.
Make Use of Labels
Once you have decided on how to store items, it’s time to have them labeled. It would be pointless to stack storage boxes one on top of the other if you’re not able to recognize what’s in each. You would end up opening every single box looking for an off-season curtain or bedding.
Take the time to attach those labels on every box if you don’t want this scenario to happen to you. Check some label templates online. Print them out and start labeling your storage bins. There are small, medium and large labels, choose which ones you need according to the size of your boxes.
Store Digitally
When you’re thinking of storing stuff, don’t just think of tangible pieces. There are now things in this world that you can’t store in boxes or cabinets. These are things like digital files – from photos to videos, your favorite music and documents.
Declutter
Of course, home organization also means decluttering. So say goodbye to these items (yes, you have to!) –
Broken sunglasses
Wrong prescription eyeglasses
Inkless pens
Unused food containers
Old clothes
Mustard, catsup and soy sauce packets
Salt packets
Scarves that haven’t been used for a long time.
Tags: decluttering, home organization, McCreerys, McCreerys Home Furnishings, storage, storage advice, storage systems, storage techniques, tips
Posted in Home Maintenance, Interior Design 101 | No Comments »
Monday, October 24th, 2016
Hooker Furniture Bedroom Sanctuary King Tufted Bed – Bling: Tufting is an effective means of muffling some sounds.
Noise is one of those things that most homeowners fail to plan against. You may live in a small apartment or a bigger bungalow but noise will always be a concern unless you finally address it. Soundproofing your home effectively means less to zero irritation and peace being restored.
Soundproofing means you have to decide now as to what lengths you are willing to go through especially since this project is costly.
Always begin soundproofing projects with research. You have to understand how sound works first so that you know what sort of insulation you will need to use.
Understand How Sound Works
What is noise?
This is that unwanted sound ranging from dripping water to the shrill voice of your neighbor. Conventional ceilings, floors and walls are just marginally effective – at best. They are even built like drums since they come with membranes (e.g. drywall).
Sound waves land on one surface then carry through the framework or the air to another surface. This is audible noise. The thinner the wall, the easier it is for you to hear the sound traveling from one area to the next.
Identify Your Noise Problems
You will need the help of experts if your noise problems are severe. Common solutions include secondary ceilings, walls and floors.
Moderate to annoying noise problems, on the other hand, can be solved by installing additional components on walls, floors and ceilings. These can be one or more of the following – soundproofing mats, acoustic quilts, acoustic mineral wool, acoustic carpet underlay, and resilient bars.
Manageable noise problems such as TV noise, street traffic, barking dogs and snoring could be easily solved by having thicker carpets, rugs, wall hangings, and interlined curtains. Using fabric on walls and the ceiling means using faux suede and wool. Wall padding should be used to up the soundproofing properties of your home. Don’t try to do this project on your own, though, since this needs to be carried out by an expert in fabric walling.
Bedroom soundproofing is as easy as having bigger wardrobes in solid wood. Make sure the sealing is done properly so that noise is effectively cut down.
Cynthia Rowley for Hooker Furniture Living Room Wallis 2 Cushion Sofa
Buy Less Noisy Appliances
Opt for appliances that are quieter. Manufacturers are aware of the noise problem brought about by dishwashers and washing machines and so they have come up with newer versions that are almost if not totally quiet.
If it’s not possible to invest in new appliance at the moment, then be sure to check on buzzing, rattling or vibrating sounds before they get worse. Get the appliance fixed once you hear an unusual noise.
Use Sound Absorbers
Since you now know that hard surfaces tend to reflect sound waves, then the opposite absorbs them. Use soft surfaces to absorb the sound waves. Materials that would best control the sounds in a room are acoustic materials, padded carpets and rugs. Say no to laminates, hardwood flooring and tiles.
Look for companies that offer a wide range of acoustic ceiling, wall and flooring materials. There are now acoustic tiles as well as drop-ceiling systems that offer acoustic properties. Traditional to contemporary styles are available.
This means you can now, say, block noise coming from the basement and prevent it from going up the upper floors of your home.
Say Yes to Sound-Blocking Door
Keep noise from moving from one room to another by installing solid doors. Interiors doors are often hollow and you know how easily noise can get through those. Now, you can limit the noise by having solid doors installed since these are effective sound barriers.
If you want to go further on your soundproofing task, then check all around your door, too. You can also install weather-stripping so that you could seal the door. Foam tape should do the trick.
Tags: McCreerys, McCreerys Home Furnishings, soundproofing, soundproofing homes, tips
Posted in Home Maintenance, Interior Design 101, Wall Design | No Comments »
Follow us on our social media
© McCreery's Home Furnishings | All Rights Reserved | Privacy Policy