- Follow us:


Friday, January 5th, 2018

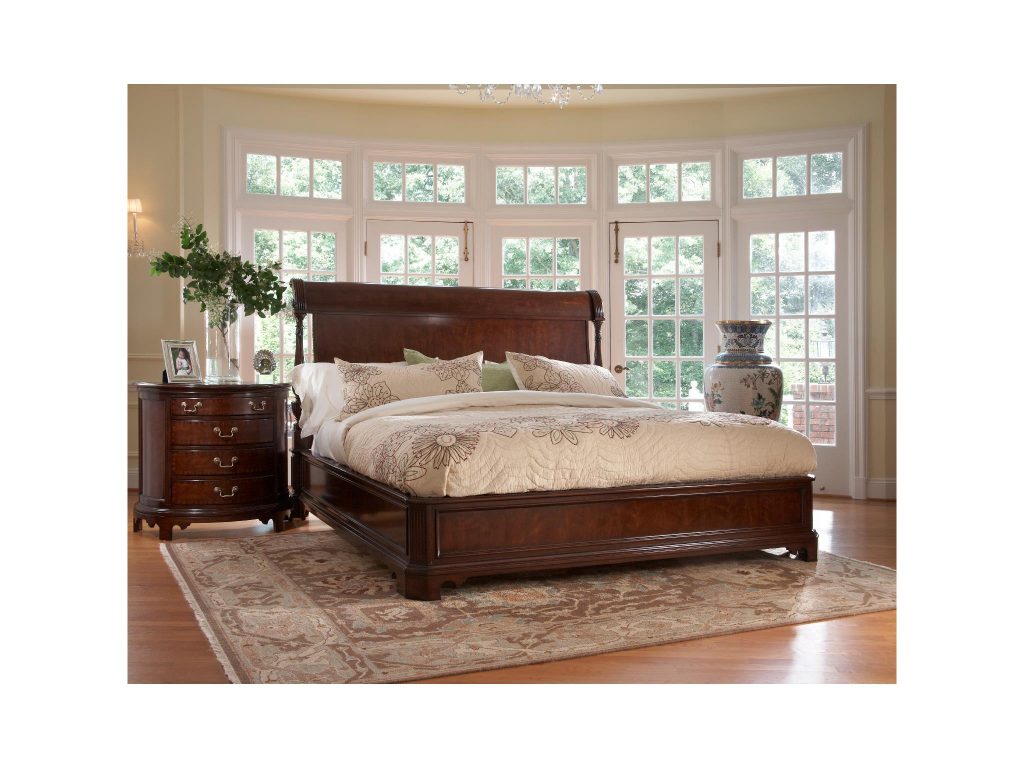
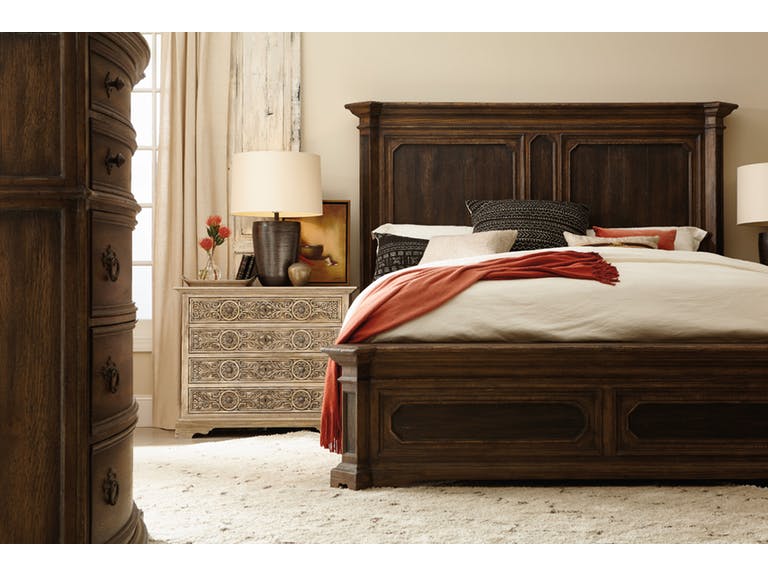
Whether you have a larger glass surface to clean such as the windows on the first photograph or smaller slats such as the one on the second photo, you need to make sure that you have the right tools to finish the job. Featured furniture pieces are the Poster King Bed from Fine Furniture Design’s Belvedere and the Charleston Panel Queen Bed from the American Cherry Collection.
After the holidays, you may have taken the time to sit down and just ponder over what happened. While sitting in your favorite chair and sipping a mug of hot chocolate, you suddenly realize that your windows are full of smears and streaks. Well, it is the time for some post-holiday cleanup.
Most homeowners tend to overlook window cleaning. Some clean their windows once in a blue moon. You may be one of those who take this work for granted but you should know that a simple cleanup in this area of your home could lead to many benefits.
First, you will let in more natural light as the glass on the windows become clearer. Sea spray, mortar, acid rain, oxidation, and other contaminants tend to destroy the surface of glass but regularly cleaning your windows should be able to prevent these from permeating the glass.
So brighten your home and add more Vitamin D to your system by simply cleaning the glass panes on your windows.
And just like many surfaces in your home, grime and dirt also tend to build up on your windows (whether the indoor or outdoor part). The dirt does not just make the window appear dull but it can also increase the number of allergens in the room.
Allergens can lead to respiratory issues and other health problems.
Another benefit of cleaning windows is to make your home more appealing. It is a huge turnoff to see what-would-have-been a lovely home had it come with clean windows. Make your home more attractive by cleaning the windows more regularly.
Window Cleanup Made Easy
Regular window cleaning can also give your window a lengthier life since contaminants such as oxidation and hard water can make glass weaker. Professional window cleaning thoroughly removes dirt from your windows and would even make them appear brand new.
If you are a huge DIY enthusiast, though, you can also take on this project. You can begin by simply vacuuming the window tracks and sills. This simple task should remove the dust, spider webs, and even some bugs. If the windows are installed with blinds, then be sure to clean those, too.
If you want to clean just like the pros, then buy a squeegee, dish soap, and boil some water. Work a little lather then have this soapy solution applied to the glass surfaces of your windows. You can then squeegee the soapy foam off.
Another simple way to clean window surfaces is to buy those cloths that are used to clean eyeglasses. Many pharmacies sell those and they have been found to be quite effective in wiping off spots on glass surfaces. All you need is a spritz or two of water, wipe it off with the eyeglass wiper, and then you’re good.
Now, how about those extremely high windows in your home? You can still reach those by having a telescoping microfiber duster. Spray some water onto this duster and this should be able to remove the light dust buildup that is usually found there.
For problematic streaks, be sure to clean and dry using a horizontal motion. On the inside, do this task vertically. If you still have a streak, then the horizontal streak will reveal that it is outdoors while a vertical one will mean that you have to deal with an indoor streak.
Have you ever been intrigued by how effective newspapers are in cleaning glass surfaces? While they do avoid smears and streaks, you have to be careful in cleaning glass windows near white walls or white trim.
Newspapers leave a grimy, oily film on glass surfaces (effective for keeping streaks at bay) but they can also add dark smudges to white or wood trims and walls.
Use a microfiber cloth for such areas instead.
Tags: cleaning the windows, McCreerys, McCreerys Home Furnishings, post-holiday cleanup, window cleanup
Posted in Home Maintenance, Interior Design 101 | Comments Off on Post-holiday Cleanup: How to Have Streak-free Windows
Tuesday, January 2nd, 2018

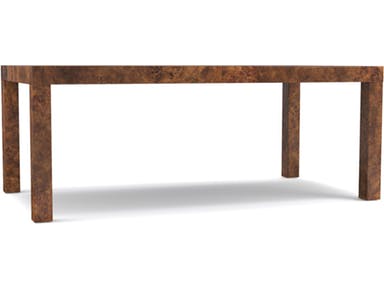
Wouldn’t it be nice to have this peaceful, clutter-free nook after the holidays? Featured here is the Console Estrelas from Fine Furniture Design’s Deco Collection.
A Happy New Year to everyone! Just like millions of others, you are now ready to catch up with work deadlines and the hustle and bustle of city life once more. But before you even go back do take a careful look around. There are lots of post-holiday clutter to take care of.
Get Organized
It’s time to bring out or buy additional organizing containers from your home depot. Your holiday stuff doesn’t need to become clutter. Those wrapping papers and holiday décor need to be kept out of sight in the next 11 months.
Getting organized means knowing where to get your stuff when you already need them.
You can begin in the kitchen. This is the most-used room apart from the dining area during the holiday season so it’s about right that you begin your cleanup there. Get rid of food wastes and make some room in your refrigerator.
This is also the time to deodorize your pots and pans. Use some salt with lemon then wipe clean with paper towels. Brighten those crystal glasses before you have them stored for yet another year.
After the kitchen and dining room cleanup, it’s time to head to the living room. Get rid of that pile of holiday cards. Take pictures of each (if you are feeling sentimental) then throw the cards away. Get rid of ornaments, any non-working lights, garlands, wreaths, etc. Organize these inside garbage bags and have them thrown away.
Post-holiday decluttering must also include editing your closet. Eliminate the clothes, bags, shoes, and accessories that you no longer use. Have them donated to other people who could still use them. Picture the image that you would want to project this year and if the items in your closet no longer represent who you are, then it’s time to throw those away.
Sort your off-season clothes and have them stored out-of-sight. Also, once and for all, if you’ve been holding on to a junk drawer or two, then this is the year to finally get rid of it.
Every Available Hand Should Help
Gather your family and have them work composed with you. If you enjoyed the holidays all together then you should also be together during this decluttering project.
Hold a family meeting to discuss the cleanup that is going to happen. Even small kids can help by storing or putting away their toys. Every little thing must have a place where it is supposed to go once it is not in use.
Use a family calendar to remind everyone where they should be and what they are supposed to do on a particular day.
Recycle
Save the bubble wraps and padded mailers inside Ziploc bags. These can be used throughout the year. Find out which gifts you want and keep them while making a new home for those that you don’t want. The giver, of course, doesn’t have to know.
Going back to those holiday cards, those are also recyclable. Some of the wrapping paper are non-recyclable, though, because of their dyes, plastics, and glitter. With this in mind, consider what you would wrap your gifts with next year. It is best to use newspaper or tissue so you can recycle afterward.
Taking down the Christmas tree is also another task that you need to take on. It is best to cut it up then put the pieces in your bin during the recycling day. Be sure to remove any plastic item on your tree before you dispose of it.
If you live in an apartment, be sure to check with your property manager regarding recycling instructions.
Tags: decluttering after the holidays, McCreerys, McCreerys Home Furnishings, post-holiday cleanup, post-holiday decluttering
Posted in Home Maintenance, Interior Design 101 | Comments Off on Post-holiday Cleanup – Are You Ready For It?
Friday, November 17th, 2017

American Leather Living Room Astoria-Sectional: The lighter walls provide the perfect transition to the upcoming winter season. The neutral shades all around it point to the change that is about to take place.
Colder conditions are right around the corner so this is the time to prepare your home for the sub-zero temperatures. There are so many things to do and check so here is a short checklist –
Once you’ve done all of the above, it’s time to set up the design for your home as you subtly transition from fall to winter.
Winter Colors
Here are five suggestions on how you can expertly do this transition. These colors will match the wall paint colors, home furnishings, wallpaper, and other design elements. You can be stylish both fall and winter as you choose these hues.
First, light blue colors such as turquoise and sky blue are favorite tones for winter decorators. Create a more spacious room as early as fall then just wait for the season to transition.
These light blue hues also blend well with greens. Vibrant turquoise and pale blue tones are trendy colors for fall and winter because they add freshness and they also look great with other paint colors. Green and sky blue are also amazing hues to choose from.
If you want to
Comfy Textiles
Find soft accessories complete with the most comfortable cashmere, flannel or wool sheets. Cotton quilts are the star of winter interiors. You can opt to have them draped at the back of the sofa if you intend to use them in the living room or just spread it all over the bed when you want it to keep you warm throughout the winter nights.
Knitted stuff are also default decorative elements during winter. Instead of the usual weaves used during fall, slowly transition to cable-knits.
There are many forms of textiles which would look great this upcoming winter. Faux fur is a form that’s amazing when used on seats. Sheepskin rugs also offer awesome warm underfoot.
Timeless Wood
During cold weather, it would be useful for your home to have wood elements. These offer the much-needed warming effects. Wood panels and flooring create a warmer impact more than any other design element, however, you can also swap the wooden elements with a mere tree stump if you’re feeling artistic. This is a simple rustic solution that’s easy to create.
Offer warm beverages to everyone as you also gather around the fireplace. Of course, it would be lovelier to watch the flickering wood.
Speak of fireplaces, this is one of the most amazing places to socialize at during fall to winter. A fireplace is a natural focal point so you won’t even have to try hard to create a statement. Now all you have to worry about is how to create your own style and patterns using this awesome piece de resistance.
Light Up with Candles
What could be warmer than the flickering light given off by candles? Candles are especially calming and their glow offers a romantic but at the same time, a festive element to your design.
Tags: designing for winter, McCreerys, McCreerys Home Furnishings, preparing for winter, preparing your home for winter, prepping for winter, winter decorating, winter design
Posted in Color Schemes, Fall Season, Home Maintenance, Interior Design 101, Interior Design Elements, Interior Design Themes, Winter Season | Comments Off on Transitioning to Winter from Fall Design
Friday, November 10th, 2017

American Leather Bedroom Queen Bed MEN-BED-QN
Decluttering one’s home is most homeowner’s wish. The problem is, when it comes down to actually doing the task, many just simply give up. While decluttering isn’t easy, it is easy to accumulate so many stuff in life. You justify this by saying that these things are your collections and that they even make you happy. Remember, though, that true happiness is never dependent on materials things.
So, why should you declutter?
Clutter Equals Stress
It is not an imaginary thing – clutter can cause stress. Cortisol (the stress hormone) is often associated with a high volume of household stuff. This means that the more material things remain cluttered in your home, the more stress you tend to experience.
Messy homes are even seen as places of failure.
Stress is also attributed to other conditions such as overeating and weight gain. Some people feel more tired when they see a lot of clutter in their home. And haven’t you noticed how difficult it is to focus or even to process information when you are in a cluttered environment?
Decluttering in a Nutshell
First, dare yourself to live only with the things that you need. A lot of stuff even in a spacious home could easily look like a hobo’s haven. If you can, stick to the basics such as a comfy couch, a bookshelf, an end table, and a beautiful center or coffee table.
Always be focused on cleaning up. You don’t have to begin piles of magazines. You can just clip the articles that you want then have the rest thrown to be recycled.
Categorize your possessions. This is an effective way to sort through your stuff. Begin with your clothing, then carefully check your jewelry, bags, shoes, books, electronics, and so forth.
Discard any of the items that you have not used for over six months. If there are items that you keep for posterity’s sake or for sentimental reasons, then at least store them properly so they won’t visually clutter the rooms of your home.
Give away the things that you no longer need.
Cynthia Rowley for Hooker Furniture Dining Room Long Board Rectangle Dining Table with 2-20in leaves 1586-75200B-BRN
The Decluttering Don’ts
If the professional fees of organizing professionals make you dizzy, then it’s time to DIY. But if you have to do this on your own, make sure that you’re not going to do these mistakes –
Tags: declutter, decluttering, home decluttering, McCreerys, McCreerys Home Furnishings
Posted in Home Maintenance, Interior Design 101, Interior Design Elements | Comments Off on An Immaculate Home for the New, Minimalist You
Thursday, November 2nd, 2017

Century Furniture Living Room Made to Measure Sectional 10-Sectional: Cleanliness also means having ample light and an airy atmosphere.
If you’re not feeling motivated to clean your home then you’re not alone. Many postpone cleaning their habitats for as long as they can because it is far from fun. Yet messy homes can up the stress levels of their inhabitants. Also, you won’t be able to find things more quickly if there is so much clutter all around.
Having kids and pets could double your cleaning efforts. The benefits outweigh the difficulty of cleaning up, though, which means you should value a clean home more than spending more time in front of a gaming console.
The idea of steaming the carpet or wiping the refrigerator is not a project that most people look forward to doing. But if you want a spotless sanctuary, don’t fret. There are ways to cleaning your home without spending too much time being dirty.
Compartmentalize
There is no need to take a leave off work just to clean your home. And, no, you don’t have to become a speed cleaner in order to finish this cleanup project.
First, you need to divide your chores according to the frequency that you would do each. Being able to cut down your cleaning time means establishing a system.
You can work from one room to the next, with one room representing one day of the week. You can also group the cleaning chores according to their level of difficulty.
Getting the time down means you have to be consistent with the time and the day that you assign for each task.
Compartmentalization also means you have to be consistent.
Take Note of the Little Things
While it is a huge deal to clean the ceilings as well as the wall-to-wall carpet, it is also crucial to remember to clean the nooks and crannies in your home.
For example, you should remember to wipe the insides of your microwave at least once every week. You can also deep clean this appliance twice each month. Just use half a cup of water and white vinegar. Place the mixture in a microwave-safe dish. Turn on the microwave on high till the window shows some steam.
Wipe using a clean sponge.
A toilet is also a place that has a reputation as a dirty space. Clean the bathtub since it has been proven to contain more bacteria than your trash bins.
Clean the Windows Inside and Out
If you can’t seem to get the squeaky clean look that glass windows are supposed to have, then invest in a quality squeegee. Use a drop of dish soap – yes, just a drop – in a gallon of water. Spread this mixture onto the glass windows then use the squeegee to remove the sudsy concoction.
You should be able to enjoy the clearest glass windows in no time.
Organize Cleaning Tools
Have all of your cleaning tools at arms-length. Doing so would mean you won’t have to walk from the cabinet to the area where you’re cleaning. Wear an apron also when you begin cleaning. Have a carpenter’s tool belt on the ready. Use cleaning clothes that have deep pockets.
Be Positive
Yes, positivity can help you finish faster. Be positive that you will be able to spot the areas that would require cleanup. Be positive that you will find the issues before they even require a cleanup.
A good cleanup will also ascertain that you won’t be having crawling pests. Clean up as soon as messes happen so that clutter will no longer pile up and you won’t have to worry about vermin at all.
In the process, you are guaranteed that your home’s building materials, as well as furniture and appliances, will have longer lives.
Tags: clutter removal, clutter-free home, decluttering, McCreerys, McCreerys Home Furnishings
Posted in Home Maintenance, Interior Design 101, Interior Design Elements | Comments Off on 5 Amazing Tips to a Spotless Sanctuary in Less Time
Thursday, September 21st, 2017
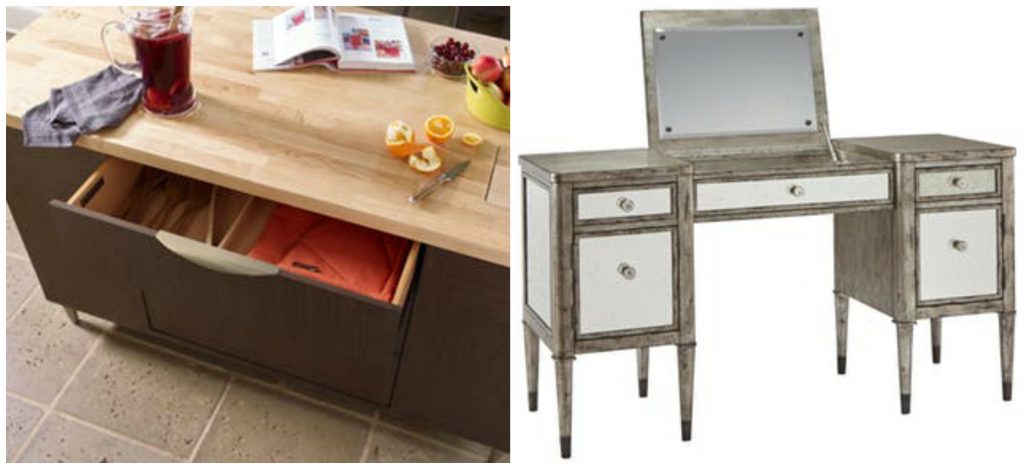
Wood furnishings must be well-maintained when used inside bathrooms or kitchens. From left to right: Rachael Ray Home by Legacy Classic Furniture Kitchen Island Top 6020-190-T and the Fine Furniture Design Bedroom Madeline Vanity 1586-138.
There are many decluttering and cleaning tasks that you can postpone but when your home is pestered by household molds, then you had better roll up your sleeves and see what needs to be done. Molds can cause a plethora of health issues and they can even destroy the place where they are growing on.
Molds are fungi spores that commonly float on air. They then cling to surfaces that are damp. There, they grow and then gradually consume the very surface where they have been residing at. The key to a mold-free environment is to do the cleaning even before molds take root.
More on Molds
Molds are able to produce allergens that cause allergic reactions in a few people. Some of the indicators include hay fever-like symptoms. What’s worse is that not all biocides or chemicals can kill molds. In fact, there are cleaners that are not able to annihilate the mold population and these end up causing more allergic reactions.
Apart from killing the mold, it pays to have them removed. Here are some cleanup tips –
Find Their Hideouts
The most common homes for molds include leaky plumbing, roofs, damaged floors, and even indoor humidity can lead to molds on your furnishings. Water and flood damages also often cause mold growth in just under 24 hours.
Just think of any place in your home where it is dark, damp, and unventilated and you already know the potential mold-forming zones. These are areas where water often travels including plumbing arteries, drains, crawl spaces, and walls that have plumbing from the ground bathroom to the bathrooms on the upper floors.
Mold Hot Spots
Regions that are also humid or damp tend to be the best spots for molds to grow. Arid areas are still not immune, though. Even buildings that you think are tightly sealed can still be improperly ventilated which can still cause moisture and eventual mold buildup.
Clean up cellars, basements, those areas behind or under your fridge, underneath the bathroom and kitchen sinks, behind walls, around your air-conditioning units, under your carpets, and around the window sills.
Mold can also go undetected behind wallpapers. Sometimes, it takes mold inspectors to find where they are hiding. Glue can actually act as a food source to molds.
What Is Mildew?
Mildew is a kind of fungi coating that forms on any damp surface. This generally grows in flat patterns and looks powdery gray or white.
Mold is much darker in color and is usually green or black. Unlike mildew that just grows on the surface, molds tend to take root and penetrate the surface where they’re at.
Time to Clean Up
If the mold buildup is on ceiling tiles, carpeting, wallpaper, drywall or any porous surface, then make sure that the item gets thrown right away. These materials make it impossible for you to totally remove the mold buildup especially when it has already taken root.
Molds also cultivate on the backside of your drywalls, also in wall cavities. Since this is so, it takes time before you see the problem on the surface.
DIY Mold Cleanup
Bleach. Mix a cup of bleach with ample water to concoct a gallon. Pour the solution to spray bottles and spray on those mold-infested areas. You can also use a cloth or sponge for your bleach solution.
Vinegar. Do not dilute. Use full-strength and spray onto the moldy surfaces. Wipe off with a clean cloth.
Baking soda. Make this baking ingredient your new best friend since it is renowned for its cleaning properties. For molds, mix half a teaspoon of baking soda with a gallon of water. Mix then scrub onto the moldy surface.
Rinse with water.
Tags: cleaning mold and mildew, McCreerys, McCreerys Home Furnishings, mold and mildew buildup, mold cleanup
Posted in Home Maintenance, Interior Design 101 | Comments Off on Say Goodbye to Molds: Your DIY Project
Wednesday, September 20th, 2017
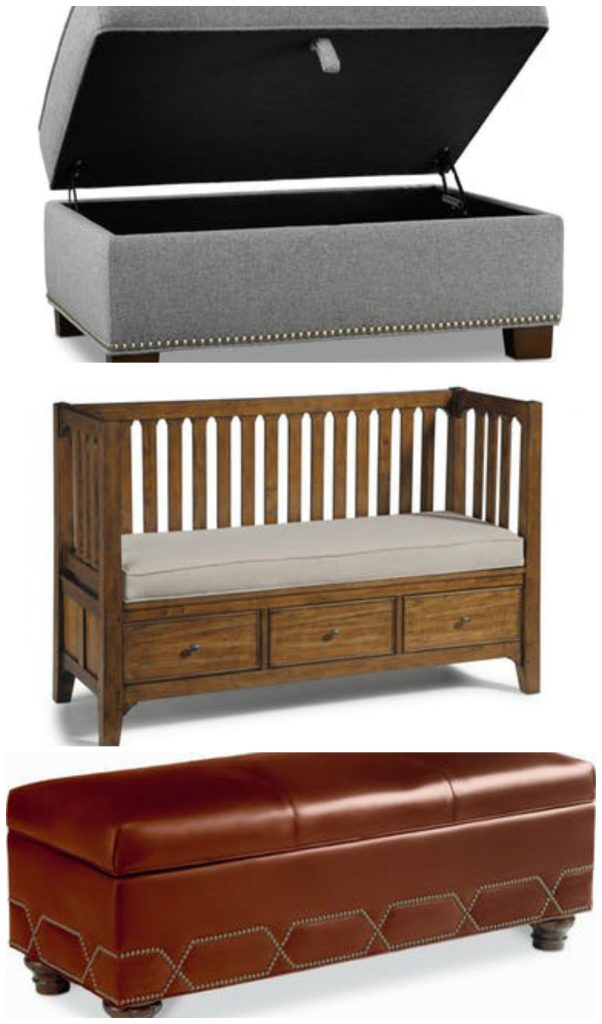
Top to bottom: Hooker Furniture Bedroom Nest Theory Storage Bench 101-94019; Flexsteel Living Room Storage Bench W1434-021S; and the Thomasville Living Room Sojourn Storage Bench HS1646 18ST.
Cleaning up mess is not – you must admit it – the easiest and most fun thing to do. Yet everyone loves a clutter-free space so you also know that it is something that you have to do one way or another. Finding the energy and time to do the project, though, is a totally different topic all together.
So what could you do to hasten decluttering so you can enjoy its benefits soon?
Match and Toss
Do you have a pile of Tupperware containers inside your cupboards? This is the time to pull them all out and to start matching the lids to their respective containers. Check for other items inside the dishwasher as well. Store the matched containers and lids and give away any excess pieces that no longer fit into the cupboards.
Stack the matched pieces neatly then go back to the containers that do not have lids. Have those pieces recycled.
Unload ‘Em
Your next 10-minute decluttering project is to dig into the fridge and look for those messy condiments which have been stuck there. These are those spices and condiments which you did not like but ended up storing anyway.
It’s time to unload the fridge and to let go of these bottles. For those that you decide to keep, just wipe the wipe the bottle bottoms with a wet sponge before you put them back in. If you have extra time, group the bottles according to taste – the sweet ones go together while the spicy ones have their own space inside your refrigerator.
Check the Utensils
Your third project is to check out the utensils in your kitchen. Do you use each item daily? Or are most just stored there and remain unused for many months now?
See if you really need all 15 of your spatulas or turners. If not – and frankly you really need one or two – then dispose of the others. If there are utensils that you want to still keep due to sentimental value, then just store them in a different bin. That spot near your stove should be reserved for the ones that you regularly use for cooking.
Oh, the Pen Mug
Yes. That mug where you store all of your pencils and pens. Check if all of your pens still have inks. And for those that are lying around in the kitchen, the dining room, or even the living room, it’s time to scoop them all up and place them inside that mug.
That mug should be their only home when they are not in use. If you have tons of pens, then you might want to give away or donate some of them. There are various non-profit organizations that would be more than happy to receive your lovely pens.
Organize the Socks
Now open your drawers and check out how the socks are stored. Pull out each pair, match the unmarried pieces and inspect each for holes and damages. Fold the matched pieces then return them in your drawer.
Before you decide to throw the unmatched pieces, try checking for their partners in your laundry area. Once you confirm that some do not have mates, then just put these pieces to your recycling bin. Once you have a mount, you can then find a textile recycler in your area where you can donate them.
Organize Shower and Laundry Supplies
Check your shower area then pull out all bottles of shampoos, shower gels, and such. Those that you use daily need to go to your shower caddy. The other bottles that are used less frequently can be stored in a drawer or a bathroom cabinet.
Give away the products or throw away the contents and have the bottles recycled. While you may think that you’re wasting resources, think again. Instead of taking up valuable space in your cabinet, just let them go.
Do the same with your laundry detergents and stain removers.
Tags: declutter, decluttering, decluttering tips, DIY decluttering tips, McCreerys, McCreerys Home Furnishings
Posted in Home Maintenance, Interior Design 101 | Comments Off on Decluttering Tasks in Under 10 Minutes
Sunday, July 9th, 2017

The Hooker Furniture Bedroom Fair Oaks King Upholstered Bed sits beautifully on the lush bedroom carpet and a unique area rug just on its side.
Carpets have come a long way from the time when woven wool was used in the 1700s. Thanks to the power loom of Erastus Bigelow, the world has now more woven carpets to enjoy.
If you haven’t decided to use a carpet yet, it would be best to take a look at the benefits. Primarily carpets are used to protect the surface of your flooring. Whether you decided to have wood or stone installed, your flooring needs all the protection that it can get. Having a carpet does not just beautify the place but also helps it protect your feet and the flooring from having more scuffs and dents.
There are literally thousands of carpet designs and colors in the market. Your ultimate choice, therefore, should represent who you are and what truly personalizes the living space.
The carpet can serve as a neutral foundation or if it’s interesting enough, it can also serve as the focal point. If you choose to do the latter, make sure that you pick a carpet with bolder patterns, interesting texture, and brighter color.
Did you also know that studies have proven how people with asthma or other allergy problems have improved symptoms when the carpet was installed in their homes? This means that carpeting can also improve the indoor air quality.
The newest carpets have low VOC-emissions. They act as passive air filters that can trap pollen, dust and other harmful particles. These are then removed from the breathing zone.
Of course, carpets also provide warmth and comfort. They also soften one’s fall or slip as they are also the best cushions for your feet.
Last but not the least among carpet benefits is noise reduction. Just imagine all the speaker phones, TVs, and modern sound systems in your home. Without carpeting, the sounds that these create will not be reduced.

Capel Incorporated Floor Coverings Biltmore Select Bidjar Rug 1773RS Regal Blue
Professional Carpet Cleaning Tips
Despite your family’s best efforts to clean up after spills, accidents, and drops, the carpet will eventually succumb to damages. If you want to clean up your carpet in ways that professionals do, then learn some tips –
Let the solution sit for about 10 to 15 minutes. A sponge could then be used to soak up the liquid. As soon as the stain is gone, be sure to rinse the previously stained spot with warm water.
Cap your carpet cleaning with shaving cream by spraying the area further with a mixture of one part of water and one part of vinegar. Again, using a clean cloth, wipe away the solution.
Tags: carpet, carpet cleaning, carpet maintenance, McCreerys, McCreerys Home Furnishings
Posted in Flooring Design, Home Maintenance, Interior Design 101, Interior Design Elements | Comments Off on Carpet Appreciation and Maintenance
Thursday, July 6th, 2017
(The Last of a Six-Part Series)
The perfectly painted walls served as the beautiful backdrop for this Hooker Furniture Bedroom Woodcreek King Mansion Bed.
Painting your home’s walls is the most basic way to freshen up your entire place. This can be a tricky task, though, as it can just as easily turn into a nightmare. Here are some tips on how you can keep your sanity as you try to update the look of your home –
Practice and Be Patient
Interior house painting is a very popular DIY (do-it-yourself) activity. With this said, you can have this become a home activity or a project with your friends or office buddies. There isn’t a more affordable way to freshen up a home than to put on a new coat of paint together with your friends.
Painting is not difficult, in fact, you don’t need to have specialized training just to be able to do it. Any person who is able-bodied should be able to paint a room but you must have a bit of practice prior to the real project. Also, you need a lot of patience in order to finish the task.
Surface Prep
Successful paint jobs are successful because they began correctly. You need to properly prepare the surfaces that you are going to paint. This means you will have to sand, scrape, patch and then fill each hole that you could find.
Search also for dents, cracks and surface imperfections. This is not the fun part of your painting activity, in fact, it can be the most tedious part though it is a crucial part that you cannot ignore.
No amount of paint, no matter how pricey, will hide a cracked or pockmarked surface. Don’t think also that a thick coat will be able to hide imperfections – it won’t. It will only highlight the unprepared surfaces.
Primer Tinting
Priming the walls and ceilings is also mandatory when you need to paint over a wall with a darker color or a new drywall.
‘Wanna know why it is smart to first prime before you paint any wall surface?
Primer paint serves as a blocking stain from bleed through. It also allows a single-coat coverage for your main paint and, most importantly, it lets the paint adhere more, thus, peeling and blisters are greatly reduced.
A professional painter will tint right to the finished color. He does this by mixing topcoat paint to the primer. This will enhance the hiding capability of the top coat on the primed surface.
There are also paint nowadays that have primers. Nothing can cover as well as a dedicated primer, though.
Choose Canvas Over Plastic
Drop cloths are always plastic – you may have heard this a lot from your friends and relatives who finished their painting projects. While canvas is more expensive, it is better to have it because it is rip-resistant and highly durable.
Canvas also absorbs paint drips more than plastic cloths which can even contribute to accidents when the drips cause a slip.
Use an Extension Pole
Where needed, that is. Don’t risk using the stepladder, instead, invest in a telescoping extension pole. There are some that are even 18 feet long which can extend to 36 inches when fully extended.
Look for one that has that nonslip grip and metal core.
When You’re Done Painting
Once you’re done painting for the day, but would still need a few more surfaces the day after, be sure to roll off excess paint then wrap the brushes with food wrap. Double up so that you will seal off air completely.
This actually works in keeping the paint from drying off, thus, it would save you a lot of time from laborious cleaning of paint brushes.
The next day, remove the plastic wrap and you’re good to continue.
Tags: home painting, McCreerys, McCreerys Home Furnishings, painting, painting advice, painting guidelines, painting tips, wall painting
Posted in Color Schemes, Home Maintenance, Interior Design 101 | Comments Off on Color 101: Handy Paint Guidelines for Walls
Tuesday, June 13th, 2017

Cynthia Rowley Rivington 3-Over-3 Sofa is deliciously summer.
Heat brings about humidity, grime and dust. All these nobody wants so why not engage in summer cleaning? This task does not have to be a drag. You can actually have some fun while doing it.
But how?
Use Leftover Cleaning Agents
Now whoever said you have to buy expensive chemicals just so you can get the dirt off surfaces? Half a lemon that’s been left over dinner can be used to clean up faucets and stainless steel fixtures. You can also use this to get the grime off the grill.
Using a wire brush, rub the lemon juice onto the still warm grill. For major mess, use oven cleaner so you can attach the grime and food bits.
The grill isn’t the only thing that you can clean up using leftovers. You can also use full fat mayonnaise for those stubborn water rings left by some of your guests. Instead of hating that particular guest forever, just apply some mayonnaise onto the area. Let it sit for an hour before you wipe it off with a clean cloth.
Eliminate Mold and Mildew
Your washing machine could smell awful during the summer because it could get really humid. To prevent this from happening, use hot water and detergent and run an empty load. This should get rid of the awful smell. Just be sure to leave the washing machine door ajar so that it will dry properly.
As much as you can, try getting rid of mold and mildew using natural means. You would be surprised to find out that you already have some of the cleaning agents right inside your kitchen.
Vinegar, when diluted with water, can cut any pungent odor. It is also a natural mold killer when it is sprayed directly to the moldy area. Just leave the vinegar for a few hours then scrub using a clean brush.
If vinegar odor offends you, then use a few drops of essential oil to overcome the powerful scent.
Tea tree oil is also an effective mold eliminator. This may be more expensive than most green remedies but you would just need two teaspoons of this oil mixed with two cups water so it is actually relative. Spray this solution to the affected area but don’t wipe off or rinse.
Baking soda is another natural kitchen ingredient that you can use get rid of mold and mildew. Use it with water or water and vinegar. Spray the solution onto the moldy surface, let sit then scrub using a damp cloth.
Divide Your Work
Instead of tackling your cleaning in just one day, why not divide your summer cleanup to a number of days. You can spread the cleaning throughout the weeks and among different family members. This is so everyone will feel that they did their share of cleaning.
As a family, you can also set a goal to have a clutter-free home during the summer. Remember that having more stuff than needed means having more things where dust can accumulate.
Have the kids say yes to dusting during this season. Encourage even the preschoolers to take part. Ask them to put their laundry into the hamper and also to store their playthings once they’re done playing.
Never be sidetracked. Allow the voicemail to take your call while you’re still halfway through with your living room cleanup. Answer the call or email once you’re done with what you were initially doing.
Always make it a group project so that the cleaning will become fun rather than a burden.
Keep Dirt at Bay
One effective way to keep dust, dirt and sand away from your home is to have people remove their shoes right before they enter your home. Invest in a thick doormat that is also gentle on your feet.
Tags: McCreerys, McCreerys Home Furnishings, summer cleaning, summer cleaning tips, summer cleanup
Posted in Home Maintenance, Interior Design 101, Summer Season | Comments Off on Summer Cleaning (Coz You Missed Spring Cleaning)
Follow us on our social media
© McCreery's Home Furnishings | All Rights Reserved | Privacy Policy