- Follow us:


Tuesday, October 16th, 2018
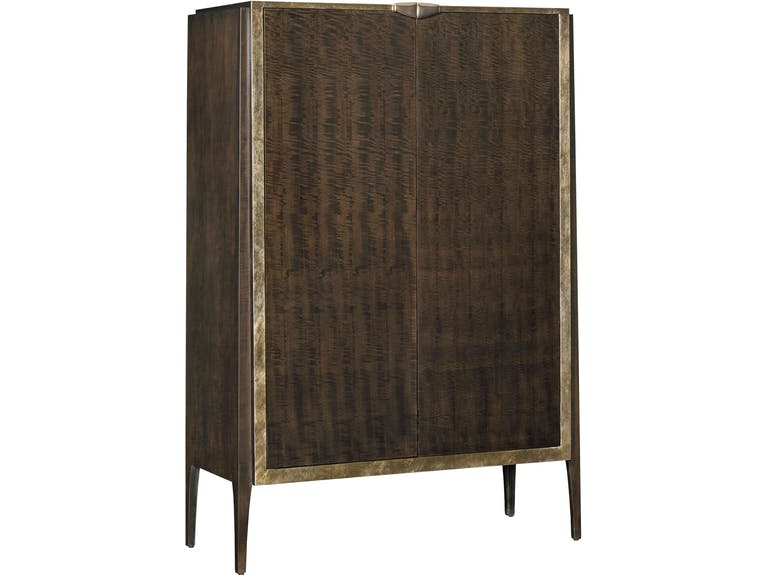
Fine Furniture Design Living Room Le Vestiaire Shoe Cabinet 1680-990S
Unlike an entryway that’s seen by family members and guests, a mudroom is often a space that’s designed with a secondary entrance. A lot of the older homes do not have this small room but it is one space that more and more homeowners view to be a hardworking space.
A mudroom can help keep a house organized and clean. It is also a spot that’s set up for efficiency. So, are you aching to know what its purpose is?
Consider the mudroom as a transitory space between the indoor and the outdoors. Its main function is to hold – in an organized fashion – the wet clothes, footwear, and sports gears.
Mudrooms have been around for many decades now although they just became more popular as American homes grew ever larger. With the rooms becoming ever bigger, there was a need to create more than an entryway. Now, there’s a need for storage areas for the above-mentioned stuff.
Mudroom Benefits
Yes, there are a lot of benefits in setting up a mudroom. First, it is an amazing way to boost your home’s aesthetics. And it doesn’t just make your home appear fashionable, it also comes with a lot of functions.
Yes, the mudroom is a dedicated storage zone. And you know very well by now that keeping one’s sanity in terms of a clean home means having ample storage. A home can never have too much of storage units.
A mudroom is also there for convenience. Just imagine, you won’t have to open closets anymore since there are multiple hooks already in place and there are also some open shelves where you can place millineries, scarves, and even shoes. This is especially handy when there are kids who are too lazy to open closets just to hang a coat.
Mudroom equals neatness, too. Just think of all the stuff that you no longer have to take into the living room with you anymore. Your home will surely look a lot neater with a mudroom already set up. Say goodbye to picking stuff up from behind the couch.
Now don’t think that mudrooms are just for bigger homes. Even smaller homes will surely benefit from them. Since these rooms are built especially for storage, then it is the perfect organizational zone even for a tiny home.
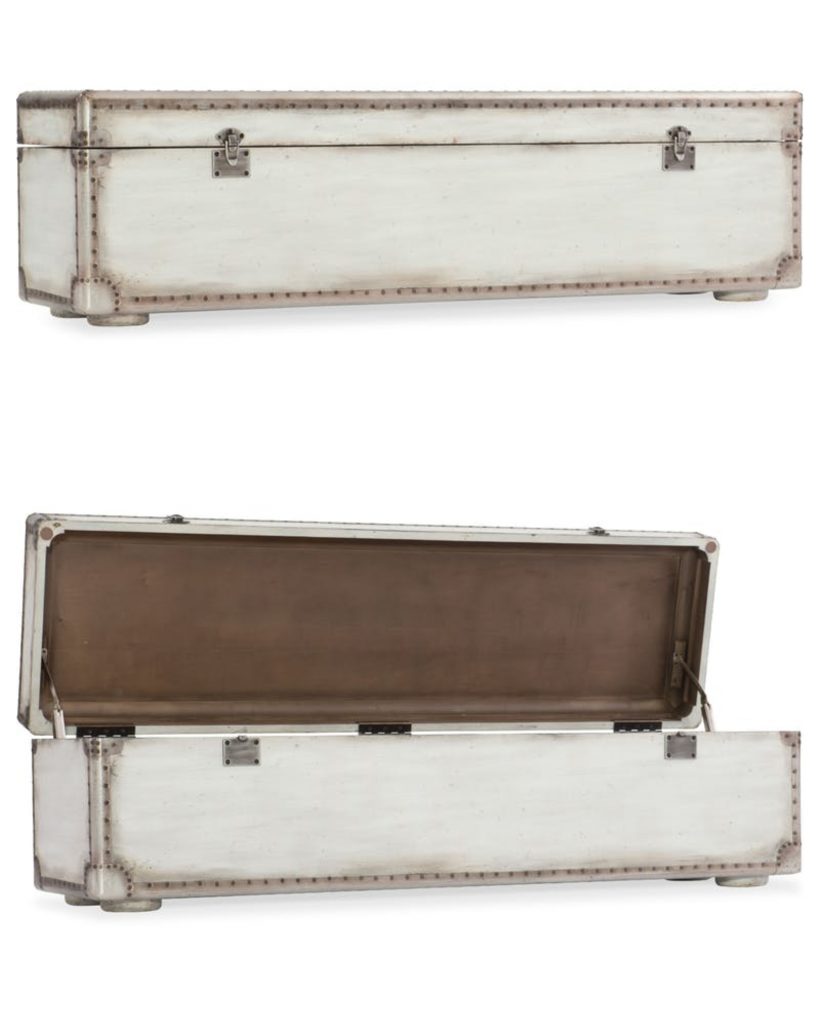
A bench or thisHooker Furniture Bedroom Beaumont Dressing Chest. The latter offers more with its spacious storage.
Mudroom Storage Ideas
First, it is always best to have a couple (or more) of shelves in that spot. These are the perfect alternative to closets. Of course, you can always go for the traditional look by installing a huge closet that will provide a room for the utilities, sports equipment, out-of-season clothing, cleaning supplies, and other miscellaneous items.
Go for the ultimate mudroom by setting up lockers. Just imagine having a locker for every family member – it’s sublime. Remember to put low storage for the shoes.
Hooks and racks are also great spots to put your umbrellas, hats, coats, scarves, and just about everything that you can hang. Actually, homeowners who do not have a dedicated mudroom yet often begin small by installing rows of hooks and racks. These help in maximizing the wall space.
Another furniture that you need to have in the mudroom is a bench. This is the first thing that you will sit in when you come from work or school. This is that spot where you actually take off your shoes so it has to have a welcoming feel.
If you want to go all out on your mudroom, then why not set up laundry machines and a sink there? These are useful for cleaning up, washing off, and organizing the rest of your stuff.
Just remember to install proper plumbing and you’re good to go.
Tags: McCreerys, McCreerys Home Furnishings, mudroom, mudroom design, mudroom design elements, mudroom essentials, mudroom furnishings
Posted in Interior Design 101, Interior Design Elements, Special Rooms In Your Home | Comments Off on What’s a Mudroom?
Monday, October 15th, 2018
Whether that alcove in your home is that living room nook or that kitchen corner, that tricky area can actually help maximize any living space. You might not have given this tiny space much thought when you moved in but now that you see this unused area everyday, it’s just right to begin planning how to utilize it.
An alcove is often associated with period homes. These are often that space created when a chimney breast juts out of the center of a room. More often than not, these spaces are merely used as storage space – and there is nothing wrong with that. However, there is much more that you can do with an alcove.
This isn’t just the alcove that you might find in a home, neither is storage the only way to make sense of this extra area. Those awkward corners and that area under the stairs (yup, brings to mind Mr. Harry Potter) are all spaces that might have existed because of extensions or renovations.
Rather than ignore these spaces, though, it’s high time to get over the tricky part of the design process and to start the repurposing project.
Here are just some of the exciting ways to make smarter use of an alcove –
A Sleeping Nook
Alcoves can be hard to furnish especially when it creates a deep recess. If you prefer a more contemporary look, you can always go for a bed complete with overhead shelves. These shelves will house the extra bedding especially for that spot.
Use a wall sconce to illuminate this special zone.
Display ‘Em Books
One of the best go-to solutions when making sense of a living room alcove is to create a mini library in that nook. Just set up a small cabinet, shelves or a set of drawers and you already have a special spot where you can enjoy the latest novels.
Why Not a Dresser?
You can also measure up the spot for a nice dresser. The sky’s the limit in terms of choosing a dresser that you can use in that bedroom alcove. If you can even fit nicely into this alcove, then just set up a divider and it could easily become your dressing area.
Homework Zone
If you happen to have the fusion of a fireplace and a bay window, then you won’t be having any more difficulties in creating a special nook. This can be your work area and you won’t even have to worry about getting ample light because you’ll get all the natural light that you need.
Just take these Humphrey Bogart reading nook pieces. The red desk is all you’ll need to make this small space a noticeable part of the living room. Pair it with a neutral chair and you’ve created the perfect nook ensemble.
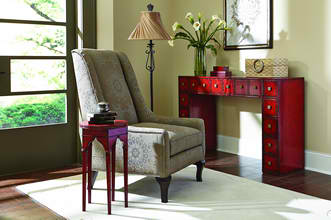
This traditional chair and accent table from Fine Furniture Design’s Humphrey Bogart collection will surely beautify that living room alcove.
Your Special Pastime Zone
You can still go for the traditional look by setting up a dedicated space especially for your hobby. That could become your knitting or sewing corner. It can also be the nook where you’ll place your vinyl record collection. Just add a lovely turntable, a plush chair, and a console table or desk and it’s the perfect spot to listen to your fave songs.
The Art Alcove
Another awesome way to make good use of that spot is to put a statement artwork there. You can even create your own gallery where you can hang multiple family pictures. Or you can just be bold and hang one piece that will surely be the focal point of the room.
So who says that alcoves are merely for storage? Now, you can create the look that you want with the functions that you need. All these smart designs should finally make sense of that long unused alcove.
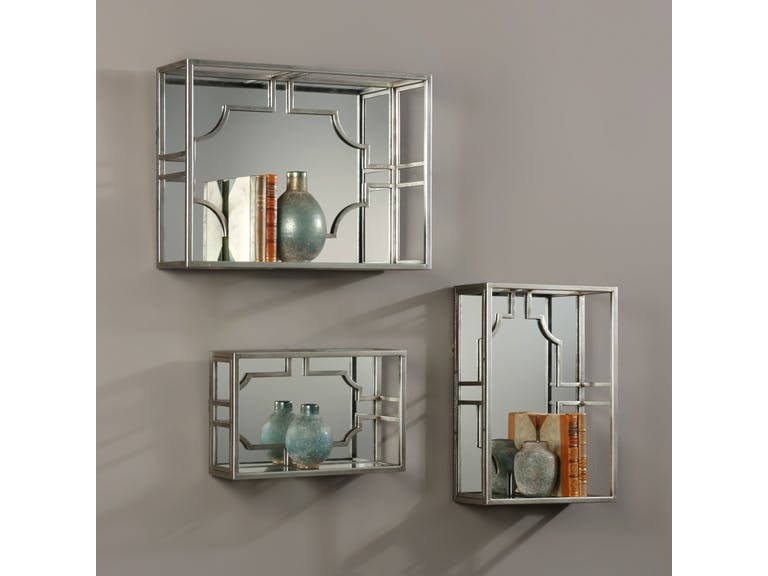
The Uttermost Accessories Adoria Silver Wall Shelves 04113 come in sets of three. Just imagine how these will look in your living room or bedroom alcove.
Tags: alcove, alcove design, designing the alcove, McCreerys, McCreerys Home Furnishings, utilizing the alcove
Posted in Accents, Accessories, Interior Design 101, Interior Design Elements | Comments Off on 6 Ways to Make Sense of An Alcove
Saturday, October 13th, 2018
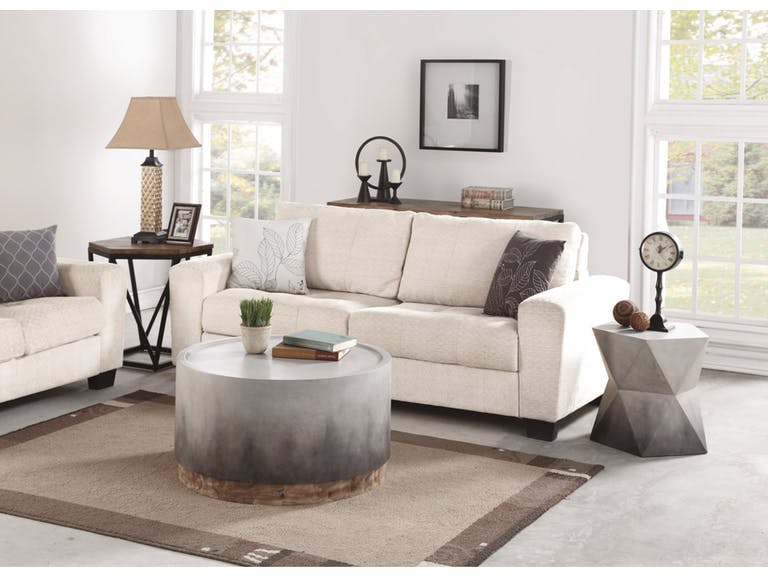
Flexsteel Living Room Round Coffee Table W1455-034 comes with a subtle ombre hue.
Ombre is less laidback than tie-dye. This graduated color technique has recently swept the world of baking, fashion, even home design. But there is a whole lot more to this trendy element that makes designers want to find ways to use it around the home.
The Ombre History
The term ombre came from the French word ombrer, meaning, to shade. The Italian equivalent of the word is umbra or ombrare which means shadow or to shade. The Merriam and Webster dictionary defines this term as the colors that “shade into each other”.
Martha Stewart once shared that ombre is actually an offshoot of a European weaving process. This was evident in pre-Civil war adornments as well as their furniture, quilts, textiles, trims, and ribbons during that time. The Victorian era, in particular, celebrated this color and, in recent history, specifically in the ‘70s, disco wear was flooded with this amazing color.
Recently, ombre has re-emerged in hairstyles, the catwalk, and majority of home décor elements. Still, the ancient art form is clearly visible but with a fresh twist.
Interior Design Uses
In textile history, weaving and fabrics use ombre as a means or technique to gradually add color starting from light then going darker. This is considered an art form because it is flexible that there is no right or wrong way to display it.
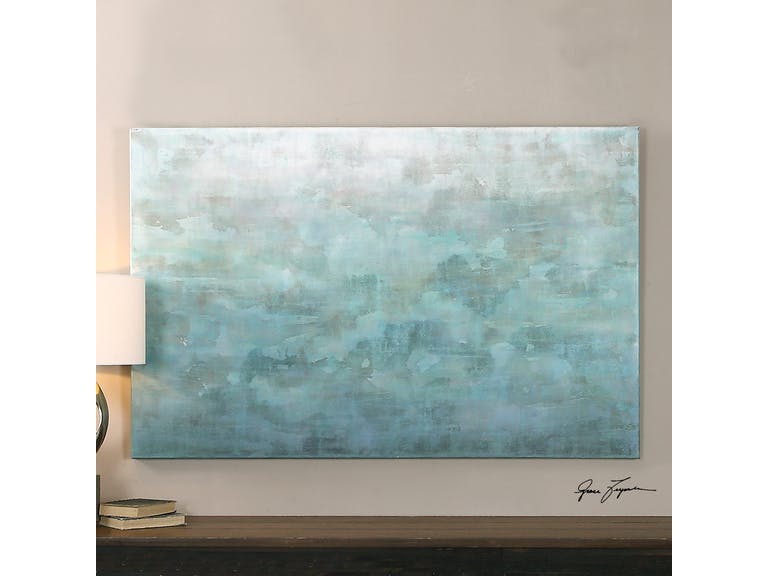
Uttermost Accessories Frosted Landscape Modern Art 35325
Refined Tie-Dye
Ombre is often mistaken as a variety of tie-dye. Anyone who uses it is seen as Bohemian, effortless or casual.
Ombre, when used in interior design, is not just limited to fabrics. With its recent popularity, it has also translated to other media like tiles, paint, and every possible design element throughout the home. The rooms where ombre is used in range from the living room to the bathroom, the dining areas, and even the bedroom.
The choices for ombre are almost limitless. It can be elegant and sophisticated while also simply beautiful. It depends how you would like to use ombre in your home. If you wish it to be something dramatic and bold, then use it on the draperies.
You can also ombre paint the furniture, or set up a bedding with ombre colors. You can also choose to have an ombre lamp, pillows, rugs, and pillowcases. Even the smallest accessories can have a touch of ombre.
The Ombre Playroom
Ombre is an exciting color that you can use inside your little one’s playroom. Let’s go traditional on this one, use blue for your little boy and graduation of pink in your little princess’ room.
You can hire a professional house painter to do this project for you. He can have the free reign and experiment on the tints of pink or blue or you can go ahead and experiment with other hues.
The Graduated Tiles
You can also have fun with ombre in the bathroom. Use four or even more tile hues from the same color family to make stripes. A sharp delineation of the varying hues is a modern take on ombre. Still, the graduated effect will always be there.
Many interior designers are now looking into even more ways of using ombre. It can easily take the shape of an interesting ink spill or it can make the ceiling an exciting surface when ombre blends two colors in blue and pink.
And if you’re feeling up to it, you can even ombre dye your own stuff. You can go as bold as you want or you can go simple. An ombre bedding can also be made using the dip-dye technique. You can also dip-dye baskets and even small accessories.
Tags: McCreerys, McCreerys Home Furnishings, ombre, ombre interior design, ombre uses
Posted in Color Schemes, Interior Design 101, Interior Design Elements | Comments Off on The Cool Ombre Effect
Friday, October 12th, 2018

Hooker Furniture Living Room Amani Round Cocktail Table: The design elements in this room look perfect because of the equally perfect flooring.
An uneven floor is oftentimes difficult to notice. Sometimes, what led homeowners to discover that they have uneven flooring are when they place a ball on the floor and then it rolls away on the sloped surface.
The sloping problem happens when the house’s foundation sunk or has settled unevenly. This is not a common problem but it is one that will surely cause you a lot of headaches if it were not corrected right away.
You don’t have to bear with this problem forever. In fact, you need to ask yourself these questions and fast –
Once you notice that your floor is already sloping, it is best to get your home inspected. Have the foundation, basement, slabs, and even the crawling spaces inspected for signs of failure.
Here are some of the telltale signs that your home has foundation issues –
Sloping Causes
Settlement can sometimes occur unevenly. This will lead to sloping where the building goes through a downward movement. The original position of the structure has sunk below that level. The soil can move, shift or be compacted because of many issues such as
Weak soil. This is when the soil beneath and all around the house should be capable of bearing the weight of the entire structure, and yet, it gives in to the weightiness.
Loose soil. This is the soil that was poorly compacted when the house was still being built. It can also be that it gave in to the structural load above it. As this happens, the signs are often sloping or cracked flooring.
Soil consolidation. At times, the weight of the structure compresses the new soil so that the weaker soil, often clay, sinks ever deeper.
Moisture changes on the soil. It can also happen that the soil beneath the foundation is exposed to moisture. The foundation then causes soil shrinkage and a lack of foundational support.
The Solutions
An uneven or sloping floor is the most obvious sign that your foundation has a serious issue. Your next step should be to get in touch with a foundation repair specialist. This expert will help you check and thoroughly inspect the foundation. He will also recommend the right solutions as he quotes the budget that you’ll eventually allocate.
There are no DIY projects for sloping floor surfaces. Sometimes, the specialist would recommend steel push piers installation. These can be installed below the foundation so that added support is given. The floor also evens out so it becomes strengthened and straightened in the process.
The other option is to use hydraulic piers. These are installed then lifted using a hydraulic equipment. Either one of these piers will surely add strength and support to your home. In the process, they also restore if not add value to your property.
You can also go for the temporary solutions while waiting for the expertise of a flooring specialist. You can begin combating the uneven flooring issues by initially adding feet to your furniture. Also referred to as furniture levelers, these can be bought in any hardware store or even online. These dual-threaded brass screws are inserted into the foot of the furniture. One component goes to each foot. A pilot hole can also be power drilled to accommodate these. Felt pads can also be attached to the bottom so that there won’t be any scratching.
Tags: floor care, floor maintenance, flooring, McCreerys, McCreerys Home Furnishings, uneven flooring, uneven flooring solutions
Posted in Flooring Design, Interior Design 101, Interior Design Elements | Comments Off on Uneven Flooring No More
Thursday, October 11th, 2018
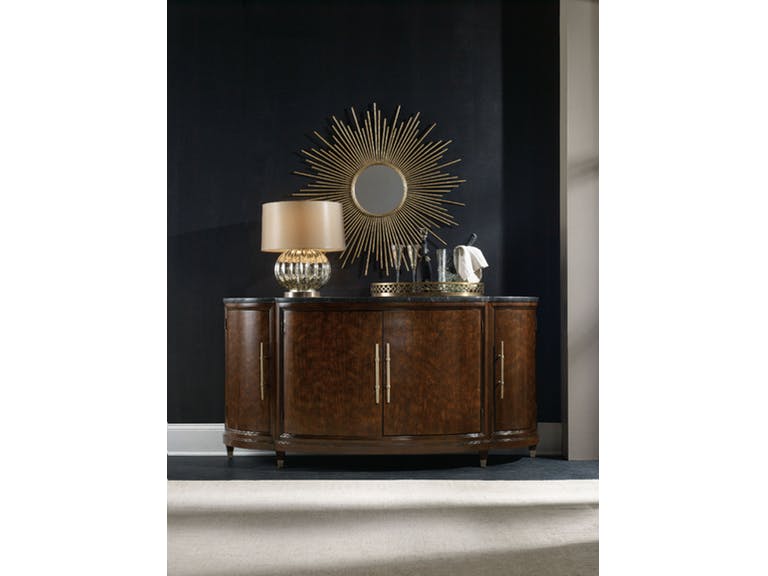
The Hooker Furniture Dining Room Skyline Server comes with a granite countertop.
Granite, as every homeowner would admit, can be a big deal when it comes to cleanups. Actually, if you take a closer look at it, it was just misinterpreted as a high maintenance material. But cleaning it can be a breeze if you know the correct steps and cleaning methods to employ.
Granite Countertop Cleanup
The right knowledge is key to proper cleanup. Don’t listen to all the confusing pieces of advice that you’ve been hearing about granite countertops. Some are, of course, spot on, but there are also those that are merely mythical.
Majority of the incorrect pieces of advice are because of generalizations. Some lack proper understanding, while others simply misinterpreting what should have been correct methods.
It is easy to be confused or even be frustrated. But don’t worry about countertop damage for now. What you need to do is to learn the ways that, from now on, you can care for your granite kitchen countertops or furniture with ease.
Granite Is Stone
Don’t experiment with the methods so you avoid the potential hassles, pitfalls, and headaches. Keep in mind that the granite flooring, counters or furniture are all made of stone. You are practically dealing with stone, the same kind that the Egyptian pyramids of old as well as the Roman Colosseum are made of.
Granite is a potential material that can last and even outlive you by hundreds if not thousands of years. This is evident in all the pyramids that have been previously erected. These are resilient and have even aged beautifully.
While these are so, stone is still just stone and it can also be damaged. The key to granite care now is to keep damages at bay, although, granite repair is also now possible. There is no special talent needed to clean this stone material. You can do this.
To Seal Granite, Or Not
Generally, every natural stone must be sealed. But before you do this, take note that there are some exceptions. There are some granite pieces that no longer require sealing.
There is still so much confusion when it comes to granite sealing. First, how does one know if the granite on hand needs to be sealed? How should this be sealed? What granite sealer is right for the slab that you have? How frequently should granite be resealed?
The Do’s and Don’t’s
There are bad habits that you might do which could result in limestone, marble, travertine, quartz, soapstone, or even granite damage.
Do blot the spills right away especially for acidic substances like fruit juices, wine, coffee, tomato sauce, and many types of sodas. These might not cause etching as they would do with marble but they could stain the granite surface.
You also need to clean the surface with a soft cloth or a sponge. Use granite or natural stone cleaner. Hot water can also be used for quick cleanups. Do not repeatedly use dish soap because it could make the granite surface duller. While dish soap can be used sporadically, it might strip the countertop of its lovely shine if you keep using it so it is best to use another cleaner.
Use coasters under all of your bottles, glasses, and those cold soda cans. While granite won’t etch, it is good practice to use coasters to prevent mishaps.
Hot pans and pots should have trivets underneath them. Doing so will keep the granite from having thermal shock. Cracking may be rare but it is best to keep this possibility at bay.
If the damage does happen, don’t fret. Granite damages can now be repaired although, of course, it is best to prevent them from happening in the first place.
Tags: granite, granite care, granite maintenance, McCreerys, McCreerys Home Furnishings
Posted in Home Maintenance, Interior Design 101, Interior Design Elements | Comments Off on Easy Granite Care Made Possible
Wednesday, October 10th, 2018
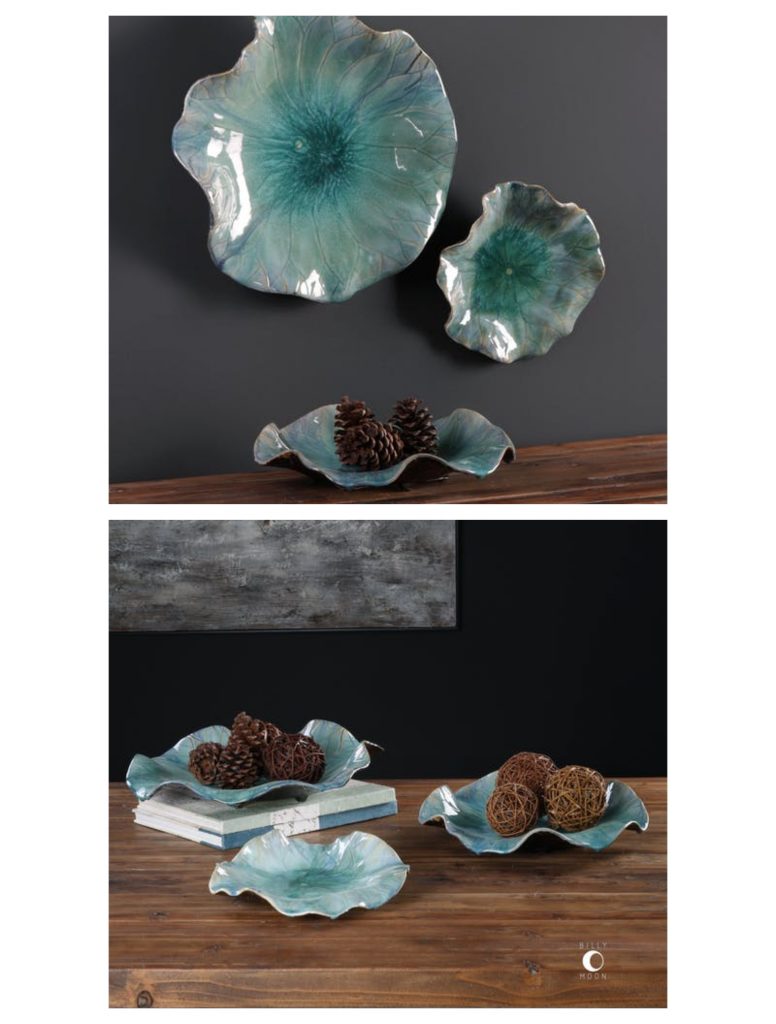
Uttermost Accessories Abella Ceramic Flowers, Set of three, 04100.
Fall is a season that gives people a chance to take it slow and to enjoy the fruits of their hard work. As the nights lengthen and the days grow ever shorter, we tend to desire to create a balance between our indoor and outdoor lives. If you’re feeling that a particular aspect is eating your life, then this is the time to do some Feng Shui.
Here are some suggestions that can help you transition smoothly to the colder seasons –
Increase the Flower Power
What could be an even more awesome power or energy during fall than to harness the beauty of marigolds, chrysanthemums, and the equally colorful nasturtiums? These are the kinds of colors that will make you feel better when you’re feeling stressed or burdened by something.
Just imagine the golds, oranges, reds, and greens that beautifully mix to give you’re the soothing effects that you would need after a long day at work or at school.
Harness the Flow
Have you ever thought of adding a water element to your home? Having a fountain will give you that welcoming sight when you come home from a hectic day at the office. Wouldn’t it be nice to hear the sound of flowing water after spending hours in a traffic jam? This sound can also appease your nerves especially when you want to sleep more soundly at night.
Lights: Lower the Notch Please
It’s time to change those bright light bulbs and have them replaced with low-watt ones. Summer was a time to be active and to frolic in the sun but those days are long over. Now that fall is here, it’s time to slow things down a bit and to soften your home’s lighting as well.
With dimmed lights, you can better enjoy a cup of tea in the afternoon or listen to soft music prior to going to bed.
Feng Shui Your Social Life
Yes, you read that one correctly. If you want to transition peacefully to fall and eventually to the colder months of winter, it is best that you do not only declutter physically but also socially.
A good way to begin is to remove all the things that deplete your energy. If you have to update your address book as well as your online friends, then do so. You don’t have to tolerate intolerable people.
Move, Move, Move
If you’re still feeling energized from summer’s activities, then you can harness the power of Feng Shui to help you adjust. Just reposition 27 elements in your place. The Chinese believe that nine is the number representing longevity and when you multiply that thrice, then you get the number representing growth.
The number 27 is an auspicious number that will bring about many positive changes in your life.
Be Inspired
If you’re one of those people who have a hard time disconnecting from the business and hustle and bustle of modern life, then you have to learn to lift your thoughts to a much higher level.
You can do this visually by putting a lovely vase right where you normally rest your eyes when you are in your bedroom or you can also hang a wall painting that evokes peace and harmony onto your entryway.
If these don’t work for you, then set up a special spot where you can meditate when the time permits. A yoga room should be far from the busiest parts of your home such as the dining room, kitchen, and the living room. Ideally, it should be neighbors with your bedroom.
Lastly, you can also create boundaries such as shielding the home office desk with a group of potted plants or hang a curtain between the home office and the bedroom so that there’s a distinction between these zones.
Tags: McCreerys, McCreerys Home Furnishings
Posted in 2018 Trends | Comments Off on Fall 2018 Feng Shui
Tuesday, October 9th, 2018
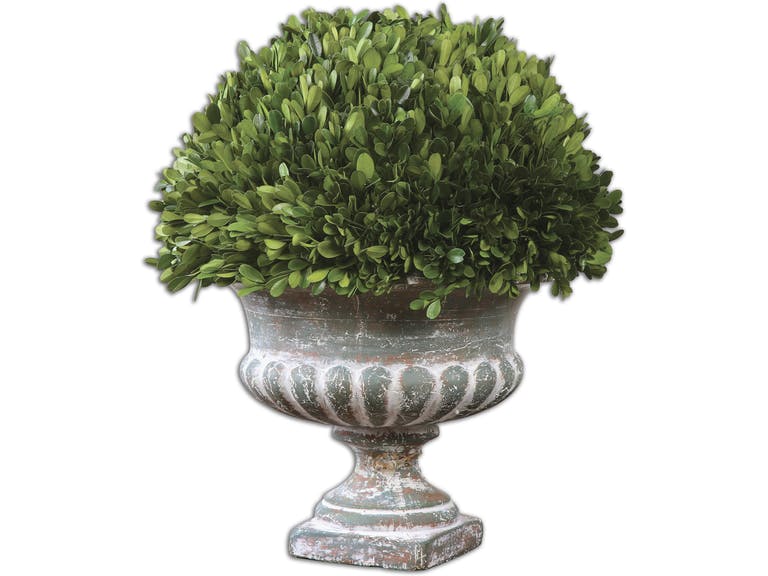
Uttermost Accessories Preserved Boxwood Garden Urn 60113
Spring is a wonderful season to tend the garden but fall is equally beneficial for starting to take care of plants. Shrubs, turf grass, cool-season veggies, spring-blooming bulb, trees, and perennials can also be planted during fall.
There are actually some benefits if you do decide to plant during fall. Autumn offers a cooler temperature so it becomes easy for the gardener as well as the plants. During this time, the soil is also warm but just enough so the plants can grow up until the season when the ground finally freezes.
Fall also offers better days for planting when compared to spring. Yes, believe it or not, plants don’t seem to grow on spring until the soil becomes warmer so gardeners frantically plant during spring than on fall.
Fall also comes with rain showers. Diseases and pests also tend to fade away during this season. There is also less need to use fertilizer since these problems do not occur during the colder seasons.
Be sure to take note of the window for planting during fall. It should end at about six weeks prior to when the hard frost sets in, normally, in September or the month of October.
Just so we’re clear, let’s put here the reasons why you should schedule your gardening activities mostly on fall –
The Cool Weather
Just imagine the cool mornings – can you picture yourself gardening under this cool and easy weather? The coolness then becomes warmer during the afternoons and then the nights are capped with an equally cool weather.
Notice also the rushing bees and butterflies that are all out to gather nectar and pollen. You don’t just garden without sweating profusely, you also get to enjoy Mother Nature’s scenic presentations.
Less Maintenance
What do you notice if you begin gardening during summer? You end up spending more time to water your plants, right? Looking after your flowering babies and your vegetable patches becomes more tedious as the heat also increases.
With fall planting, you can water the potted plants just a few hours prior to digging then you just put them in the ground (such as in the case of perennials). As for trees and shrubs, you water the soil in the newly dug up hole then put in the root ball.
You Get a Bird’s Eye View
Of course, you need to understand that the garden will insulate itself come winter so plant enough to help the garden stay alive. The trees and shrubberies that you planted during fall will help in protecting your garden from drying up. You will also get a better view of the gaps between each of the plants.
Fall is the time to plant in the bald spots while all the leaves and mosquitoes are on leave. This is the season when you have a better view of the ground. If you live in the higher regions, then be sure to dig during August through September. For the coastal areas as well as the Southern regions, you have until December to do your gardening tasks.
The Smaller the Better
You can save energy and money by investing in smaller plants. Buy plugs and three-inch pots. You can also invest in trees plated in gallon containers. Getting plants like these will not only make your fall planting easier but you will also keep the plant from having transplant shock. Buy a bigger specie and you’d know what we mean.
What to Plant
Every spring-blooming bulb needs a dormancy period in order to fully bloom. Know that plants tend to bulb during fall so that they can spring forth in…well…spring. If you don’t want to worry about critters eating up your plants, then include any of the following –
Tags: fall gardening, McCreerys, McCreerys Home Furnishings
Posted in Fall Season, Outdoors Style | Comments Off on The Benefits of Fall Planting
Saturday, October 6th, 2018
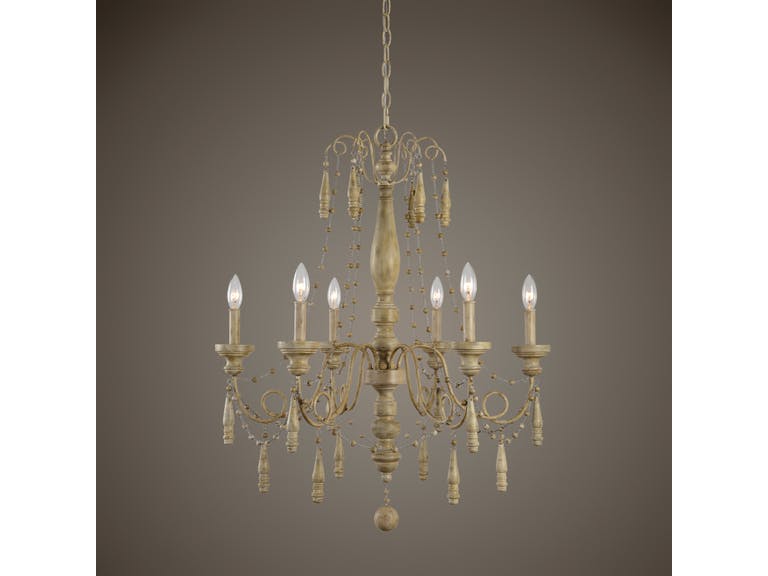
Uttermost Lamps and Lighting Marinot, 12Lt. Chandelier 21298
If you’ve recently redecorated your home and the project involved stripping the walls of old wallpaper, then the dirt and dust might have found their way to your chandelier. So how do you clean those plaster dust and wallpaper particles? ‘Time to give your lighting fixture a lot of lovin’.
There are two known methods of chandelier cleanup. The first one is the Glass Off and the other is Glass On.
Glass On is a method that makes use of a damp cloth to wipe down the decorative elements while the fixture is still attached to the frame. The Glass Off type requires that the hanging elements are taken off of the fixture and then cleaned piece by piece. Each of the cleaned pieces is then reattached after they have been polished.
If you’re thinking of spraying some solutions directly to the chandelier, hold your horses. There are cleaning solutions that can easily damage the non-crystal parts of your lighting fixture.
For now, let’s learn about the two types of cleaning methods.
The Glass Off Method
If you choose to clean your chandelier using the glass off method, then you will be better able to clean the parts. It can get difficult to clean a swinging chandelier for those who clean it with the Glass On method. This is especially dangerous when you’re cleaning a chandelier that’s installed high up on a very high ceiling.
If you’re cleaning up to resurrect a vintage or an antique fixture, then it is best to work with a ladder. As soon as you acquire this, turn the circuit breaker off. If this is not possible at the moment, then turn off the switch to the chandelier. Use a large tape to cover the switch just as an added precaution.
Check the chandelier since you will be removing many hanging elements and you will also replace them after the cleanup. Remove every section that you see and make a mental note (if not a physical note) on how to put them all back. You might also want to take a photo of the chandelier from different angles. This is for reference later on.
A grimy or dusty chandelier will not be as brilliant or sparkly as a new one. You can recapture the shine by taking the time to clean the lighting fixture, step by step.
The Glass On Method
This chandelier cleaning method is best in removing light dust and dirt. This can be done every two to six months, also depending on the room conditions where the chandelier has been placed.
Here, there is no need to remove the crystals. Switch off the power to the lighting fixture, though. Just make sure that all the bulbs are screwed on tightly to their sockets.
Protect the fixture from any water by covering them with sandwich bags. You can also use rubber bands to tie all around the bases. Next, place one towel on the floor right below the fixture. This should help absorb the drips coming from the cleaning spray.
There are cleaning solutions that you can buy from shops or you can just go ahead and make the cleaner. One part of ammonia should be mixed with three parts of distilled water. This solution won’t leave water marks as compared to just using tap water.
An alternative to this is a hot soapy water solution. Others use one part of isopropyl alcohol together with three parts of distilled water.
Whatever solution you end up using, make sure that you spray all the surfaces except the wire and electrical parts. let the solution drip off then rinse off using distilled water. You can also just wipe them off with cotton cloth if you don’t want to wait for the solution to drip.
Tags: chandelier, chandelier cleanup, how to clean chandeliers, McCreerys, McCreerys Home Furnishings
Posted in Accents, Interior Design 101, Interior Design Elements, Lighting | Comments Off on Chandelier Cleanup 101
Friday, October 5th, 2018
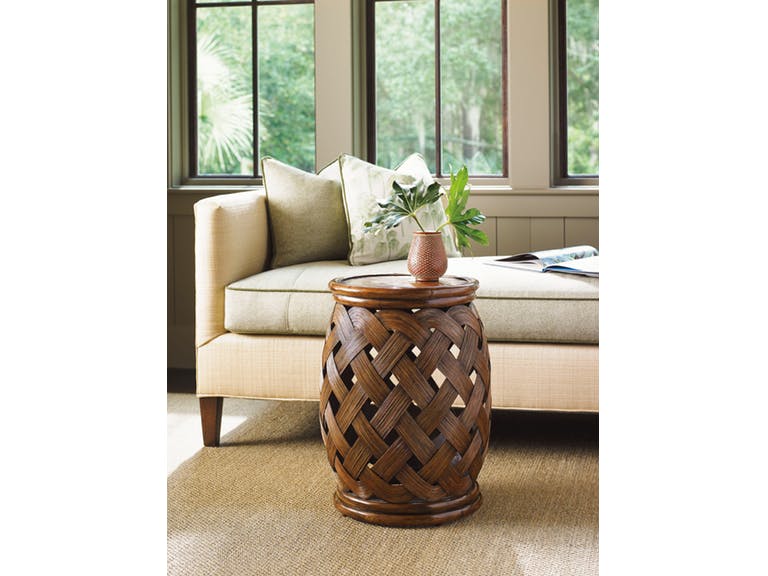
This room is green because it has wide, open windows and it features this Tommy Bahama Home Living Room Hibiscus Round Accent Table 593-953.
Green home is a term that could mean so many different things. There are those who consider a home green only if the Energy Star standards have been met. There are those, however who don’t just depend on certifications in order to define a certain home green.
Generally, though, a green home is one that uses less energy. This is also one that’s been built using sustainable materials. And with the leading U.S. wastes already including non-industrial wastes such as demolition and construction wastes, it’s about time that green builders take center stage.
Find the Alternatives
The bulky building materials that are often used in many construction projects throughout the nation comprise the biggest carbon footprint. There is chance, though, because green builders, are seeking ways to give more options. They are now presenting materials that are recycled, locally sourced, reused, durable, and renewable.
The wisest homeowners have taken heed. From the usual aluminum window frames, there are now those that choose local wood as a material. The rapidly growing bamboo plant is also now highly favored among Zen enthusiasts.
It’s All About Energy Efficiency
Now let’s talk about greenhouse gas emissions. It is wrong to presume that only industrial plants emit these harmful gases. Even households can contribute to the problem and U.S. households have been very busy.
There are homeowners who take part in saving Mother Earth by installing only the energy efficient appliances. There are also those who now use solar panels. Yet energy efficiency isn’t the only thing that can make homes sustainable. Zero energy homes could still use steel, concrete and bricks on an environmentally sensitive area and then they become unsustainable in the process.
Consider the Location, Too
Green homes are also often built on developed lands. This is so the environmental impact is reduced if not totally brought down to zero. There is nothing green about sprawl because they eat up a lot of green space.
Another way to consider your home a green home is to build it in close proximity to your school or work so that you won’t have to spend a lot of energy on transportation.
Plant Shade Trees
Planting deciduous trees on all sides of your home will provide the maximum amount of shade. You just need to carefully plan as well as design where the trees would be specifically planted.
Going green through tree planting is another good way to save energy all year round. Imagine a cool home even during summer. And during the coldest months, these trees can also help your home weather the winter winds. You then reduce the heating cost.
Once you’ve decided to plant shade trees, it is best to inspect all around your home first. Determine which walls and windows receive the most amount of sunlight. The east and west sides should be provided with shade since these sides receive 50% more light compared to their south and north counterparts.
Be sure to plant these trees close to your house so that they will have ample room to grow out to their full height and also for proper air circulation. A tree that’s been planted 10 feet away from your house wall will eventually shade that area four times longer than one that’s been planted 20 feet away.
If you have limited space to plant trees, then you can always go for shrubs and vines. Use trellises to shade the walls as well as the windows. Examples of vines that will provide you with year-round shade is the Confederate Jasmine.
Design and Size Also Matter
Yes, size does matter because bluntly put, bigger homes have a larger physical footprint. It is essentially more difficult to maintain a 5,000 sq. ft. home compared to a 1,500 sq. ft. one.
As for the design, it is best to go for the already energy efficient ones such as the passive solar or passive houses.
Tags: green home, green living, McCreerys, McCreerys Home Furnishings, sustainable home
Posted in Green Living, Interior Design 101, Interior Design Elements | Comments Off on Do You Have A Green Home?
Thursday, October 4th, 2018
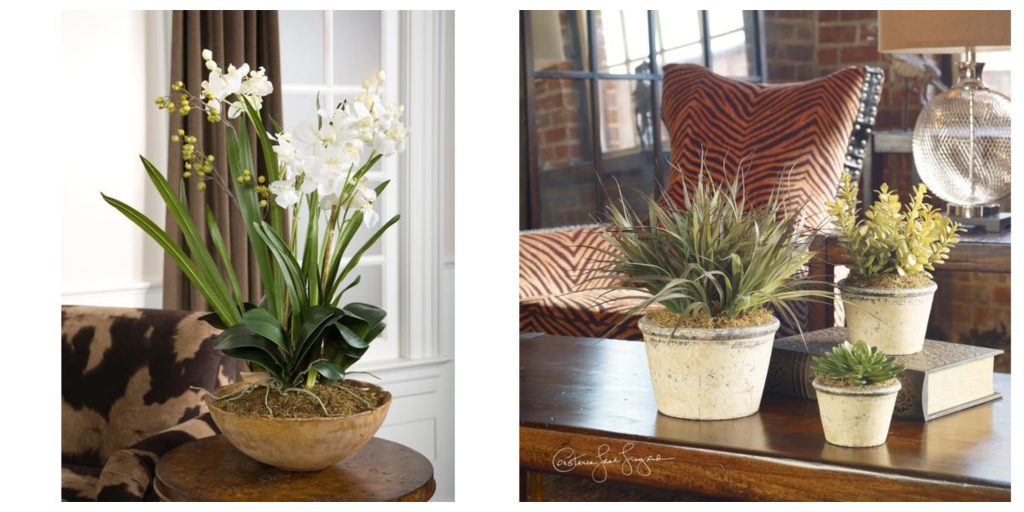
Featured plants are the Uttermost Accessories Moth Orchid Planter 60039 and the Accessories La Costa Greenery, Set/3 60115.
Do you have the feeling, at times, that you can’t quite put your finger on what’s missing in your home? Are you wondering whether your habitat needs a unique décor? One way to do this is the traditional way of decorating with plants.
But caring for these plants causes a concern for most homeowners and this is a valid feeling. If you think that you can’t find more time for plant care, then you can always go for the low maintenance types.
Here are some ways that you can spruce up your home without the houseplants eating up your time and energy –
Know Their Benefits
Sometimes, all it takes to change your feelings toward plant care is to know their countless benefits. First, these green things are great in improving the energy and wellness in your home.
Second, plants are also aesthetically pleasing. They have amazing colors that never fail to captivate. They are also awesome air purifiers. Elementary science tells us that plants absorb the carbon dioxide that humans breathe out. They then give out oxygen, which humans need to breathe.
Other than air purification, plants are also known to improve man’s mental health, increase the humidity in a room, and reduce stress and fatigue.
Choose the Best Houseplants
When you’ve decided to incorporate houseplants to your interior décor, then begin with the low-maintenance type first, and just one potted plant would do, initially.
Snake plants and spider plants are wonderful choices for people who want to begin with easy maintenance plants. When you’re already looking for color sources, then look for succulents and houseplants.
Versatile flowering plants include chrysanthemums, Gerber daisies, orchids, and mums. The Chinese evergreen is a green and red plant that can be used as a perfect Christmas décor.
Here’s a word of caution, though – most flowering plants need a lot of care. They are worth your time and energy, though, since their beauty will surely captivate you. African violets and Bromeliads are also common choices in many homes because they are beautiful to behold.
Bring In Succulents
If you’re searching for an even smaller option, then you can always go for succulents. These are the houseplants that require the least amount of light. They also come in different shapes and sizes and you won’t have to worry whether they will thrive inside a room or not – because they will.
Succulents are best placed on shelves, on tables, and on the windowsills. Examples of succulents are aloe vera, hens-and-chicks ,and cacti.
Display Tall Houseplants
When you’re looking for a houseplant that can fill up a narrow corner or space, then you should look for a tall houseplant variety. Most of these thin and tall plants are also varieties that do not require a lot of light.
Expect for these to be a bit pricier than your usual houseplant, though. You will also need a special potholder or a plant stand to complete the plant’s look. The best examples of this plant type are Ficus, Philodendron, and Area palms.
Bamboo houseplants are also low-maintenance but stylish. Bamboo is also an amazing accent piece. Just make sure that it does not get direct sunlight or it will be in danger of being killed. Check also that the plant’s distilled water is changed every month. Find a vase or dish that can show off this amazing plant.
Show Off the Big-Leafed Plants
Today, these plants share the limelight with other trending interior design elements. Large leaf houseplants need tropical environment and care. These are the best additions to a contemporary or minimalist home.
Shop for a dieffenbachia or a monstera. These are the hottest large-leaf plants at the moment.
Tags: decorating with houseplants, houseplant benefits, houseplant decor, houseplant options, houseplants, McCreerys, McCreerys Home Furnishings
Posted in Accents, Color Schemes, Decorative Elements, Interior Design 101, Interior Design Elements | Comments Off on Houseplants: Home Beautification Must-Haves
Follow us on our social media
© McCreery's Home Furnishings | All Rights Reserved | Privacy Policy